|
|
3 weeks ago | |
|---|---|---|
| .. | ||
| README.md | 3 weeks ago | |
| assignment.md | 3 weeks ago | |
| pi-camera.md | 3 weeks ago | |
| single-board-computer-classify-image.md | 3 weeks ago | |
| virtual-device-camera.md | 3 weeks ago | |
| wio-terminal-camera.md | 3 weeks ago | |
| wio-terminal-classify-image.md | 3 weeks ago | |
README.md
Check fruit quality from an IoT device
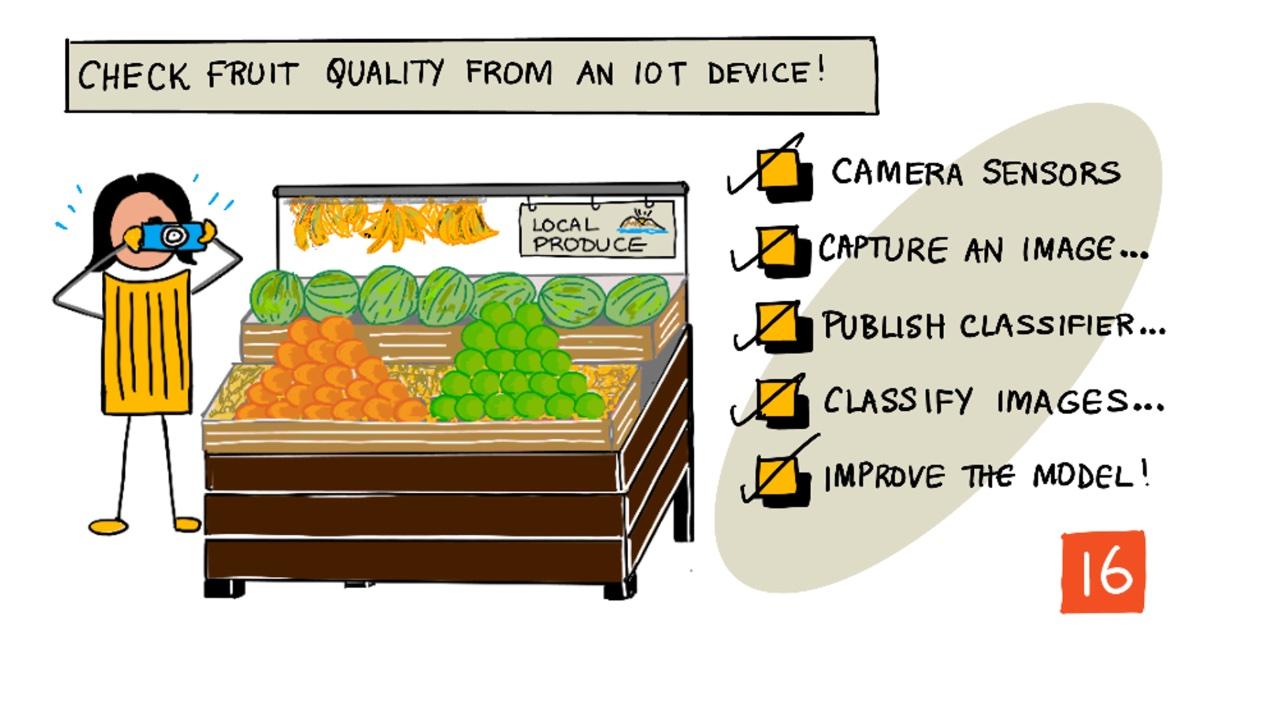
Sketchnote by Nitya Narasimhan. Click the image for a larger version.
Pre-lecture quiz
Introduction
In the previous lesson, you learned about image classifiers and how to train them to identify good and bad fruit. To use this image classifier in an IoT application, you need a way to capture an image using a camera and send it to the cloud for classification.
In this lesson, you will learn about camera sensors and how to use them with an IoT device to capture images. You will also learn how to call the image classifier from your IoT device.
This lesson will cover:
- Camera sensors
- Capture an image using an IoT device
- Publish your image classifier
- Classify images from your IoT device
- Improve the model
Camera sensors
Camera sensors are cameras that can be connected to your IoT device. They can capture still images or streaming video. Some provide raw image data, while others compress the data into formats like JPEG or PNG. IoT-compatible cameras are often smaller and lower resolution than typical cameras, but high-resolution options are available, rivaling top-end smartphones. You can also find cameras with interchangeable lenses, multi-camera setups, infrared thermal imaging, or UV capabilities.
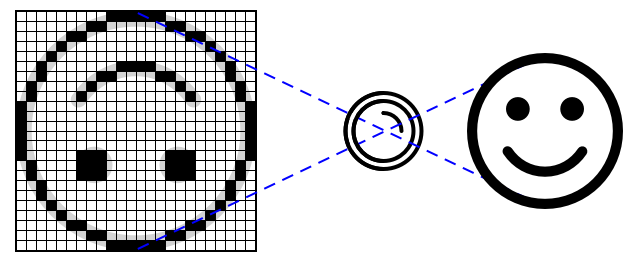
Most camera sensors use image sensors where each pixel is a photodiode. A lens focuses the image onto the sensor, and thousands or millions of photodiodes detect the light hitting them, recording it as pixel data.
💁 Lenses invert images, and the camera sensor flips them back to the correct orientation. This is similar to how your eyes work—images are detected upside down on the back of your eye, and your brain corrects them.
🎓 The image sensor is called an Active-Pixel Sensor (APS), with the most common type being a complementary metal-oxide semiconductor sensor, or CMOS. You may have heard the term CMOS sensor used for camera sensors.
Camera sensors are digital, sending image data as digital signals, often with the help of a library for communication. Cameras use protocols like SPI to transmit large amounts of data, as images are much larger than single values from sensors like temperature sensors.
✅ What are the limitations of image size with IoT devices? Consider the constraints, especially on microcontroller hardware.
Capture an image using an IoT device
You can use your IoT device to capture an image for classification.
Task - capture an image using an IoT device
Follow the appropriate guide to capture an image using your IoT device:
Publish your image classifier
You trained your image classifier in the previous lesson. Before using it with your IoT device, you need to publish the model.
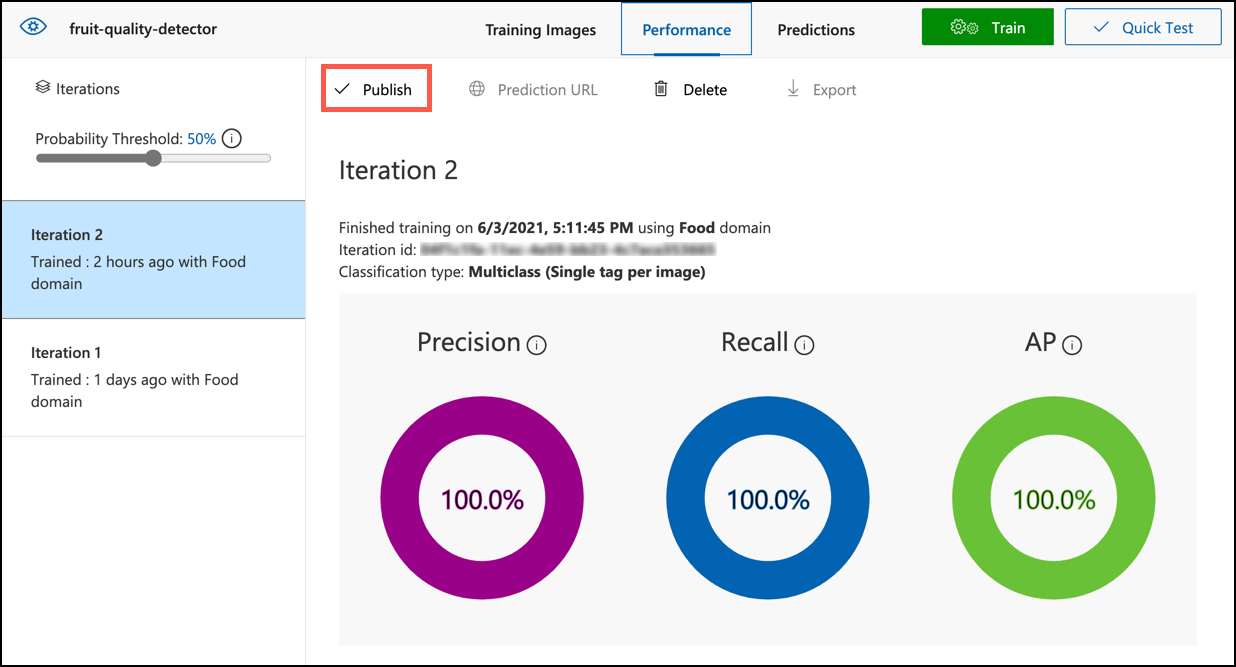
Model iterations
During training in the last lesson, you may have noticed the Performance tab showing iterations. For example, the first training session would have been labeled Iteration 1. If you improved the model using prediction images, you would have seen Iteration 2.
Each training session creates a new iteration, allowing you to track different versions of your model trained on various datasets. When performing a Quick Test, you can use a dropdown to select an iteration and compare results.
Once satisfied with an iteration, you can publish it to make it accessible to external applications. This allows you to maintain a stable published version for devices while working on improvements in new iterations.
Task - publish an iteration
Iterations are published through the Custom Vision portal.
-
Open the Custom Vision portal at CustomVision.ai and sign in if needed. Then, open your
fruit-quality-detectorproject. -
Select the Performance tab at the top.
-
Choose the latest iteration from the Iterations list on the side.
-
Click the Publish button for the selected iteration.
-
In the Publish Model dialog, set the Prediction resource to the
fruit-quality-detector-predictionresource created in the last lesson. Keep the name asIteration2and click Publish. -
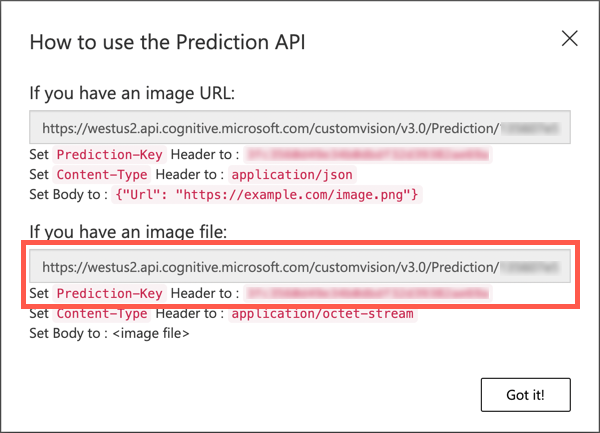
After publishing, click the Prediction URL button. This will display the prediction API details needed to call the model from your IoT device. Focus on the section labeled If you have an image file. Copy the URL, which will look like:
https://<location>.api.cognitive.microsoft.com/customvision/v3.0/Prediction/<id>/classify/iterations/Iteration2/imageHere,
<location>is the location of your custom vision resource, and<id>is a unique identifier.Also, copy the Prediction-Key. This secure key is required to access the model. Only applications with this key can use the model; others will be denied.
✅ When a new iteration is published, it will have a different name. How would you update the iteration your IoT device is using?
Classify images from your IoT device
You can now use the connection details to call the image classifier from your IoT device.
Task - classify images from your IoT device
Follow the appropriate guide to classify images using your IoT device:
Improve the model
You may notice that predictions from your IoT device's camera differ from what you expect. This happens because the model was trained on data that differs from the images used for predictions.
For optimal results, train the model with images similar to those used for predictions. For example, if you used a phone camera for training, the image quality, sharpness, and color may differ from those of an IoT device's camera.
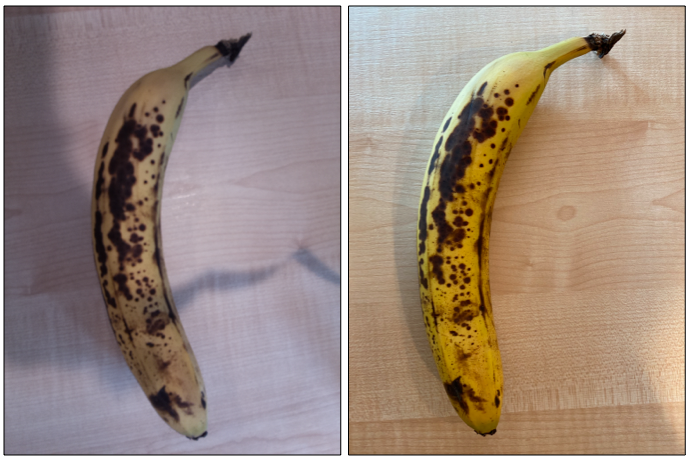
In the image above, the left banana picture was taken with a Raspberry Pi Camera, while the right one was taken with an iPhone. The iPhone image is sharper, with brighter colors and better contrast.
✅ What other factors might cause incorrect predictions from your IoT device's images? Consider the environment where the IoT device operates and what might affect the captured images.
To improve the model, retrain it using images captured from the IoT device.
Task - improve the model
-
Classify multiple images of both ripe and unripe fruit using your IoT device.
-
In the Custom Vision portal, retrain the model using the images in the Predictions tab.
⚠️ Refer to the instructions for retraining your classifier in lesson 1 if needed.
-
If your new images differ significantly from the original training images, delete the original ones. Go to the Training Images tab, select the images, and click Delete. To select an image, hover over it and click the tick that appears.
-
Train a new iteration of the model and publish it using the steps above.
-
Update the endpoint URL in your code and re-run the app.
-
Repeat these steps until you are satisfied with the prediction results.
🚀 Challenge
How much do image resolution and lighting affect predictions?
Try adjusting the resolution of the images in your device code and observe the impact on image quality. Experiment with different lighting conditions as well.
If you were designing a production device for farms or factories, how would you ensure consistent results?
Post-lecture quiz
Review & Self Study
You trained your custom vision model using the portal, which requires pre-existing images. In real-world scenarios, you may not have training data that matches the images captured by your device's camera. To address this, you can train the model directly from your device using the training API, allowing you to use images captured by the IoT device.
- Learn more about the training API in the using the Custom Vision SDK quick start
Assignment
Respond to classification results
Disclaimer:
This document has been translated using the AI translation service Co-op Translator. While we aim for accuracy, please note that automated translations may include errors or inaccuracies. The original document in its native language should be regarded as the authoritative source. For critical information, professional human translation is advised. We are not responsible for any misunderstandings or misinterpretations resulting from the use of this translation.