5.0 KiB
Classify an image - Virtual IoT Hardware and Raspberry Pi
In this part of the lesson, you will send the image captured by the camera to the Custom Vision service for classification.
Send images to Custom Vision
The Custom Vision service provides a Python SDK that you can use to classify images.
Task - Send images to Custom Vision
-
Open the
fruit-quality-detectorfolder in VS Code. If you are using a virtual IoT device, ensure the virtual environment is active in the terminal. -
The Python SDK for sending images to Custom Vision is available as a Pip package. Install it using the following command:
pip3 install azure-cognitiveservices-vision-customvision -
Add the following import statements at the top of the
app.pyfile:from msrest.authentication import ApiKeyCredentials from azure.cognitiveservices.vision.customvision.prediction import CustomVisionPredictionClientThese modules from the Custom Vision libraries allow you to authenticate using the prediction key and provide a prediction client class to interact with Custom Vision.
-
Add the following code to the end of the file:
prediction_url = '<prediction_url>'
prediction_key = '<prediction key>'
Replace
<prediction_url>with the URL you copied from the Prediction URL dialog earlier in this lesson. Replace<prediction key>with the prediction key you copied from the same dialog. -
The prediction URL provided by the Prediction URL dialog is formatted for direct REST endpoint calls. The Python SDK uses different parts of this URL separately. Add the following code to extract the necessary components:
parts = prediction_url.split('/')
endpoint = 'https://' + parts[2]
project_id = parts[6]
iteration_name = parts[9]
This code splits the URL to extract the endpoint
https://<location>.api.cognitive.microsoft.com, the project ID, and the name of the published iteration. -
Create a predictor object to perform the prediction using the following code:
prediction_credentials = ApiKeyCredentials(in_headers={"Prediction-key": prediction_key})
predictor = CustomVisionPredictionClient(endpoint, prediction_credentials)
The
prediction_credentialsencapsulate the prediction key, which is then used to create a prediction client object pointing to the endpoint. -
Send the image to Custom Vision using the following code:
image.seek(0)
results = predictor.classify_image(project_id, iteration_name, image)
This rewinds the image to the beginning and sends it to the prediction client.
-
Finally, display the results using the following code:
for prediction in results.predictions:
    print(f'{prediction.tag_name}:\t{prediction.probability * 100:.2f}%')
This loops through all the returned predictions and displays them in the terminal. The probabilities are floating-point numbers between 0 and 1, where 0 represents a 0% chance of matching the tag, and 1 represents a 100% chance.
💁 Image classifiers return probabilities for all tags used. Each tag will have a probability indicating how closely the image matches that tag.
-
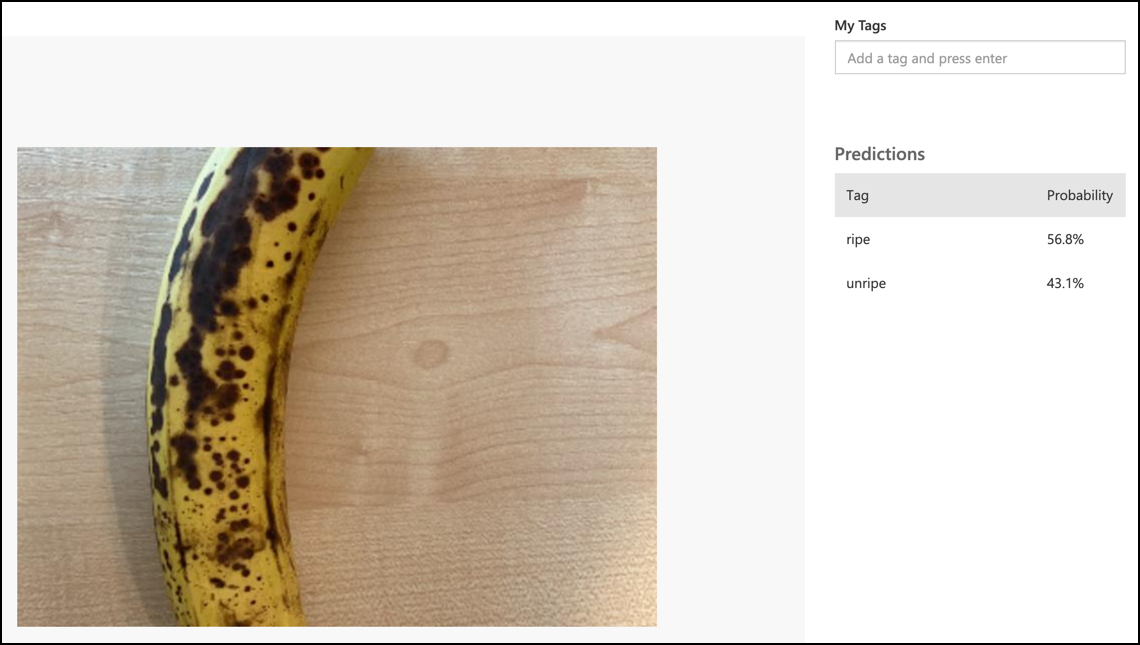
Run your code with your camera pointed at some fruit, an appropriate image set, or visible fruit on your webcam if using virtual IoT hardware. You will see the output in the console:
(.venv) ➜  fruit-quality-detector python app.py
ripe:   56.84%
unripe: 43.16%
You will also see the captured image and these values in the Predictions tab in Custom Vision.
💁 You can find this code in the code-classify/pi or code-classify/virtual-iot-device folder.
😀 Your fruit quality classifier program was a success!
Disclaimer:
This document has been translated using the AI translation service Co-op Translator. While we aim for accuracy, please note that automated translations may include errors or inaccuracies. The original document in its native language should be regarded as the authoritative source. For critical information, professional human translation is advised. We are not responsible for any misunderstandings or misinterpretations resulting from the use of this translation.