5.9 KiB
Capture an image - Virtual IoT Hardware
In this part of the lesson, you will add a camera sensor to your virtual IoT device and read images from it.
Hardware
The virtual IoT device will use a simulated camera that sends images either from files or your webcam.
Add the camera to CounterFit
To use a virtual camera, you need to add one to the CounterFit app.
Task - Add the camera to CounterFit
Add the Camera to the CounterFit app.
-
Create a new Python app on your computer in a folder called
fruit-quality-detectorwith a single file namedapp.pyand a Python virtual environment. Add the CounterFit pip packages.⚠️ You can refer to the instructions for creating and setting up a CounterFit Python project in lesson 1 if needed.
-
Install an additional Pip package to add a CounterFit shim that simulates some of the Picamera Pip package. Make sure you install this from a terminal with the virtual environment activated.
pip install counterfit-shims-picamera -
Ensure the CounterFit web app is running.
-
Create a camera:
-
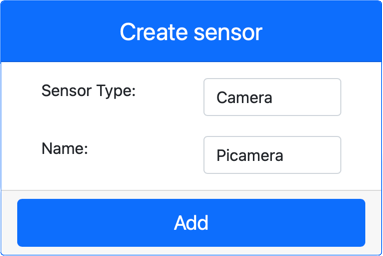
In the Create sensor box in the Sensors pane, drop down the Sensor type box and select Camera.
-
Set the Name to
Picamera. -
Click the Add button to create the camera.
The camera will be created and appear in the sensors list.
-
Program the camera
The virtual IoT device can now be programmed to use the virtual camera.
Task - Program the camera
Program the device.
-
Make sure the
fruit-quality-detectorapp is open in VS Code. -
Open the
app.pyfile. -
Add the following code to the top of
app.pyto connect the app to CounterFit:from counterfit_connection import CounterFitConnection CounterFitConnection.init('127.0.0.1', 5000) -
Add the following code to your
app.pyfile:import io from counterfit_shims_picamera import PiCameraThis code imports some necessary libraries, including the
PiCameraclass from the counterfit_shims_picamera library. -
Add the following code below this to initialize the camera:
camera = PiCamera()
camera.resolution = (640, 480)
camera.rotation = 0
This code creates a PiCamera object and sets the resolution to 640x480. Although higher resolutions are supported, the image classifier works on much smaller images (227x227), so there’s no need to capture and send larger images.
The
camera.rotation = 0line sets the rotation of the image in degrees. If you need to rotate the image from the webcam or file, adjust this value as needed. For example, if you want to change the orientation of a banana image captured in landscape mode to portrait, setcamera.rotation = 90. -
Add the following code below this to capture the image as binary data:
image = io.BytesIO()
camera.capture(image, 'jpeg')
image.seek(0)
This code creates a
BytesIOobject to store binary data. The image is read from the camera as a JPEG file and stored in this object. Theimage.seek(0)line moves the position indicator back to the start so that all the data can be read later. -
Below this, add the following code to save the image to a file:
with open('image.jpg', 'wb') as image_file:
    image_file.write(image.read())
This code opens a file called
image.jpgfor writing, then reads all the data from theBytesIOobject and writes it to the file.💁 You can capture the image directly to a file instead of a
BytesIOobject by passing the file name to thecamera.capturecall. The reason for using theBytesIOobject is to allow you to send the image to your image classifier later in this lesson. -
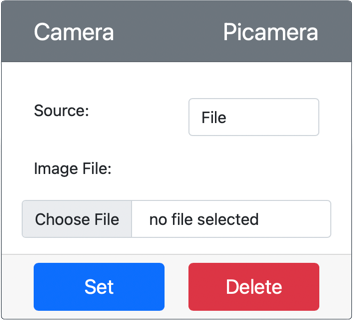
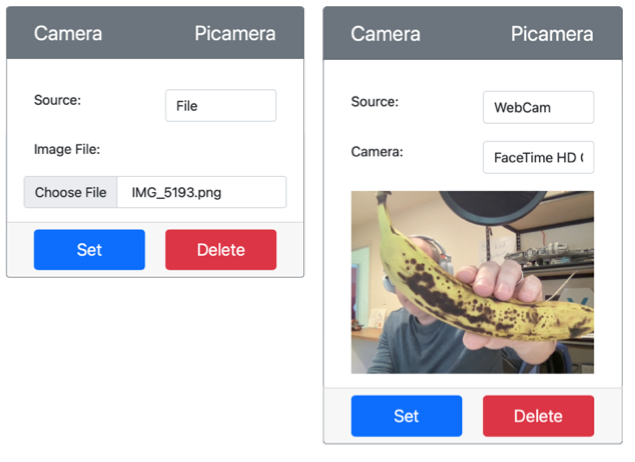
Configure the image that the camera in CounterFit will capture. You can either set the Source to File and upload an image file, or set the Source to WebCam to capture images from your webcam. Make sure to click the Set button after selecting a picture or your webcam.
-
An image will be captured and saved as
image.jpgin the current folder. You will see this file in the VS Code explorer. Select the file to view the image. If it needs rotation, update thecamera.rotation = 0line as necessary and take another picture.
💁 You can find this code in the code-camera/virtual-iot-device folder.
😀 Your camera program was a success!
Disclaimer:
This document has been translated using the AI translation service Co-op Translator. While we aim for accuracy, please note that automated translations may include errors or inaccuracies. The original document in its native language should be regarded as the authoritative source. For critical information, professional human translation is advised. We are not responsible for any misunderstandings or misinterpretations resulting from the use of this translation.