10 KiB
Virtual single-board computer
Instead of buying an IoT device along with sensors and actuators, you can use your computer to simulate IoT hardware. The CounterFit project allows you to run an app locally that simulates IoT hardware like sensors and actuators, and access them from local Python code written in the same way as you would on a Raspberry Pi with physical hardware.
Setup
To use CounterFit, you need to install some free software on your computer.
Task
Install the required software.
-
Install Python. Follow the instructions on the Python downloads page to install the latest version of Python.
-
Install Visual Studio Code (VS Code). This is the editor you will use to write your virtual device code in Python. Refer to the VS Code documentation for installation instructions.
💁 You can use any Python IDE or editor for these lessons if you prefer, but the instructions will be based on using VS Code.
-
Install the VS Code Pylance extension. This extension provides Python language support in VS Code. Refer to the Pylance extension documentation for installation instructions.
Instructions for installing and configuring the CounterFit app will be provided later in the assignment, as it is installed on a per-project basis.
Hello world
When starting with a new programming language or technology, it’s traditional to create a 'Hello World' application—a small program that outputs something like "Hello World" to confirm that all tools are set up correctly.
The Hello World app for the virtual IoT hardware will ensure that Python and Visual Studio Code are installed correctly. It will also connect to CounterFit for the virtual IoT sensors and actuators. No hardware will be used; the app will simply connect to verify everything is working.
This app will be created in a folder called nightlight and will be reused with different code in later parts of this assignment to build the nightlight application.
Configure a Python virtual environment
One of Python's strengths is the ability to install Pip packages—packages of code written by others and shared online. You can install a Pip package with a single command and use it in your code. You’ll use Pip to install a package to interact with CounterFit.
By default, installed packages are available system-wide, which can lead to version conflicts—one application might require a specific version of a package that breaks when another application installs a newer version. To avoid this, you can use a Python virtual environment, which is essentially a copy of Python in a dedicated folder. Pip packages installed in this environment are isolated to that folder.
💁 If you are using a Raspberry Pi, you didn’t set up a virtual environment on that device to manage Pip packages. Instead, you are using global packages, as the Grove packages are installed globally by the installer script.
Task - configure a Python virtual environment
Set up a Python virtual environment and install the Pip packages for CounterFit.
-
From your terminal or command line, run the following commands to create and navigate to a new directory:
mkdir nightlight cd nightlight -
Create a virtual environment in the
.venvfolder:python3 -m venv .venv💁 Use
python3explicitly to create the virtual environment, aspythonmight refer to Python 2 if it’s installed on your system. -
Activate the virtual environment:
-
On Windows:
-
If using the Command Prompt or Command Prompt in Windows Terminal, run:
.venv\Scripts\activate.bat -
If using PowerShell, run:
.\.venv\Scripts\Activate.ps1If you encounter an error about running scripts being disabled, enable script execution by launching PowerShell as an administrator and running:
Set-ExecutionPolicy -ExecutionPolicy UnrestrictedConfirm with
Ywhen prompted. Then restart PowerShell and try again.You can reset this execution policy later if needed. For more details, see the Execution Policies page on Microsoft Docs.
-
-
On macOS or Linux, run:
source ./.venv/bin/activate
💁 Run these commands from the same location where you created the virtual environment. You don’t need to navigate into the
.venvfolder; always activate the environment and run commands from the folder where the virtual environment was created. -
-
Once the virtual environment is activated, the
pythoncommand will use the version of Python that created the environment. Check the version by running:python --versionThe output should include:
(.venv) ➜  nightlight python --version
Python 3.9.1
💁 Your Python version may differ. As long as it’s 3.6 or higher, you’re good. If not, delete the folder, install a newer Python version, and try again.
-
Install the Pip packages for CounterFit:
pip install CounterFit
pip install counterfit-connection
pip install counterfit-shims-grove
These packages will only be available in the virtual environment.
Write the code
Once the Python virtual environment is ready, you can write the 'Hello World' application.
Task - write the code
Create a Python application to print "Hello World" to the console.
-
From the terminal or command line, create a Python file called
app.py:-
On Windows:
type nul > app.py -
On macOS or Linux:
touch app.py
-
-
Open the current folder in VS Code:
code .💁 If you see
command not foundon macOS, it means VS Code isn’t in your PATH. Follow the VS Code documentation to add it to your PATH. -
When VS Code launches, it will activate the Python virtual environment. The selected environment will appear in the bottom status bar:

-
If the VS Code Terminal is already running, it won’t have the virtual environment activated. Kill the terminal using the Kill the active terminal instance button:

The terminal prompt should include
.venvwhen the virtual environment is active. -
Launch a new terminal in VS Code by selecting Terminal -> New Terminal or pressing
CTRL+`. The new terminal will activate the virtual environment:➜ nightlight source .venv/bin/activate (.venv) ➜ nightlight -
Open
app.pyin VS Code and add the following code:print('Hello World!')The
printfunction outputs the provided text to the console. -
Run the Python app from the VS Code terminal:
python app.pyThe output will be:
(.venv) ➜  nightlight python app.py
Hello World!
😀 Your 'Hello World' program works!
Connect the 'hardware'
As a second 'Hello World' step, you’ll run the CounterFit app and connect your code to it. This simulates plugging IoT hardware into a development kit.
Task - connect the 'hardware'
-
Launch the CounterFit app from the VS Code terminal:
counterfitThe app will open in your browser:
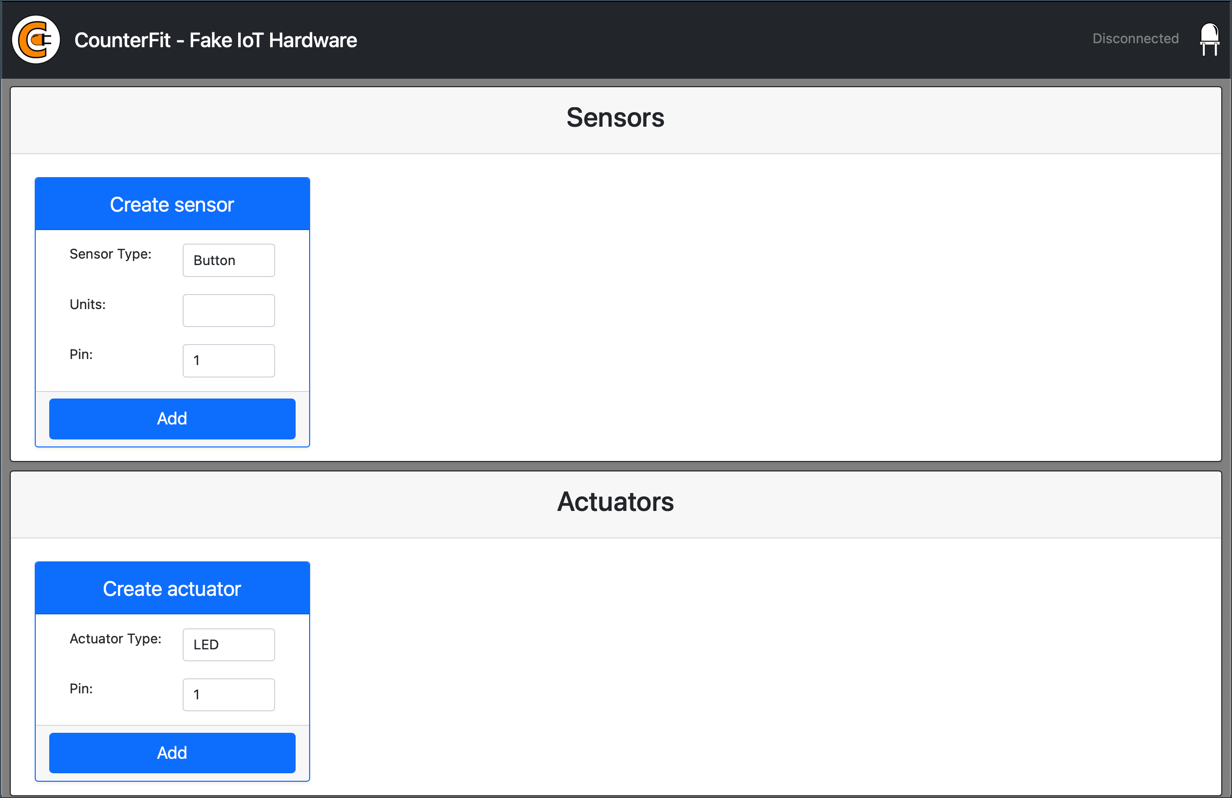
It will show as Disconnected, with the LED in the top-right corner turned off.
-
Add the following code to the top of
app.py:from counterfit_connection import CounterFitConnection CounterFitConnection.init('127.0.0.1', 5000)This imports the
CounterFitConnectionclass and initializes a connection to the CounterFit app running on127.0.0.1(localhost) on port 5000.💁 If port 5000 is in use, change the port in the code and run CounterFit with
CounterFit --port <port_number>. -
Open a new VS Code terminal, as the current one is running the CounterFit app:

-
Run
app.pyin the new terminal. The CounterFit app will show as Connected, and the LED will light up.
💁 You can find this code in the code/virtual-device folder.
😀 Your connection to the hardware was successful!
Disclaimer:
This document has been translated using the AI translation service Co-op Translator. While we aim for accuracy, please note that automated translations may include errors or inaccuracies. The original document in its native language should be regarded as the authoritative source. For critical information, professional human translation is advised. We are not responsible for any misunderstandings or misinterpretations resulting from the use of this translation.