7.1 KiB
Read GPS Data - Virtual IoT Hardware
In this part of the lesson, you will add a GPS sensor to your virtual IoT device and read values from it.
Virtual Hardware
The virtual IoT device will use a simulated GPS sensor that communicates over UART via a serial port.
A physical GPS sensor typically has an antenna to receive radio signals from GPS satellites and converts these signals into GPS data. The virtual version simulates this by allowing you to set a latitude and longitude, send raw NMEA sentences, or upload a GPX file with multiple locations that can be returned sequentially.
🎓 NMEA sentences will be explained later in this lesson.
Add the Sensor to CounterFit
To use a virtual GPS sensor, you need to add one to the CounterFit app.
Task - Add the Sensor to CounterFit
Add the GPS sensor to the CounterFit app.
-
Create a new Python app on your computer in a folder called
gps-sensorwith a single file namedapp.py, set up a Python virtual environment, and add the CounterFit pip packages.⚠️ You can refer to the instructions for creating and setting up a CounterFit Python project in lesson 1 if needed.
-
Install an additional Pip package to add a CounterFit shim that can communicate with UART-based sensors over a serial connection. Ensure you are installing this from a terminal with the virtual environment activated.
pip install counterfit-shims-serial -
Make sure the CounterFit web app is running.
-
Create a GPS sensor:
-
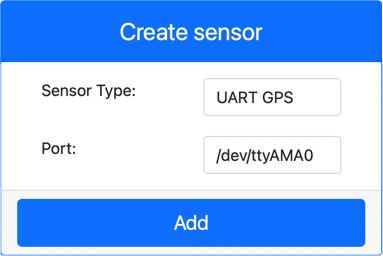
In the Create sensor box in the Sensors pane, open the Sensor type dropdown and select UART GPS.
-
Leave the Port set to /dev/ttyAMA0.
-
Click the Add button to create the GPS sensor on port
/dev/ttyAMA0.
The GPS sensor will be created and appear in the sensors list.
-
Program the GPS Sensor
The virtual IoT device can now be programmed to use the virtual GPS sensor.
Task - Program the GPS Sensor
Program the GPS sensor app.
-
Make sure the
gps-sensorapp is open in VS Code. -
Open the
app.pyfile. -
Add the following code to the top of
app.pyto connect the app to CounterFit:from counterfit_connection import CounterFitConnection CounterFitConnection.init('127.0.0.1', 5000) -
Add the following code below this to import some required libraries, including the library for the CounterFit serial port:
import time
import counterfit_shims_serial

serial = counterfit_shims_serial.Serial('/dev/ttyAMA0')
This code imports the
serialmodule from thecounterfit_shims_serialPip package. It then connects to the/dev/ttyAMA0serial port, which is the address of the serial port used by the virtual GPS sensor for its UART port. -
Add the following code below this to read from the serial port and print the values to the console:
def print_gps_data(line):
    print(line.rstrip())

while True:
    line = serial.readline().decode('utf-8')

    while len(line) > 0:
        print_gps_data(line)
        line = serial.readline().decode('utf-8')

    time.sleep(1)
A function called
print_gps_datais defined to print the line passed to it to the console.Next, the code enters an infinite loop, reading as many lines of text as it can from the serial port during each iteration. It calls the
print_gps_datafunction for each line.After all the data has been read, the loop pauses for 1 second before trying again.
-
Run this code, ensuring you use a different terminal than the one running the CounterFit app, so the CounterFit app remains active.
-
From the CounterFit app, change the value of the GPS sensor. You can do this in one of the following ways:
-
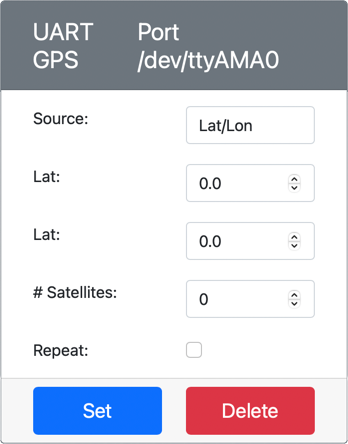
Set the Source to
Lat/Lon, and specify a latitude, longitude, and the number of satellites used to get the GPS fix. This value will be sent only once, so check the Repeat box to have the data repeat every second.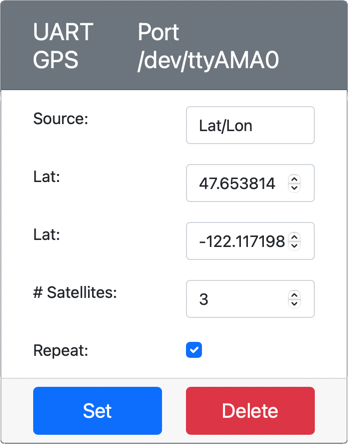
-
Set the Source to
NMEAand add some NMEA sentences into the text box. All these values will be sent, with a delay of 1 second before each new GGA (position fix) sentence can be read.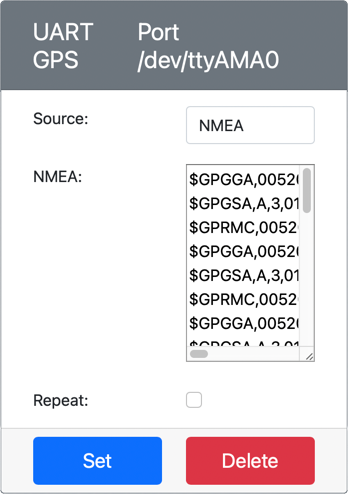
You can use a tool like nmeagen.org to generate these sentences by drawing on a map. These values will be sent only once, so check the Repeat box to have the data repeat one second after all sentences have been sent.
-
Set the Source to GPX file, and upload a GPX file with track locations. You can download GPX files from various popular mapping and hiking sites, such as AllTrails. These files contain multiple GPS locations as a trail, and the GPS sensor will return each new location at 1-second intervals.
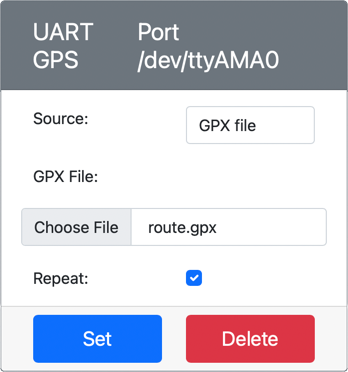
These values will be sent only once, so check the Repeat box to have the data repeat one second after all locations have been sent.
Once you have configured the GPS settings, click the Set button to apply these values to the sensor.
-
-
You will see the raw output from the GPS sensor, which will look something like this:
$GNGGA,020604.001,4738.538654,N,12208.341758,W,1,3,,164.7,M,-17.1,M,,*67
$GNGGA,020604.001,4738.538654,N,12208.341758,W,1,3,,164.7,M,-17.1,M,,*67
💁 You can find this code in the code-gps/virtual-device folder.
😀 Your GPS sensor program was a success!
Disclaimer:
This document has been translated using the AI translation service Co-op Translator. While we aim for accuracy, please note that automated translations may include errors or inaccuracies. The original document in its native language should be regarded as the authoritative source. For critical information, professional human translation is advised. We are not responsible for any misunderstandings or misinterpretations resulting from the use of this translation.