|
|
# 购物车功能
|
|
|
|
|
|
# 一、购物车模块
|
|
|
|
|
|
## 1.创建cart服务
|
|
|
|
|
|
  我们需要先创建一个cart的微服务,然后添加相关的依赖,设置配置,放开注解。
|
|
|
|
|
|
```xml
|
|
|
<dependencies>
|
|
|
<dependency>
|
|
|
<groupId>com.msb.mall</groupId>
|
|
|
<artifactId>mall-commons</artifactId>
|
|
|
<version>0.0.1-SNAPSHOT</version>
|
|
|
</dependency>
|
|
|
<dependency>
|
|
|
<groupId>org.springframework.boot</groupId>
|
|
|
<artifactId>spring-boot-starter-thymeleaf</artifactId>
|
|
|
</dependency>
|
|
|
<dependency>
|
|
|
<groupId>org.springframework.boot</groupId>
|
|
|
<artifactId>spring-boot-starter-web</artifactId>
|
|
|
</dependency>
|
|
|
<dependency>
|
|
|
<groupId>org.springframework.cloud</groupId>
|
|
|
<artifactId>spring-cloud-starter-openfeign</artifactId>
|
|
|
</dependency>
|
|
|
<dependency>
|
|
|
<groupId>org.springframework.cloud</groupId>
|
|
|
<artifactId>spring-cloud-starter-loadbalancer</artifactId>
|
|
|
</dependency>
|
|
|
<dependency>
|
|
|
<groupId>org.springframework.boot</groupId>
|
|
|
<artifactId>spring-boot-devtools</artifactId>
|
|
|
<scope>runtime</scope>
|
|
|
<optional>true</optional>
|
|
|
</dependency>
|
|
|
<dependency>
|
|
|
<groupId>org.projectlombok</groupId>
|
|
|
<artifactId>lombok</artifactId>
|
|
|
<optional>true</optional>
|
|
|
</dependency>
|
|
|
<dependency>
|
|
|
<groupId>org.springframework.boot</groupId>
|
|
|
<artifactId>spring-boot-starter-test</artifactId>
|
|
|
<scope>test</scope>
|
|
|
</dependency>
|
|
|
</dependencies>
|
|
|
```
|
|
|
|
|
|
然后属性文件中的配置
|
|
|
|
|
|
```properties
|
|
|
server.port=40000
|
|
|
spring.application.name=mall-cart
|
|
|
|
|
|
spring.cloud.nacos.discovery.server-addr=192.168.56.100:8848
|
|
|
spring.thymeleaf.cache=false
|
|
|
```
|
|
|
|
|
|
然后再添加配置中心的配置:bootstrap.yml文件
|
|
|
|
|
|
```properties
|
|
|
spring.application.name=mall-cart
|
|
|
spring.cloud.nacos.config.server-addr=192.168.56.100:8848
|
|
|
```
|
|
|
|
|
|
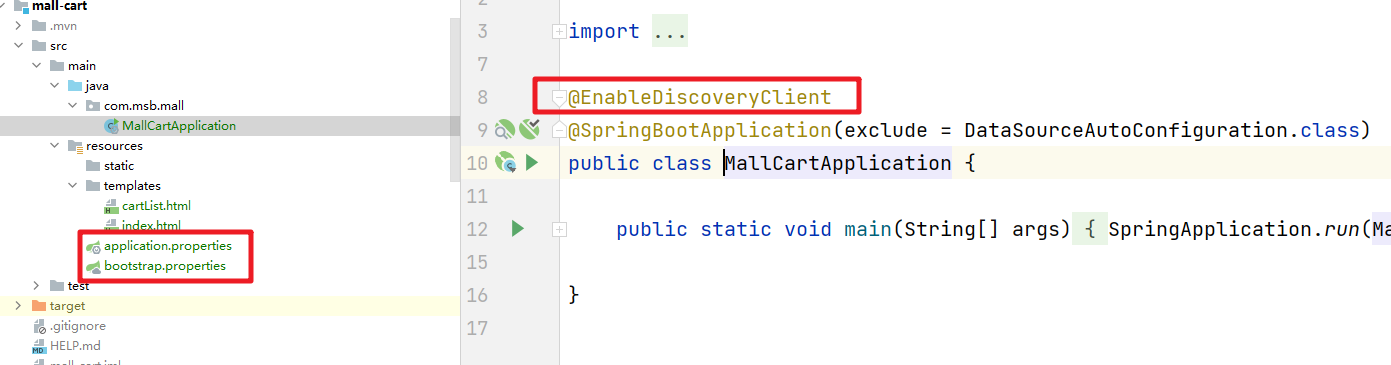
放开注册中心的注解
|
|
|
|
|
|
|
|
|
|
|
|
## 2.Nginx配置
|
|
|
|
|
|
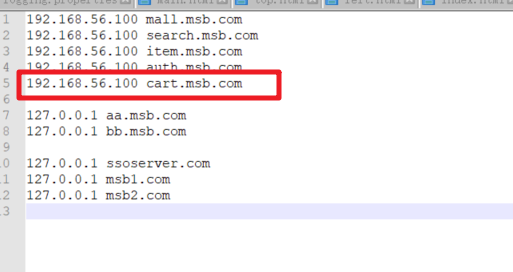
  首先在windows中的host指定对应域名
|
|
|
|
|
|
|
|
|
|
|
|
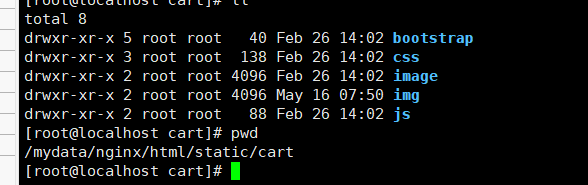
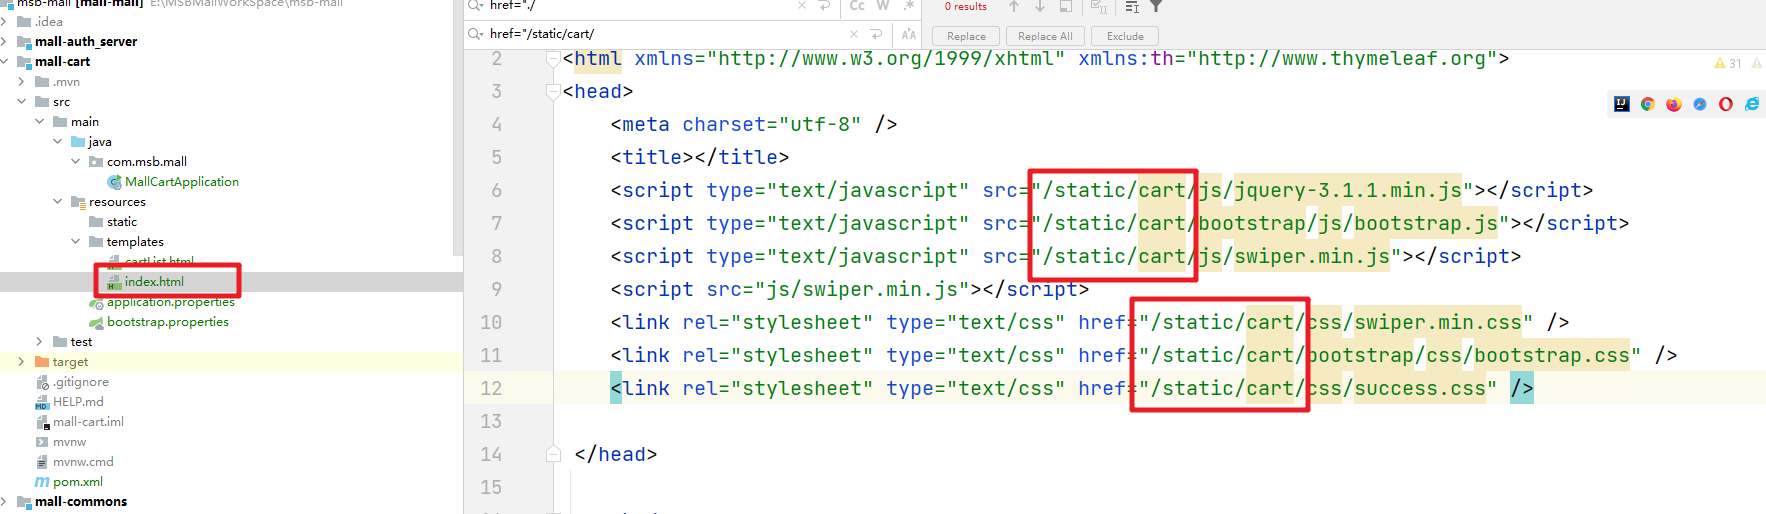
拷贝对应的静态资源到Nginx的static/cart目录中
|
|
|
|
|
|
|
|
|
|
|
|
然后修改Nginx的配置文件
|
|
|
|
|
|

|
|
|
|
|
|
然后重启nginx服务
|
|
|
|
|
|
```properties
|
|
|
docker restart nginx
|
|
|
```
|
|
|
|
|
|
## 3.配置网关服务
|
|
|
|
|
|
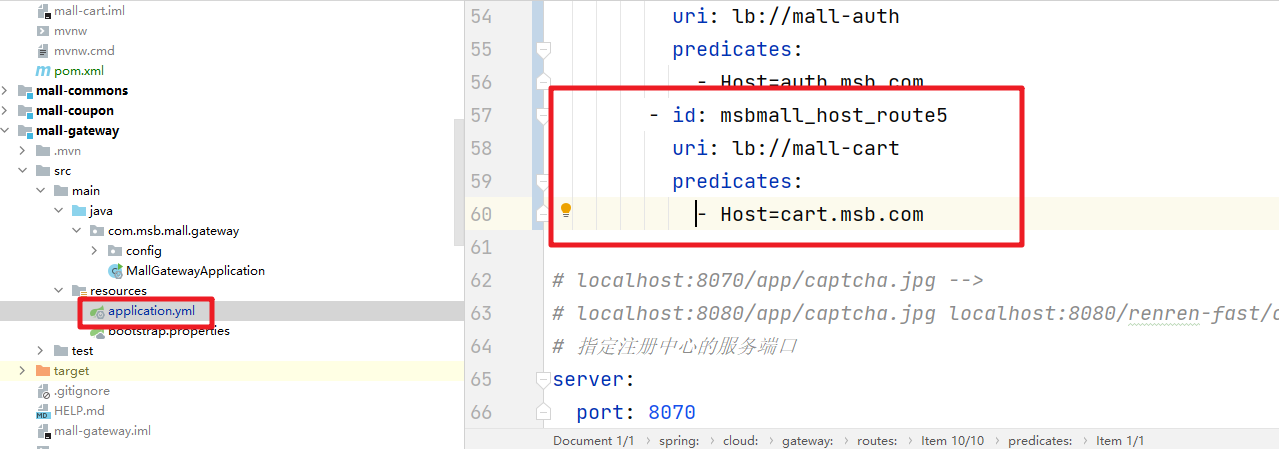
  Nginx接收了 `cart.msb.com`这个域名的访问,那么会把服务反向代理给网关服务,这时网关服务就需要把该请求路由到购物车服务中。我们需要修改网关服务的配置
|
|
|
|
|
|
|
|
|
|
|
|
最后调整下模板页面中的静态资源的路径就可以了
|
|
|
|
|
|
|
|
|
|
|
|
然后启动服务访问即可
|
|
|
|
|
|

|
|
|
|
|
|
# 二、购物车功能
|
|
|
|
|
|
## 1.购物车模式处理
|
|
|
|
|
|
  讨论购物车中数据的存储方式。我们在购物车中可以有多见商品
|
|
|
|
|
|
|
|
|
|
|
|
然后对应的数据我们可以选择存储在Redis中,对应的数据存储结构我们要慎重的考虑,因为有多条记录,如果用List来存储
|
|
|
|
|
|
```json
|
|
|
[
|
|
|
|
|
|
{skuId:1,subTile:'华为',price:666}
|
|
|
|
|
|
,{skuId:1,subTile:'华为',price:666}
|
|
|
|
|
|
,{skuId:1,subTile:'华为',price:666}
|
|
|
|
|
|
]
|
|
|
```
|
|
|
|
|
|
那么我们后面要对商品做添加删除和修改商品数量的时候就会比较麻烦,我们需要取出List中的整个数据,然后找到我们要操作的数据,然后把所有数据回写到Redis中,这种方式显然不可取,这时我们可以考虑hash的方式来存储:
|
|
|
|
|
|

|
|
|
|
|
|
这样我们就可以一条一条来处理了,相比上面会更加的灵活。然后我们在后端服务中存储的结构为
|
|
|
|
|
|
```java
|
|
|
Map<String,Map<String,CartItemVo>>
|
|
|
```
|
|
|
|
|
|
## 2.购物车VO
|
|
|
|
|
|
  针对购物车的信息存储,我们创建两个对应的VO对象。
|
|
|
|
|
|
```java
|
|
|
package com.msb.mall.vo;
|
|
|
|
|
|
import java.math.BigDecimal;
|
|
|
import java.util.List;
|
|
|
|
|
|
/**
|
|
|
* 购物车中的商品信息
|
|
|
*/
|
|
|
public class CartItem {
|
|
|
|
|
|
// 商品的编号 SkuId
|
|
|
private Long skuId;
|
|
|
// 商品的图片
|
|
|
private String image;
|
|
|
// 商品的标题
|
|
|
private String title;
|
|
|
// 是否选中
|
|
|
private boolean check = true;
|
|
|
// 商品的销售属性
|
|
|
private List<String> skuAttr;
|
|
|
// 商品的单价
|
|
|
private BigDecimal price;
|
|
|
// 购买的数量
|
|
|
private Integer count;
|
|
|
// 商品的总价
|
|
|
private BigDecimal totalPrice;
|
|
|
|
|
|
public Long getSkuId() {
|
|
|
return skuId;
|
|
|
}
|
|
|
|
|
|
public void setSkuId(Long skuId) {
|
|
|
this.skuId = skuId;
|
|
|
}
|
|
|
|
|
|
public String getImage() {
|
|
|
return image;
|
|
|
}
|
|
|
|
|
|
public void setImage(String image) {
|
|
|
this.image = image;
|
|
|
}
|
|
|
|
|
|
public String getTitle() {
|
|
|
return title;
|
|
|
}
|
|
|
|
|
|
public void setTitle(String title) {
|
|
|
this.title = title;
|
|
|
}
|
|
|
|
|
|
public boolean isCheck() {
|
|
|
return check;
|
|
|
}
|
|
|
|
|
|
public void setCheck(boolean check) {
|
|
|
this.check = check;
|
|
|
}
|
|
|
|
|
|
public List<String> getSkuAttr() {
|
|
|
return skuAttr;
|
|
|
}
|
|
|
|
|
|
public void setSkuAttr(List<String> skuAttr) {
|
|
|
this.skuAttr = skuAttr;
|
|
|
}
|
|
|
|
|
|
public BigDecimal getPrice() {
|
|
|
return price;
|
|
|
}
|
|
|
|
|
|
public void setPrice(BigDecimal price) {
|
|
|
this.price = price;
|
|
|
}
|
|
|
|
|
|
public Integer getCount() {
|
|
|
return count;
|
|
|
}
|
|
|
|
|
|
public void setCount(Integer count) {
|
|
|
this.count = count;
|
|
|
}
|
|
|
|
|
|
public BigDecimal getTotalPrice() {
|
|
|
// 商品的总价 price * count
|
|
|
return price.multiply(new BigDecimal(count));
|
|
|
}
|
|
|
|
|
|
}
|
|
|
|
|
|
```
|
|
|
|
|
|
Cart
|
|
|
|
|
|
```java
|
|
|
package com.msb.mall.vo;
|
|
|
|
|
|
import java.math.BigDecimal;
|
|
|
import java.math.BigInteger;
|
|
|
import java.util.List;
|
|
|
|
|
|
/**
|
|
|
* 购物车
|
|
|
*/
|
|
|
public class Cart {
|
|
|
// 购物车中的商品种类
|
|
|
private Integer countType;
|
|
|
|
|
|
// 选中的商品数量
|
|
|
private Integer checkCountNum;
|
|
|
|
|
|
// 选中商品的总价
|
|
|
private BigDecimal totalAmount;
|
|
|
|
|
|
// 购物中存储的商品信息
|
|
|
private List<CartItem> items;
|
|
|
|
|
|
public Integer getCountType() {
|
|
|
return items.size();
|
|
|
}
|
|
|
|
|
|
|
|
|
public Integer getCheckCountNum() {
|
|
|
Integer count = 0;
|
|
|
for (CartItem item : items) {
|
|
|
if (item.isCheck()){
|
|
|
count += item.getCount();
|
|
|
}
|
|
|
}
|
|
|
return count;
|
|
|
}
|
|
|
|
|
|
|
|
|
public BigDecimal getTotalAmount() {
|
|
|
BigDecimal amount = new BigDecimal(0);
|
|
|
for (CartItem item : items) {
|
|
|
if (item.isCheck()){
|
|
|
amount = amount.add(item.getTotalPrice());
|
|
|
}
|
|
|
}
|
|
|
return amount;
|
|
|
}
|
|
|
|
|
|
|
|
|
public List<CartItem> getItems() {
|
|
|
return items;
|
|
|
}
|
|
|
|
|
|
public void setItems(List<CartItem> items) {
|
|
|
this.items = items;
|
|
|
}
|
|
|
}
|
|
|
|
|
|
```
|
|
|
|
|
|
## 3.认证信息
|
|
|
|
|
|
  我们需要在购物车服务中根据当前登录用的用户信息去Redis中查询对应的购物车信息。首先我们需要导入Redis的相关依赖,同时我们要借助于前面讲解的SpringSession来共享认证的Session信息。
|
|
|
|
|
|
```xml
|
|
|
<dependency>
|
|
|
<groupId>org.springframework.boot</groupId>
|
|
|
<artifactId>spring-boot-starter-data-redis</artifactId>
|
|
|
</dependency>
|
|
|
<dependency>
|
|
|
<groupId>org.springframework.session</groupId>
|
|
|
<artifactId>spring-session-data-redis</artifactId>
|
|
|
</dependency>
|
|
|
```
|
|
|
|
|
|
添加属性文件信息
|
|
|
|
|
|
```properties
|
|
|
server.port=40000
|
|
|
spring.application.name=mall-cart
|
|
|
|
|
|
spring.cloud.nacos.discovery.server-addr=192.168.56.100:8848
|
|
|
spring.thymeleaf.cache=false
|
|
|
|
|
|
spring.redis.host=192.168.56.100
|
|
|
spring.redis.port=6379
|
|
|
spring.thymeleaf.enabled=false
|
|
|
|
|
|
spring.session.store-type=redis
|
|
|
server.servlet.session.timeout=30m
|
|
|
spring.session.redis.namespace=spring:session
|
|
|
```
|
|
|
|
|
|
添加Cookie的配置信息
|
|
|
|
|
|
```java
|
|
|
@Configuration
|
|
|
public class MySessionConfig {
|
|
|
|
|
|
/**
|
|
|
* 自定义Cookie的配置
|
|
|
* @return
|
|
|
*/
|
|
|
@Bean
|
|
|
public CookieSerializer cookieSerializer(){
|
|
|
DefaultCookieSerializer cookieSerializer = new DefaultCookieSerializer();
|
|
|
cookieSerializer.setDomainName("msb.com"); // 设置session对应的一级域名
|
|
|
cookieSerializer.setCookieName("msbsession");
|
|
|
return cookieSerializer;
|
|
|
}
|
|
|
|
|
|
/**
|
|
|
* 对存储在Redis中的数据指定序列化的方式
|
|
|
* @return
|
|
|
*/
|
|
|
@Bean
|
|
|
public RedisSerializer<Object> redisSerializer(){
|
|
|
return new GenericJackson2JsonRedisSerializer();
|
|
|
}
|
|
|
}
|
|
|
```
|
|
|
|
|
|
添加自定义的拦截器
|
|
|
|
|
|
```java
|
|
|
/**
|
|
|
* 我们自定义的拦截器:帮助我们获取当前登录的用户信息
|
|
|
* 通过Session共享获取的
|
|
|
*/
|
|
|
public class AuthInterceptor implements HandlerInterceptor {
|
|
|
// 本地线程对象 Map<thread,Object>
|
|
|
public static ThreadLocal<MemberVO> threadLocal = new ThreadLocal();
|
|
|
|
|
|
@Override
|
|
|
public boolean preHandle(HttpServletRequest request, HttpServletResponse response, Object handler) throws Exception {
|
|
|
// 通过HttpSession获取当前登录的用户信息
|
|
|
HttpSession session = request.getSession();
|
|
|
Object attribute = session.getAttribute(AuthConstant.AUTH_SESSION_REDIS);
|
|
|
if(attribute != null){
|
|
|
MemberVO memberVO = (MemberVO) attribute;
|
|
|
threadLocal.set(memberVO);
|
|
|
}
|
|
|
return true;
|
|
|
}
|
|
|
}
|
|
|
```
|
|
|
|
|
|
注册拦截器
|
|
|
|
|
|
```java
|
|
|
@Configuration
|
|
|
public class MyWebInterceptorConfig implements WebMvcConfigurer {
|
|
|
@Override
|
|
|
public void addInterceptors(InterceptorRegistry registry) {
|
|
|
registry.addInterceptor(new AuthInterceptor()).addPathPatterns("/**");
|
|
|
}
|
|
|
}
|
|
|
```
|
|
|
|
|
|
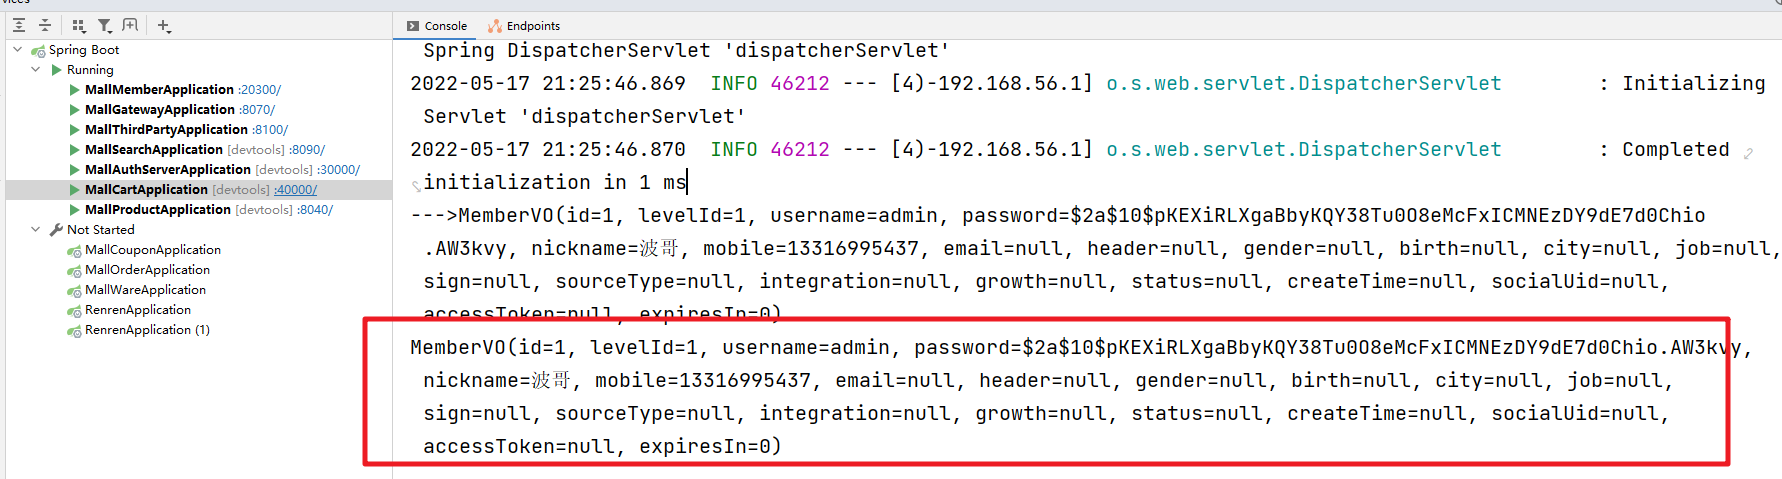
然后登录后访问controller服务测试
|
|
|
|
|
|
|
|
|
|
|
|
## 4.页面跳转
|
|
|
|
|
|
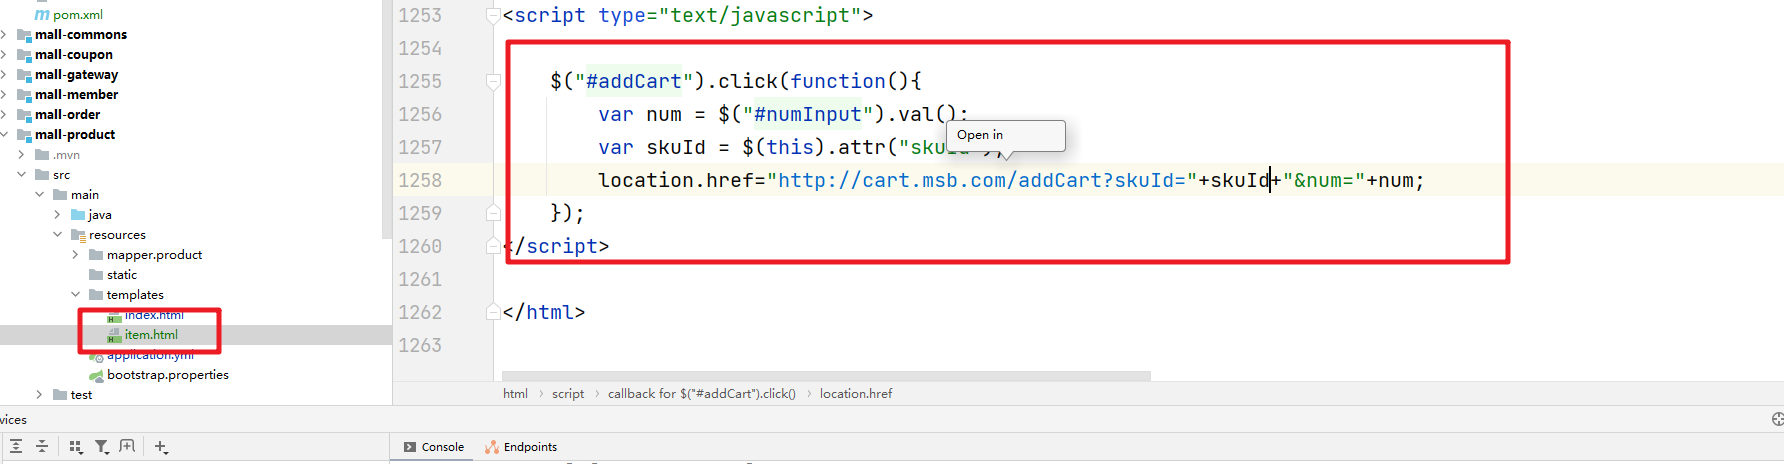
  从商品详情页面点击添加购物车完成添加购物车的逻辑。
|
|
|
|
|
|
|
|
|
|
|
|
## 5.添加购物车逻辑
|
|
|
|
|
|
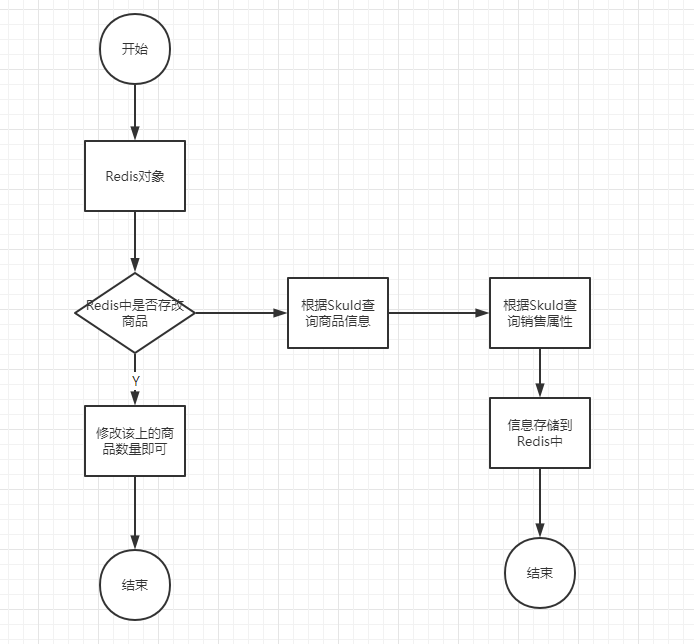
  具体完成添加购物车的逻辑,也service中我们获取到商品的SKUId和商品数量后,我们要实现的逻辑
|
|
|
|
|
|
|
|
|
|
|
|
具体核心代码
|
|
|
|
|
|
```java
|
|
|
|
|
|
/**
|
|
|
* 把商品添加到购物车中
|
|
|
* @param skuId
|
|
|
* @param num
|
|
|
* @return
|
|
|
*/
|
|
|
@Override
|
|
|
public CartItem addCart(Long skuId, Integer num) throws Exception {
|
|
|
BoundHashOperations<String, Object, Object> hashOperations = getCartKeyOperation();
|
|
|
// 如果Redis存储在商品的信息,那么我们只需要修改商品的数量就可以了
|
|
|
Object o = hashOperations.get(skuId.toString());
|
|
|
if(o != null){
|
|
|
// 说明已经存在了这个商品那么修改商品的数量即可
|
|
|
String json = (String) o;
|
|
|
CartItem item = JSON.parseObject(json, CartItem.class);
|
|
|
item.setCount(item.getCount()+num);
|
|
|
hashOperations.put(skuId.toString(),JSON.toJSONString(item));
|
|
|
return item;
|
|
|
}
|
|
|
CartItem item = new CartItem();
|
|
|
CompletableFuture future1 = CompletableFuture.runAsync(()->{
|
|
|
// 1.远程调用获取 商品信息
|
|
|
R r = productFeignService.info(skuId);
|
|
|
String skuInfoJSON = (String) r.get("skuInfoJSON");
|
|
|
SkuInfoVo vo = JSON.parseObject(skuInfoJSON,SkuInfoVo.class);
|
|
|
item.setCheck(true);
|
|
|
item.setCount(num);
|
|
|
item.setPrice(vo.getPrice());
|
|
|
item.setImage(vo.getSkuDefaultImg());
|
|
|
item.setSkuId(skuId);
|
|
|
item.setTitle(vo.getSkuTitle());
|
|
|
},executor);
|
|
|
|
|
|
CompletableFuture future2 = CompletableFuture.runAsync(()->{
|
|
|
// 2.获取商品的销售属性
|
|
|
List<String> skuSaleAttrs = productFeignService.getSkuSaleAttrs(skuId);
|
|
|
item.setSkuAttr(skuSaleAttrs);
|
|
|
},executor);
|
|
|
|
|
|
CompletableFuture.allOf(future1,future2).get();
|
|
|
// 3.把数据存储在Redis中
|
|
|
String json = JSON.toJSONString(item);
|
|
|
hashOperations.put(skuId.toString(),json);
|
|
|
|
|
|
return item;
|
|
|
}
|
|
|
```
|
|
|
|
|
|
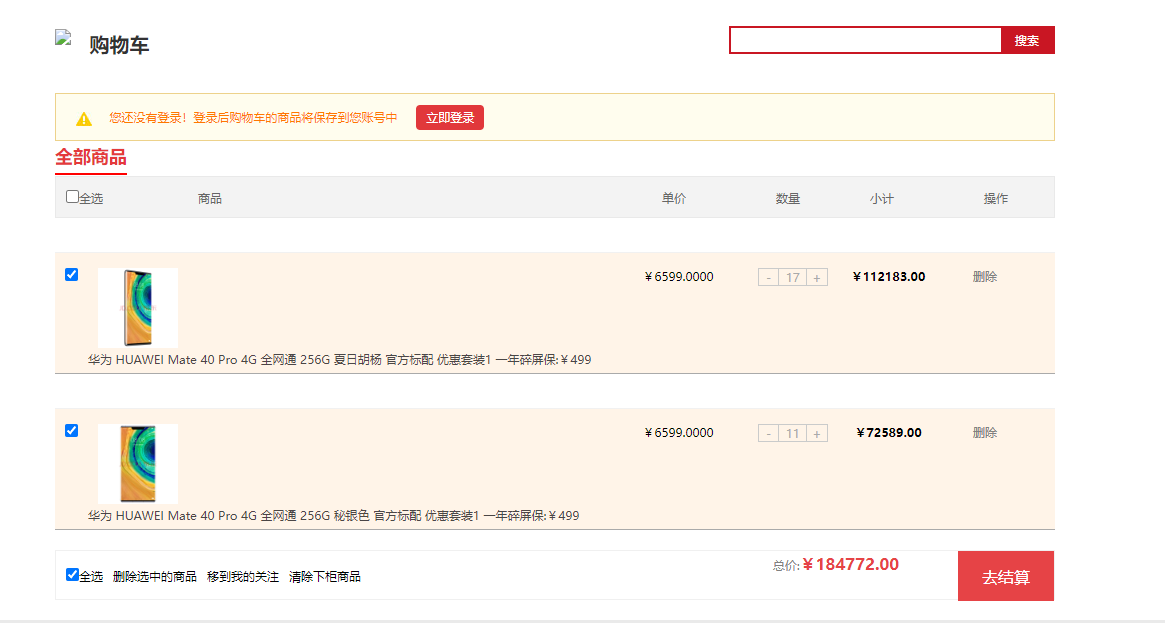
## 6.购物车主页
|
|
|
|
|
|
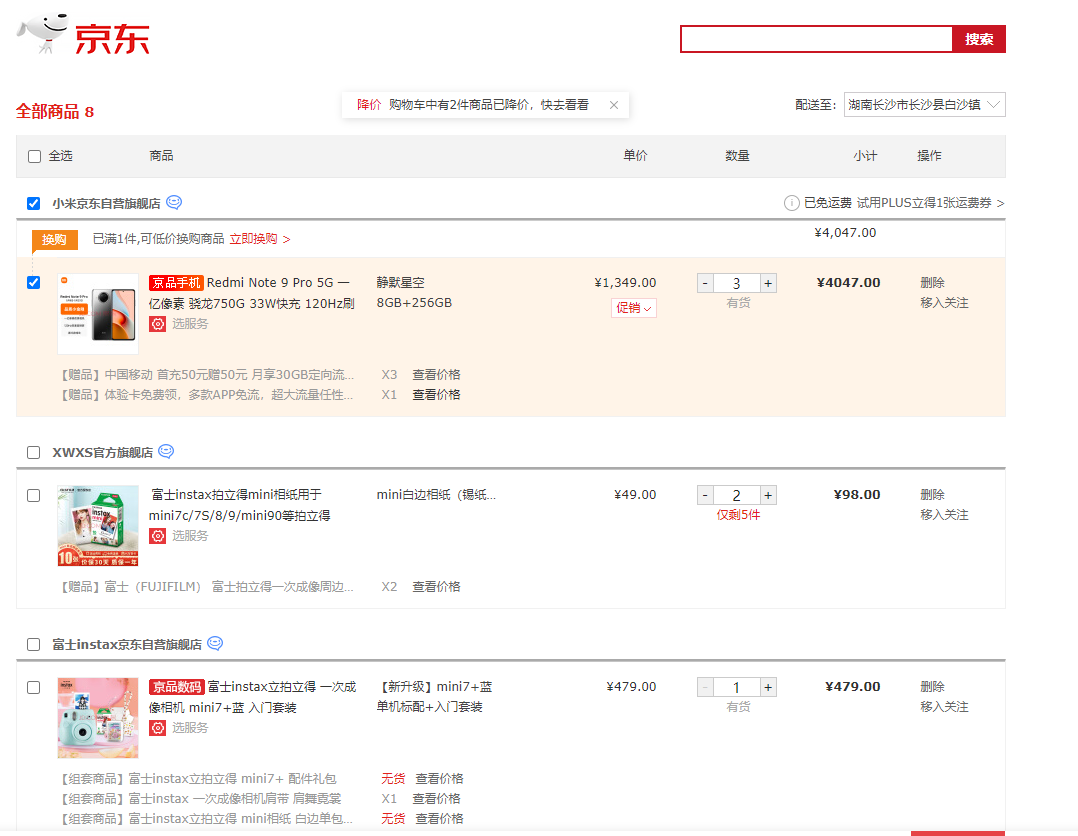
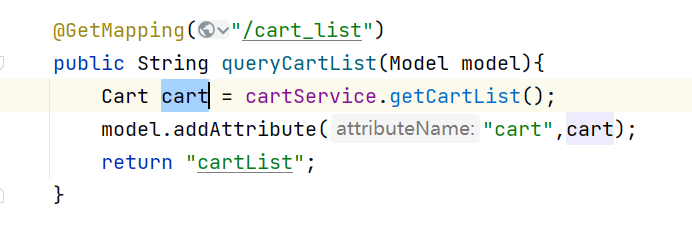
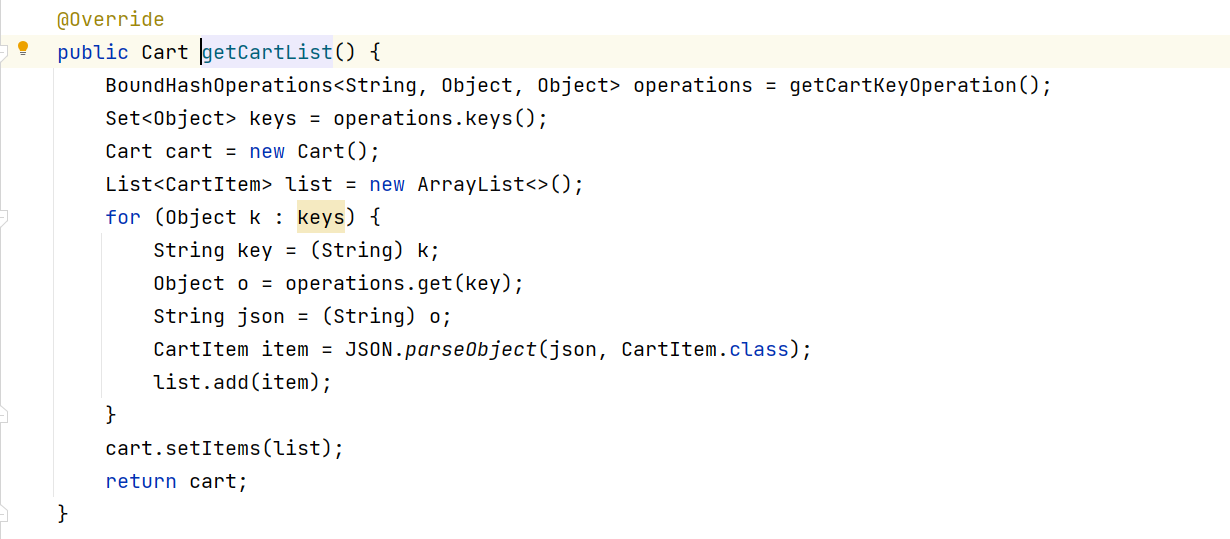
  添加商品进入购物车后,我们可以点击结算进入购物车页面,那么我们需要在后台查询出所有的当前登录用户的购物车商品信息,然后在页面中展示
|
|
|
|
|
|
|
|
|
|
|
|
|
|
|
|
|
|
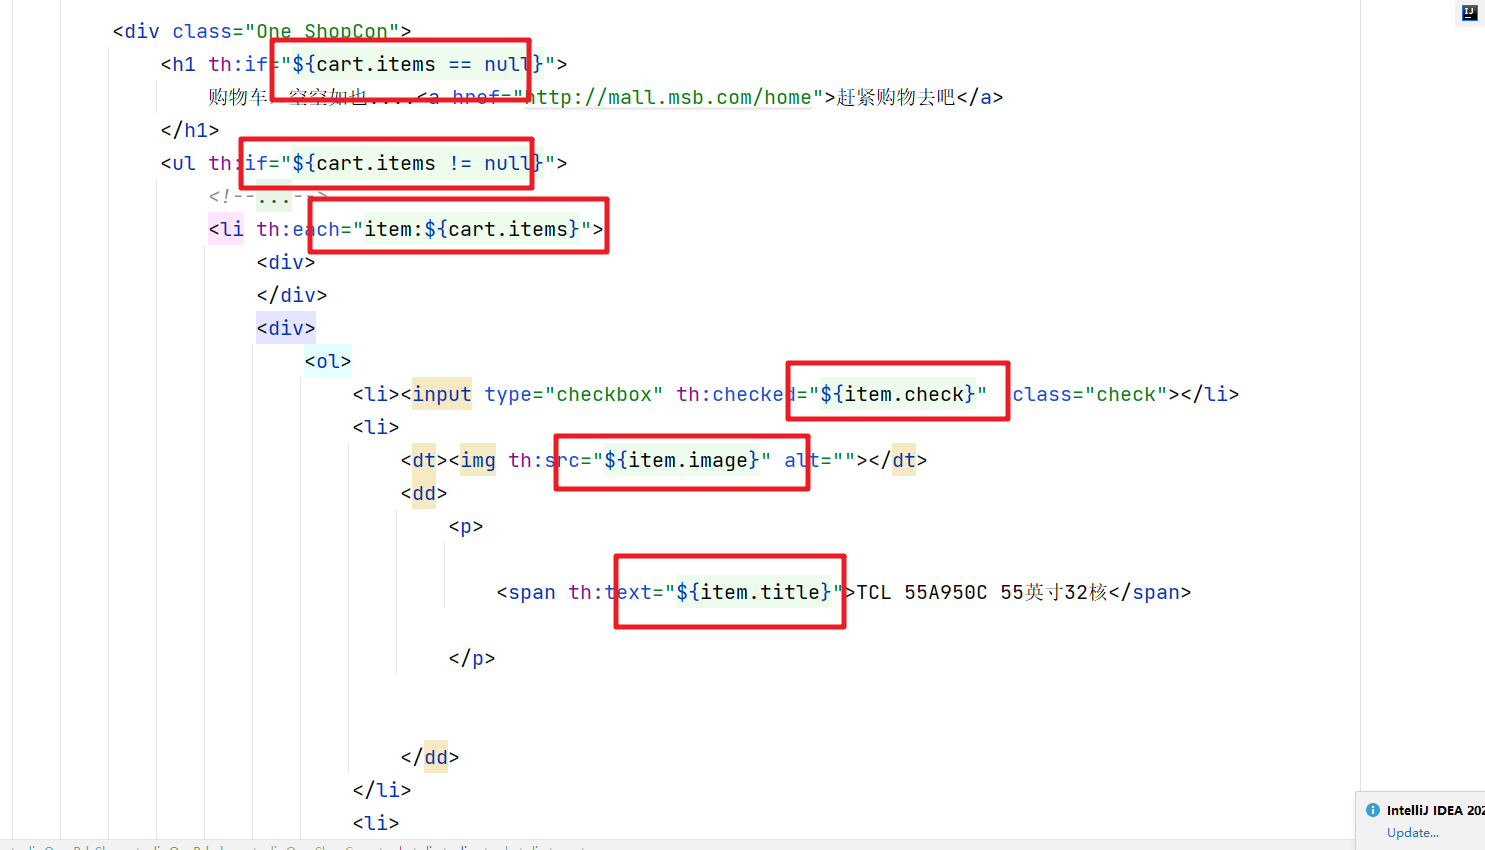
然后在页面中处理数据
|
|
|
|
|
|
|
|
|
|
|
|
|