You can not select more than 25 topics
Topics must start with a letter or number, can include dashes ('-') and can be up to 35 characters long.
329 lines
34 KiB
329 lines
34 KiB
<!--
|
|
CO_OP_TRANSLATOR_METADATA:
|
|
{
|
|
"original_hash": "ea65b75e488aa33a3cc5cb1c6c3f047a",
|
|
"translation_date": "2025-10-03T14:19:31+00:00",
|
|
"source_file": "1-getting-started-lessons/2-github-basics/README.md",
|
|
"language_code": "my"
|
|
}
|
|
-->
|
|
# GitHub အကြောင်းမိတ်ဆက်
|
|
|
|
ဒီသင်ခန်းစာမှာ GitHub ရဲ့ အခြေခံအချက်တွေကို လေ့လာပါမယ်။ GitHub က သင့်ရဲ့ ကုဒ်ကို host လုပ်ပြီး ပြင်ဆင်မှုတွေကို စီမံခန့်ခွဲဖို့ platform တစ်ခုဖြစ်ပါတယ်။
|
|
|
|

|
|
> [Tomomi Imura](https://twitter.com/girlie_mac) ရဲ့ Sketchnote
|
|
|
|
## သင်ခန်းစာမတိုင်မီ Quiz
|
|
[သင်ခန်းစာမတိုင်မီ Quiz](https://ff-quizzes.netlify.app)
|
|
|
|
## မိတ်ဆက်
|
|
|
|
ဒီသင်ခန်းစာမှာ အောက်ပါအချက်တွေကို လေ့လာပါမယ်-
|
|
|
|
- သင့်စက်မှာလုပ်ဆောင်တဲ့အလုပ်ကို tracking လုပ်ခြင်း
|
|
- အခြားသူတွေနဲ့ project တွေမှာအတူတူလုပ်ဆောင်ခြင်း
|
|
- open source software တွေကို ဘယ်လိုအထောက်အပံ့ပေးမလဲ
|
|
|
|
### လိုအပ်ချက်များ
|
|
|
|
စတင်မလုပ်ခင် Git install လုပ်ထားမထားစစ်ဆေးဖို့လိုအပ်ပါတယ်။ Terminal မှာ `git --version` လို့ရိုက်ပါ။
|
|
|
|
Git install မလုပ်ထားဘူးဆိုရင် [Git ကို download လုပ်ပါ](https://git-scm.com/downloads)။ ပြီးရင် Terminal မှာ သင့်ရဲ့ local Git profile ကို setup လုပ်ပါ:
|
|
* `git config --global user.name "your-name"`
|
|
* `git config --global user.email "your-email"`
|
|
|
|
Git ကို configuration လုပ်ထားမထားစစ်ဆေးဖို့ `git config --list` လို့ရိုက်ပါ။
|
|
|
|
GitHub account တစ်ခု၊ code editor (Visual Studio Code ကောင်းပါတယ်) တစ်ခု၊ Terminal (command prompt) ကိုဖွင့်ထားဖို့လည်းလိုအပ်ပါတယ်။
|
|
|
|
[github.com](https://github.com/) ကိုသွားပြီး account တစ်ခုဖန်တီးပါ၊ မဟုတ်ရင် login လုပ်ပြီး profile ကိုဖြည့်ပါ။
|
|
|
|
✅ GitHub က ကမ္ဘာမှာရှိတဲ့ code repository တစ်ခုသာမဟုတ်ပါဘူး၊ အခြား repository တွေလည်းရှိပါတယ်။ GitHub ကတော့ အများဆုံးလူသိများပါတယ်။
|
|
|
|
### ပြင်ဆင်မှုများ
|
|
|
|
သင့် local machine (laptop သို့မဟုတ် PC) မှာ code project ပါဝင်တဲ့ folder တစ်ခုလိုအပ်ပါတယ်။ GitHub မှာ public repository တစ်ခုလည်းလိုအပ်ပါတယ်။ ဒါက အခြားသူတွေရဲ့ project တွေကို ဘယ်လိုအထောက်အပံ့ပေးမလဲဆိုတာကို သင်ခန်းစာအနေနဲ့အသုံးပြုမယ်။
|
|
|
|
---
|
|
|
|
## Code စီမံခန့်ခွဲမှု
|
|
|
|
သင့် local folder မှာ code project တစ်ခုရှိပြီး git - version control system ကိုအသုံးပြုပြီး progress ကို tracking လုပ်ချင်တယ်ဆိုပါစို့။ git ကိုအသုံးပြုတာကို အချို့လူတွေက သင့်ရဲ့အနာဂတ်ကိုချစ်တဲ့စာရေးတာနဲ့တူတယ်လို့ယှဉ်ပြောကြပါတယ်။ commit messages တွေကို ရက်ပေါင်းများစွာ၊ လအနည်းငယ်၊ နှစ်အနည်းငယ်အကြာမှာပြန်ဖတ်တဲ့အခါ သင့်ရဲ့ဆုံးဖြတ်ချက်ကိုအလွယ်တကူသတိရနိုင်ပါတယ်။ ဒါမှမဟုတ် ပြောင်းလဲမှုကို "rollback" လုပ်နိုင်ပါတယ်။ commit messages တွေကောင်းကောင်းရေးထားရင်တော့ပါ။
|
|
|
|
### Task: Repository တစ်ခုဖန်တီးပြီး code ကို commit လုပ်ပါ
|
|
|
|
> ဗီဒီယိုကိုကြည့်ပါ
|
|
>
|
|
> [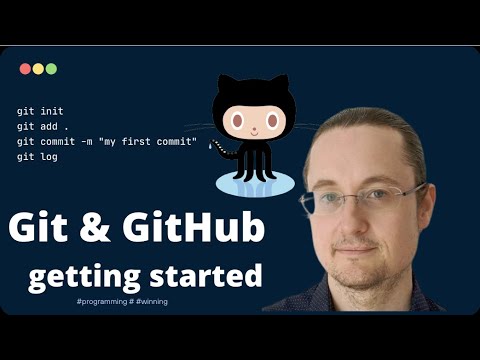](https://www.youtube.com/watch?v=9R31OUPpxU4)
|
|
|
|
1. **GitHub မှာ repository တစ်ခုဖန်တီးပါ**။ GitHub.com မှာ repositories tab မှာ၊ သို့မဟုတ် navigation bar ရဲ့ အပေါ်ယာဘက်မှာ **new repo** button ကိုရှာပါ။
|
|
|
|
1. သင့် repository (folder) ကိုနာမည်ပေးပါ။
|
|
1. **create repository** ကိုရွေးပါ။
|
|
|
|
1. **သင့်ရဲ့လုပ်ဆောင်နေတဲ့ folder ကိုသွားပါ**။ Terminal မှာ သင့် tracking လုပ်ချင်တဲ့ folder (directory) ကိုရွေးပါ။ ရိုက်ပါ:
|
|
|
|
```bash
|
|
cd [name of your folder]
|
|
```
|
|
|
|
1. **Git repository ကို initialize လုပ်ပါ**။ သင့် project မှာ ရိုက်ပါ:
|
|
|
|
```bash
|
|
git init
|
|
```
|
|
|
|
1. **Status ကိုစစ်ဆေးပါ**။ Repository ရဲ့ status ကိုစစ်ဆေးဖို့ ရိုက်ပါ:
|
|
|
|
```bash
|
|
git status
|
|
```
|
|
|
|
output က အောက်ပါအတိုင်းဖြစ်နိုင်ပါတယ်:
|
|
|
|
```output
|
|
Changes not staged for commit:
|
|
(use "git add <file>..." to update what will be committed)
|
|
(use "git checkout -- <file>..." to discard changes in working directory)
|
|
|
|
modified: file.txt
|
|
modified: file2.txt
|
|
```
|
|
|
|
`git status` command က typically repo မှာ save လုပ်ဖို့အဆင်သင့်ဖြစ်နေတဲ့ file တွေ၊ သို့မဟုတ် persist လုပ်ချင်တဲ့ ပြောင်းလဲမှုတွေကိုပြောပြပါတယ်။
|
|
|
|
1. **Tracking လုပ်ဖို့ file တွေကို add လုပ်ပါ**
|
|
ဒါကို staging files/ adding files to the staging area လို့လည်းခေါ်ပါတယ်။
|
|
|
|
```bash
|
|
git add .
|
|
```
|
|
|
|
`git add` နဲ့ `.` argument က သင့်ရဲ့ file တွေ၊ ပြောင်းလဲမှုတွေကို tracking လုပ်ဖို့အတွက်ပါ။
|
|
|
|
1. **ရွေးချယ်ထားတဲ့ file တွေကို tracking လုပ်ပါ**
|
|
|
|
```bash
|
|
git add [file or folder name]
|
|
```
|
|
|
|
ဒီ command က file အားလုံးကို commit မလုပ်ချင်တဲ့အခါ ရွေးချယ်ထားတဲ့ file တွေကို staging area မှာ add လုပ်ဖို့အတွက်အသုံးပြုပါတယ်။
|
|
|
|
1. **File အားလုံးကို unstage လုပ်ပါ**
|
|
|
|
```bash
|
|
git reset
|
|
```
|
|
|
|
ဒီ command က file အားလုံးကိုတစ်ခါတည်း unstage လုပ်ဖို့အတွက်အသုံးပြုပါတယ်။
|
|
|
|
1. **File တစ်ခုကို unstage လုပ်ပါ**
|
|
|
|
```bash
|
|
git reset [file or folder name]
|
|
```
|
|
|
|
ဒီ command က file တစ်ခုကို unstage လုပ်ဖို့အတွက်အသုံးပြုပါတယ်။
|
|
|
|
1. **သင့်ရဲ့အလုပ်ကို persist လုပ်ပါ**။ ဒီအချိန်မှာ file တွေကို staging area မှာ add လုပ်ပြီး Git က tracking လုပ်နေပါတယ်။ ပြောင်းလဲမှုကို permanent လုပ်ဖို့ commit လုပ်ဖို့လိုအပ်ပါတယ်။ `git commit` command ကိုအသုံးပြုပြီး commit တစ်ခုဖန်တီးပါ။ commit က repo ရဲ့ history မှာ saving point တစ်ခုကိုကိုယ်စားပြုပါတယ်။ commit ဖန်တီးဖို့အတွက် အောက်ပါအတိုင်းရိုက်ပါ:
|
|
|
|
```bash
|
|
git commit -m "first commit"
|
|
```
|
|
|
|
ဒီ command က သင့်ရဲ့ file အားလုံးကို commit လုပ်ပြီး "first commit" ဆိုတဲ့ message ကိုထည့်ပါမယ်။ အနာဂတ် commit messages တွေမှာ သင့်ပြောင်းလဲမှုအမျိုးအစားကိုဖော်ပြဖို့ပိုမိုဖော်ပြချက်အပြည့်အဝရှိတဲ့ description ကိုရေးဖို့လိုအပ်ပါတယ်။
|
|
|
|
1. **Local Git repo ကို GitHub နဲ့ချိတ်ဆက်ပါ**။ Git repo ကို local machine မှာထားတာကောင်းပေမယ့် file တွေကို backup လုပ်ဖို့၊ သို့မဟုတ် အခြားသူတွေကို သင့် repo မှာအတူတူလုပ်ဆောင်ဖို့ဖိတ်ခေါ်ဖို့ GitHub ကိုအသုံးပြုနိုင်ပါတယ်။ GitHub မှာ repo တစ်ခုဖန်တီးပြီးသားဖြစ်တဲ့အတွက် local Git repo ကို GitHub နဲ့ချိတ်ဆက်ဖို့သာလိုအပ်ပါတယ်။ `git remote add` command ကဒီအလုပ်ကိုလုပ်ပေးပါမယ်။ အောက်ပါ command ကိုရိုက်ပါ:
|
|
|
|
> Command ရိုက်မလုပ်ခင် GitHub repo page ကိုသွားပြီး repository URL ကိုရှာပါ။ အောက်ပါ command မှာ GitHub URL ကိုအသုံးပြုပါ။ ```https://github.com/username/repository_name.git``` ကို သင့် GitHub URL နဲ့အစားထိုးပါ။
|
|
|
|
```bash
|
|
git remote add origin https://github.com/username/repository_name.git
|
|
```
|
|
|
|
ဒီ command က "origin" လို့ခေါ်တဲ့ _remote_ သို့မဟုတ် connection တစ်ခုကို ဖန်တီးပြီး သင့် GitHub repository ကိုညွှန်းပါတယ်။
|
|
|
|
1. **Local file တွေကို GitHub သို့ပို့ပါ**။ အခုအချိန်မှာ local repo နဲ့ GitHub repo အကြား connection တစ်ခုဖန်တီးပြီးသားဖြစ်ပါတယ်။ file တွေကို GitHub သို့ပို့ဖို့ `git push` command ကိုအသုံးပြုပါ:
|
|
|
|
> သင့် branch နာမည်က default အနေနဲ့ ```main``` နဲ့မတူနိုင်ပါတယ်။
|
|
|
|
```bash
|
|
git push -u origin main
|
|
```
|
|
|
|
ဒီ command က သင့်ရဲ့ "main" branch မှာ commit တွေကို GitHub သို့ပို့ပါမယ်။ `upstream` branch ကို `-u` argument နဲ့ထည့်သွင်းခြင်းက local branch နဲ့ remote branch အကြား link တစ်ခုကိုဖန်တီးပေးပါတယ်။ အနာဂတ်မှာ branch နာမည်ကို specify မလုပ်ဘဲ git push သို့မဟုတ် git pull ကိုအသုံးပြုနိုင်ပါတယ်။
|
|
|
|
2. **ပိုပြီးပြောင်းလဲမှုတွေထည့်ပါ**။ ပြောင်းလဲမှုတွေကိုဆက်လက်လုပ်ဆောင်ပြီး GitHub သို့ push လုပ်ချင်ရင် အောက်ပါ command သုံးခုကိုအသုံးပြုရပါမယ်:
|
|
|
|
```bash
|
|
git add .
|
|
git commit -m "type your commit message here"
|
|
git push
|
|
```
|
|
|
|
> Tip, `.gitignore` file တစ်ခုကိုအသုံးပြုပြီး GitHub မှာ tracking လုပ်ချင်မယ့် file တွေကိုရှောင်ရှားနိုင်ပါတယ်။ `.gitignore` file template တွေကို [.gitignore templates](https://github.com/github/gitignore) မှာရှာနိုင်ပါတယ်။
|
|
|
|
#### Commit messages
|
|
|
|
Git commit subject line က အောက်ပါစကားကိုပြည့်စုံစေပါတယ်-
|
|
If applied, this commit will <your subject line here>
|
|
|
|
Subject မှာ imperative, present tense ကိုအသုံးပြုပါ- "change" ဟုတ်ပြီး "changed" သို့မဟုတ် "changes" မဟုတ်ပါ။
|
|
Subject အတိုင်း body (optional) မှာလည်း imperative, present tense ကိုအသုံးပြုပါ။ Body မှာ ပြောင်းလဲမှုရဲ့ motivation ကိုဖော်ပြပြီး ယခင်အပြုအမူနဲ့ယှဉ်ကြည့်ပါ။ `why` ကိုရှင်းပြတာဖြစ်ပြီး `how` ကိုမဟုတ်ပါ။
|
|
|
|
✅ GitHub ကိုအချိန်အနည်းငယ်ကြည့်ရှုပါ။ commit message ကောင်းကောင်းတစ်ခုကိုရှာနိုင်ပါသလား? အနည်းဆုံး message တစ်ခုကိုရှာနိုင်ပါသလား? commit message မှာ ဘယ်အချက်တွေက အရေးကြီးပြီး အသုံးဝင်ဆုံးလဲလို့ထင်ပါသလဲ?
|
|
|
|
### Task: အတူတူလုပ်ဆောင်ပါ
|
|
|
|
GitHub မှာအလုပ်တွေကိုတင်တာရဲ့အဓိကရည်ရွယ်ချက်က အခြား developer တွေနဲ့အတူတူလုပ်ဆောင်နိုင်ဖို့ပါ။
|
|
|
|
## အခြားသူတွေနဲ့ project တွေမှာအတူတူလုပ်ဆောင်ခြင်း
|
|
|
|
> ဗီဒီယိုကိုကြည့်ပါ
|
|
>
|
|
> [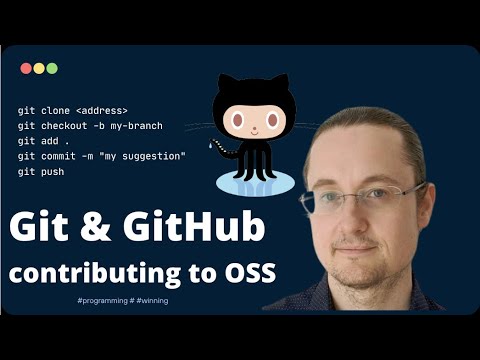](https://www.youtube.com/watch?v=bFCM-PC3cu8)
|
|
|
|
သင့် repository မှာ `Insights > Community` ကိုသွားပြီး သင့် project က recommended community standards တွေနဲ့ဘယ်လိုယှဉ်နိုင်လဲဆိုတာကြည့်ပါ။
|
|
|
|
GitHub repo ကိုတိုးတက်အောင်လုပ်နိုင်တဲ့အချက်တွေက:
|
|
- **Description**. သင့် project အတွက် description ထည့်ထားပါသလား?
|
|
- **README**. README ထည့်ထားပါသလား? GitHub က [README](https://docs.github.com/articles/about-readmes/?WT.mc_id=academic-77807-sagibbon) ရေးဖို့အတွက်လမ်းညွှန်ချက်ပေးပါတယ်။
|
|
- **Contributing guideline**. သင့် project မှာ [contributing guidelines](https://docs.github.com/articles/setting-guidelines-for-repository-contributors/?WT.mc_id=academic-77807-sagibbon) ရှိပါသလား?
|
|
- **Code of Conduct**. [Code of Conduct](https://docs.github.com/articles/adding-a-code-of-conduct-to-your-project/) ရှိပါသလား?
|
|
- **License**. အရေးကြီးဆုံးအချက်ကတော့ [license](https://docs.github.com/articles/adding-a-license-to-a-repository/) ပါ။
|
|
|
|
ဒီ resource တွေက အသစ် join လုပ်တဲ့ team member တွေအတွက်အကျိုးရှိပါတယ်။ အဲဒီ resource တွေက typically အသစ် join လုပ်တဲ့ contributor တွေ project ကိုကြည့်ရှုမယ့်အခါ သင့် project က သူတို့အချိန်ကိုသုံးဖို့သင့်တော်တဲ့နေရာလားဆိုတာကိုရှာဖွေဖို့အတွက်အရေးကြီးပါတယ်။
|
|
|
|
✅ README file တွေက အချိန်ယူပြီးပြင်ဆင်ရတဲ့အရာဖြစ်ပေမယ့် အလုပ်များနေတဲ့ maintainer တွေက often neglect လုပ်တတ်ပါတယ်။ အလွန်ဖော်ပြချက်ပြည့်စုံတဲ့ README တစ်ခုကိုရှာနိုင်ပါသလား? Note: [README ကောင်းကောင်းရေးဖို့ tools](https://www.makeareadme.com/) တွေရှိပါတယ်။ သုံးကြည့်လိုက်ပါ။
|
|
|
|
### Task: Code တစ်ချို့ကို merge လုပ်ပါ
|
|
|
|
Contributing docs တွေက project ကိုအထောက်အပံ့ပေးဖို့လမ်းညွှန်ချက်ပေးပါတယ်။ ဘယ်အမျိုးအစားအထောက်အပံ့တွေကိုရှာဖွေနေတယ်၊ process ဘယ်လိုလုပ်ရမယ်ဆိုတာကိုရှင်းပြပါတယ်။ Contributors တွေ GitHub မှာသင့် repo ကို contribute လုပ်ဖို့အတွက်အောက်ပါအဆင့်တွေကိုလိုက်နာရပါမယ်:
|
|
|
|
1. **Forking your repo**. Contributor တွေကို သင့် project ကို _fork_ လုပ်ဖို့လိုအပ်ပါတယ်။ Forking ဆိုတာ သင့် repository ရဲ့ replica ကို သူတို့ရဲ့ GitHub profile မှာဖန်တီးတာဖြစ်ပါတယ်။
|
|
1. **Clone**. သူတို့ local machine မှာ project ကို clone လုပ်ပါမယ်။
|
|
1. **Create a branch**. Contributor တွေကို သူတို့ရဲ့အလုပ်အတွက် _branch_ တစ်ခုဖန်တီးဖို့တောင်းဆိုပါ။
|
|
1. **Focus their change on one area**. Contributor တွေကို တစ်ခါ commit တစ်ခုမှာ တစ်ခုတည်းသောအရာကိုအာရုံစိုက်ဖို့တောင်းဆိုပါ။ ဒါက သူတို့ရဲ့အလုပ်ကို _merge_ လုပ်နိုင်ဖို့အခွင့်အလမ်းကိုမြှင့်တင်ပေးပါတယ်။ Bug fix တစ်ခုရေးတာ၊ feature အသစ်တစ်ခုထည့်တာ၊ test အများအပြားကို update လုပ်တာကို imagine လုပ်ပါ- သင့်အနေနဲ့ ၃ ခုထဲက ၂ ခု သို့မဟုတ် ၁ ခုကိုပဲ implement လုပ်ချင်တယ်ဆိုရင်?
|
|
|
|
✅ Branch တွေက code ကောင်းကောင်းရေးပြီး ship လုပ်ဖို့အရေးကြီးတဲ့အခြေအနေကို imagine လုပ်ပါ။ ဘယ်လို use case တွေကိုစဉ်းစားနိုင်ပါသလဲ?
|
|
|
|
> Note, သင်လိုချင်တဲ့ပြောင်းလဲမှုကိုအခြေခံပြီး branch တွေကိုသင့်အလုပ်အတွက်ဖန်တီးပါ။ သင့်ရဲ့ commit တွေကို သင့် "checked out" လုပ်ထားတဲ့ branch မှာလုပ်ဆောင်ပါမယ်။ `git status` ကိုအသုံးပြုပြီး ဘယ် branch မှာရှိတယ်ဆိုတာကြည့်ပါ။
|
|
|
|
Contributor workflow ကိုသွားကြည့်ပါ။ Contributor က repo ကို _fork_ လုပ်ပြီး _clone_ လုပ်ထားပြီး local machine မှာ Git repo ကိုအလုပ်လုပ်ဖို့အဆင်သင့်ဖြစ်နေတယ်လို့ assume လုပ်ပါ:
|
|
|
|
1. **Branch တစ်ခုဖန်တီးပါ**. Contributor က သူတို့ရဲ့ပြောင်းလဲမှုတွေကိုထည့်သွင်းမယ့် branch ကိုဖန်တီးဖို့ `git branch` command ကိုအသုံးပြုပါ:
|
|
|
|
```bash
|
|
git branch [branch-name]
|
|
```
|
|
|
|
1. **Working branch ကို switch လုပ်ပါ**. သတ်မှတ်ထားတဲ့ branch ကို switch လုပ်ပြီး working directory ကို update လုပ်ပါ:
|
|
|
|
```bash
|
|
git switch [branch-name]
|
|
```
|
|
|
|
1. **အလုပ်လုပ်ပါ**. ဒီအချိန်မှာ Contributor က သူတို့ရဲ့ပြောင်းလဲမှုတွေကိုထည့်သွင်းပါမယ်။ Git ကိုအောက်ပါ command တွေကိုအသုံးပြုပြီးပြောပြပါ:
|
|
|
|
```bash
|
|
git add .
|
|
git commit -m "my changes"
|
|
```
|
|
|
|
Commit ကိုအမည်ကောင်းကောင်းပေးပါ၊ Contributor ကိုယ်တိုင်အတွက်လည်းကောင်း၊ repo maintainer အတွက်လည်းကောင်း။
|
|
|
|
1. **Main branch နဲ့အလုပ်ကိုပေါင်းစည်းပါ**. Contributor က သူတို့ရဲ့အလုပ်ကို `main` branch နဲ့ပေါင်းစည်းချင်ပါတယ်။ `main` branch က meanwhile ပြောင်းလဲမှုရှိနိုင်ပါတယ်၊ ဒါကြောင့် အောက်ပါ command တွေကိုအသုံးပြုပြီး update လုပ်ပါ:
|
|
|
|
```bash
|
|
git switch main
|
|
git pull
|
|
```
|
|
|
|
_Conflicts_ ဖြစ်နိုင်တဲ့အခြေအနေတွေ၊ Git က _combine_ လုပ်ဖို့မလွယ်ကူတဲ့ပြောင်းလဲမှုတွေကို Contributor ရဲ့ working branch မှာဖြစ်စေဖို့အတွက် အောက်ပါ command တွေကို run လုပ်ပါ:
|
|
|
|
```bash
|
|
git switch [branch_name]
|
|
git merge main
|
|
```
|
|
|
|
`git merge main` command က `main` branch မှာရှိတဲ့ပြောင်းလ
|
|
1. **PR တစ်ခုဖွင့်ပါ**။ အခုတော့ PR တစ်ခုဖွင့်ဖို့လိုပါတယ်။ GitHub မှာ fork လုပ်ထားတဲ့ repo ကိုသွားပါ။ GitHub မှာ PR အသစ်တစ်ခုဖွင့်ချင်ပါသလားဆိုတဲ့အချက်ပြချက်ကိုတွေ့ပါလိမ့်မယ်၊ အဲဒီမှာ click လုပ်ပြီး commit message title ကိုပြောင်းနိုင်တဲ့ interface ကိုရောက်ပါလိမ့်မယ်၊ description ကိုပိုမိုသင့်တော်တဲ့အတိုင်းရေးနိုင်ပါတယ်။ အခုတော့ သင့်ရဲ့ fork လုပ်ထားတဲ့ repo ရဲ့ maintainer က ဒီ PR ကိုမြင်ပြီး _fingers crossed_ သဘောကျပြီး _merge_ လုပ်မယ်လို့မျှော်လင့်ရပါတယ်။ အခုတော့ သင် contributor ဖြစ်သွားပါပြီ၊ yay :)
|
|
|
|
1. **ရှင်းလင်းမှုလုပ်ပါ**။ PR ကိုအောင်မြင်စွာ merge လုပ်ပြီးရင် _ရှင်းလင်းမှုလုပ်_ တဲ့အကျင့်ကိုလိုက်နာသင့်ပါတယ်။ သင့်ရဲ့ local branch နဲ့ GitHub ကို push လုပ်ထားတဲ့ branch နှစ်ခုလုံးကိုရှင်းလင်းဖို့လိုပါတယ်။ အရင်ဆုံး local မှာအောက်ပါ command ကိုသုံးပြီး delete လုပ်ပါ:
|
|
|
|
```bash
|
|
git branch -d [branch-name]
|
|
```
|
|
|
|
GitHub မှာ fork လုပ်ထားတဲ့ repo ရဲ့ page ကိုသွားပြီး remote branch ကိုဖျက်ပါ။
|
|
|
|
`Pull request` ဆိုတာအနည်းငယ်အရူးအမူးဖြစ်တဲ့ term တစ်ခုလိုပဲ၊ အကြောင်းကတော့ သင် project ကိုသို့မဟုတ် code ကို push လုပ်ချင်တာပါ။ ဒါပေမယ့် maintainer (project owner) သို့မဟုတ် core team က သင့်ရဲ့ changes ကို project's "main" branch နဲ့ merge လုပ်မလားဆိုတာကိုစဉ်းစားဖို့လိုပါတယ်၊ ဒါကြောင့် maintainer ကို change decision တောင်းဆိုတာဖြစ်ပါတယ်။
|
|
|
|
Pull request က branch မှာ introduce လုပ်ထားတဲ့ အပြောင်းအလဲတွေကို review, comment, integrated tests စတဲ့အရာတွေနဲ့နှိုင်းယှဉ်ပြီးဆွေးနွေးဖို့နေရာဖြစ်ပါတယ်။ commit message ရဲ့ rule တွေနဲ့ဆင်တူတဲ့ rule တွေကိုလိုက်နာတဲ့ pull request ကောင်းတစ်ခုဖြစ်ပါတယ်။ သင့်ရဲ့အလုပ်က issue တစ်ခုကိုဖြေရှင်းပေးတယ်ဆိုရင် issue tracker မှာ issue ကို reference ထည့်နိုင်ပါတယ်။ ဒါကို `#` နဲ့ issue number ကိုလိုက်ပြီးရေးပါ။ ဥပမာ `#97`။
|
|
|
|
🤞 Fingers crossed အားလုံးအဆင်ပြေပြီး project owner(s) က သင့်ရဲ့ changes ကို project ထဲ merge လုပ်ပါစေ 🤞
|
|
|
|
GitHub မှာရှိတဲ့ remote branch ရဲ့ commit အသစ်တွေကို သင့်ရဲ့ local working branch နဲ့ update လုပ်ပါ:
|
|
|
|
`git pull`
|
|
|
|
## Open Source ကိုဘယ်လိုအထောက်အကူပြုမလဲ
|
|
|
|
အရင်ဆုံး GitHub မှာ သင့်စိတ်ဝင်စားတဲ့ repository (သို့မဟုတ် **repo**) တစ်ခုကိုရှာပြီး အဲဒီမှာ change တစ်ခုလုပ်ချင်ပါတယ်။ အဲဒီ repo ရဲ့ content ကို သင့်စက်ထဲ copy လုပ်ချင်ပါတယ်။
|
|
|
|
✅ 'beginner-friendly' repo တွေကို [good-first-issue tag နဲ့ရှာဖွေပါ](https://github.blog/2020-01-22-browse-good-first-issues-to-start-contributing-to-open-source/)။
|
|
|
|

|
|
|
|
Code ကို copy လုပ်ဖို့နည်းလမ်းအများကြီးရှိပါတယ်။ Repo ရဲ့ content ကို HTTPS, SSH, သို့မဟုတ် GitHub CLI (Command Line Interface) ကိုသုံးပြီး "clone" လုပ်နိုင်ပါတယ်။
|
|
|
|
Terminal ကိုဖွင့်ပြီး repo ကိုအောက်ပါအတိုင်း clone လုပ်ပါ:
|
|
`git clone https://github.com/ProjectURL`
|
|
|
|
Project ကိုအလုပ်လုပ်ဖို့ folder မှန်ကိုသွားပါ:
|
|
`cd ProjectURL`
|
|
|
|
GitHub ရဲ့ embedded code editor / cloud development environment ဖြစ်တဲ့ [Codespaces](https://github.com/features/codespaces) သို့မဟုတ် [GitHub Desktop](https://desktop.github.com/) ကိုသုံးပြီး project အပြည့်ကိုဖွင့်နိုင်ပါတယ်။
|
|
|
|
နောက်ဆုံးမှာ code ကို zipped folder အနေနဲ့ download လုပ်နိုင်ပါတယ်။
|
|
|
|
### GitHub အကြောင်းစိတ်ဝင်စားစရာအချို့
|
|
|
|
GitHub မှာ public repository တစ်ခုခုကို star, watch, သို့မဟုတ် "fork" လုပ်နိုင်ပါတယ်။ သင့်ရဲ့ starred repositories တွေကို အပေါ်ယာဉ် drop-down menu မှာတွေ့နိုင်ပါတယ်။ Bookmark လုပ်တာလိုပဲ၊ ဒါပေမယ့် code အတွက်ပါ။
|
|
|
|
Projects တွေမှာ issue tracker ရှိပါတယ်၊ အများအားဖြင့် GitHub ရဲ့ "Issues" tab မှာရှိပါတယ်၊ project owner ကအခြားနေရာမှာပြောထားမယ်ဆိုရင်တော့အဲဒီနေရာမှာရှိနိုင်ပါတယ်။ Pull Requests tab ကတော့ အလုပ်လုပ်နေတဲ့ changes တွေကိုဆွေးနွေးပြီး review လုပ်တဲ့နေရာဖြစ်ပါတယ်။
|
|
|
|
Projects တွေမှာ forum, mailing list, သို့မဟုတ် Slack, Discord, IRC လို chat channel တွေမှာလည်းဆွေးနွေးမှုရှိနိုင်ပါတယ်။
|
|
|
|
✅ သင့်ရဲ့ GitHub repo အသစ်ကိုကြည့်ပြီး settings ကို edit လုပ်တာ၊ repo မှာအချက်အလက်ထည့်တာ၊ project (Kanban board လို) တစ်ခုဖန်တီးတာလိုအရာတွေကိုစမ်းကြည့်ပါ။ GitHub မှာလုပ်နိုင်တဲ့အရာတွေများပါတယ်!
|
|
|
|
---
|
|
|
|
## 🚀 စိန်ခေါ်မှု
|
|
|
|
သူငယ်ချင်းတစ်ဦးနဲ့အတူ code တွေကိုအပြန်အလှန်လုပ်ပါ။ Project တစ်ခုကိုပူးပေါင်းဖန်တီးပြီး code ကို fork လုပ်ပါ၊ branch တွေဖန်တီးပြီး changes တွေကို merge လုပ်ပါ။
|
|
|
|
## Post-Lecture Quiz
|
|
[Post-lecture quiz](https://ff-quizzes.netlify.app/web/en/)
|
|
|
|
## Review & Self Study
|
|
|
|
[Open source software ကိုဘယ်လိုအထောက်အကူပြုမလဲ](https://opensource.guide/how-to-contribute/#how-to-submit-a-contribution) အကြောင်းပိုမိုဖတ်ရှုပါ။
|
|
|
|
[Git cheatsheet](https://training.github.com/downloads/github-git-cheat-sheet/) ကိုကြည့်ပါ။
|
|
|
|
လေ့ကျင့်ပါ၊ လေ့ကျင့်ပါ၊ လေ့ကျင့်ပါ။ GitHub မှာ [skills.github.com](https://skills.github.com) မှာလေ့လာရေးလမ်းကြောင်းကောင်းများရှိပါတယ်:
|
|
|
|
- [GitHub မှာပထမဆုံးအပတ်](https://skills.github.com/#first-week-on-github)
|
|
|
|
Advanced course တွေကိုလည်းတွေ့နိုင်ပါတယ်။
|
|
|
|
## Assignment
|
|
|
|
[GitHub မှာပထမဆုံးအပတ် course](https://skills.github.com/#first-week-on-github) ကိုပြီးစီးပါ။
|
|
|
|
---
|
|
|
|
**အကြောင်းကြားချက်**:
|
|
ဤစာရွက်စာတမ်းကို AI ဘာသာပြန်ဝန်ဆောင်မှု [Co-op Translator](https://github.com/Azure/co-op-translator) ကို အသုံးပြု၍ ဘာသာပြန်ထားပါသည်။ ကျွန်ုပ်တို့သည် တိကျမှုအတွက် ကြိုးစားနေသော်လည်း၊ အလိုအလျောက် ဘာသာပြန်ခြင်းတွင် အမှားများ သို့မဟုတ် မတိကျမှုများ ပါဝင်နိုင်သည်ကို သတိပြုပါ။ မူရင်းဘာသာစကားဖြင့် ရေးသားထားသော စာရွက်စာတမ်းကို အာဏာရှိသော ရင်းမြစ်အဖြစ် သတ်မှတ်သင့်ပါသည်။ အရေးကြီးသော အချက်အလက်များအတွက် လူ့ဘာသာပြန်ပညာရှင်များမှ ဘာသာပြန်ခြင်းကို အကြံပြုပါသည်။ ဤဘာသာပြန်ကို အသုံးပြုခြင်းမှ ဖြစ်ပေါ်လာသော အလွဲသုံးစားမှု သို့မဟုတ် အနားလွဲမှုများအတွက် ကျွန်ုပ်တို့သည် တာဝန်မယူပါ။ |