16 KiB
Creating a game using events
Pre-Lecture Quiz
Event-driven programming
When building a browser-based application, we provide a graphical user interface (GUI) for users to interact with what we've created. The most common ways users interact with the browser are by clicking and typing in various elements. The challenge for us as developers is that we don't know when they will perform these actions!
Event-driven programming is the type of programming we use to create our GUI. If we break down the term, the key word here is event. According to Merriam-Webster, an event is "something which happens." This perfectly describes our situation. We know something will happen that we want to respond to with code, but we don't know when it will occur.
The way we specify the code we want to execute is by creating a function. In procedural programming, functions are called in a specific order. This is also true in event-driven programming. The difference lies in how the functions are called.
To handle events (like button clicks or typing), we register event listeners. An event listener is a function that waits for an event to occur and executes in response. Event listeners can update the UI, make server calls, or perform any other necessary actions based on the user's input. We add an event listener using addEventListener and provide a function to execute.
NOTE: There are many ways to create event listeners. You can use anonymous functions, create named functions, or use shortcuts like setting the
clickproperty. In this exercise, we will focus onaddEventListenerand anonymous functions, as this is the most common and flexible approach used by web developers.addEventListenerworks for all events, and the event name can be passed as a parameter.
Common events
There are dozens of events you can listen to when building an application. Essentially, anything a user does on a page triggers an event, giving you the power to create the desired user experience. Fortunately, you'll typically only need a few key events. Here are some common ones (including the two we'll use for our game):
- click: Triggered when the user clicks on something, like a button or hyperlink.
- contextmenu: Triggered when the user right-clicks.
- select: Triggered when the user highlights text.
- input: Triggered when the user enters text.
Creating the game
We will create a game to explore how events work in JavaScript. Our game will test a player's typing skills, which is an essential skill for developers. Here's the general flow of the game:
- The player clicks the start button and is presented with a quote to type.
- The player types the quote as quickly as possible in a textbox.
- As each word is completed, the next word is highlighted.
- If the player makes a typo, the textbox turns red.
- When the player completes the quote, a success message is displayed along with the elapsed time.
Let's build the game and learn about events!
File structure
We will need three files: index.html, script.js, and style.css. Let's set them up to make things easier.
- Create a new folder for your project by opening a console or terminal and running the following command:
# Linux or macOS
mkdir typing-game && cd typing-game

# Windows
md typing-game && cd typing-game
- Open Visual Studio Code.
code .
- Add three files to the folder in Visual Studio Code:
- index.html
- script.js
- style.css
Create the user interface
Based on the requirements, we know we need a few elements on our HTML page. Think of this as a recipe where we need specific ingredients:
- A place to display the quote for the user to type.
- A place to display messages, like a success message.
- A textbox for typing.
- A start button.
Each of these elements will need IDs so we can interact with them in JavaScript. We will also include references to the CSS and JavaScript files.
Create a new file named index.html and add the following HTML:
<!-- inside index.html -->
<html>
<head>
  <title>Typing game</title>
  <link rel="stylesheet" href="style.css">
</head>
<body>
  <h1>Typing game!</h1>
  <p>Practice your typing skills with a quote from Sherlock Holmes. Click **start** to begin!</p>
  <p id="quote"></p> <!-- This will display our quote -->
  <p id="message"></p> <!-- This will display any status messages -->
  <div>
    <input type="text" aria-label="current word" id="typed-value" /> <!-- The textbox for typing -->
    <button type="button" id="start">Start</button> <!-- To start the game -->
  </div>
  <script src="script.js"></script>
</body>
</html>
Launch the application
It's always a good idea to develop iteratively and check how things look. Let's launch the application. Visual Studio Code has a great extension called Live Server that hosts your application locally and refreshes the browser whenever you save.
- Install Live Server by clicking Install on the linked page.
- Your browser will prompt you to open Visual Studio Code, and Visual Studio Code will prompt you to install the extension.
- Restart Visual Studio Code if prompted.
- Once installed, press Ctrl-Shift-P (or Cmd-Shift-P) in Visual Studio Code to open the command palette.
- Type Live Server: Open with Live Server.
- Live Server will start hosting your application.
- Open a browser and navigate to https://localhost:5500.
- You should now see the page you created!
Let's add some functionality.
Add the CSS
With the HTML in place, let's add CSS for styling. We need to highlight the word the player should type and change the textbox color if the player types incorrectly. We'll achieve this with two classes.
Create a new file named style.css and add the following code:
/* inside style.css */
.highlight {
  background-color: yellow;
}

.error {
  background-color: lightcoral;
  border: red;
}
✅ Feel free to customize the CSS to make the page more visually appealing:
- Choose a different font.
- Add colors to the headers.
- Adjust the sizes of elements.
JavaScript
Now that the UI is ready, let's focus on the JavaScript logic. We'll break this into a few steps:
First, create a new file named script.js.
Add the constants
We'll need a few constants to simplify our code. Here's what we'll need:
- An array of quotes.
- An empty array to store the words of the current quote.
- A variable to track the index of the word the player is typing.
- A variable to store the time when the player clicks start.
We'll also need references to the UI elements:
- The textbox (typed-value).
- The quote display (quote).
- The message display (message).
// inside script.js
// all of our quotes
const quotes = [
    'When you have eliminated the impossible, whatever remains, however improbable, must be the truth.',
    'There is nothing more deceptive than an obvious fact.',
    'I ought to know by this time that when a fact appears to be opposed to a long train of deductions it invariably proves to be capable of bearing some other interpretation.',
    'I never make exceptions. An exception disproves the rule.',
    'What one man can invent another can discover.',
    'Nothing clears up a case so much as stating it to another person.',
    'Education never ends, Watson. It is a series of lessons, with the greatest for the last.',
];
// store the list of words and the index of the word the player is currently typing
let words = [];
let wordIndex = 0;
// the starting time
let startTime = Date.now();
// page elements
const quoteElement = document.getElementById('quote');
const messageElement = document.getElementById('message');
const typedValueElement = document.getElementById('typed-value');
✅ Add more quotes to make the game more interesting.
NOTE: We can retrieve elements in the code using
document.getElementById. To avoid typos, we use constants for these elements. Frameworks like Vue.js or React can help centralize your code.
Watch this video to learn about const, let, and var:
🎥 Click the image above to watch the video.
Add start logic
The game begins when the player clicks the start button. Since we don't know when they'll click, we use an event listener. The event listener will execute code when the user clicks start.
When the user clicks start, we need to select a quote, set up the UI, and initialize tracking for the current word and timing. Add the following JavaScript, and we'll explain it afterward:
// at the end of script.js
document.getElementById('start').addEventListener('click', () => {
  // get a quote
  const quoteIndex = Math.floor(Math.random() * quotes.length);
  const quote = quotes[quoteIndex];
  // Put the quote into an array of words
  words = quote.split(' ');
  // reset the word index for tracking
  wordIndex = 0;

  // UI updates
  // Create an array of span elements so we can set a class
  const spanWords = words.map(function(word) { return `<span>${word} </span>`});
  // Convert into string and set as innerHTML on quote display
  quoteElement.innerHTML = spanWords.join('');
  // Highlight the first word
  quoteElement.childNodes[0].className = 'highlight';
  // Clear any prior messages
  messageElement.innerText = '';

  // Setup the textbox
  // Clear the textbox
  typedValueElement.value = '';
  // set focus
  typedValueElement.focus();
  // set the event handler

  // Start the timer
  startTime = new Date().getTime();
});
Breaking it down:
- Word tracking setup:
- Use Math.floor and Math.random to randomly select a quote from the
quotesarray. - Convert the
quoteinto an array ofwordsto track the player's progress. - Set
wordIndexto 0, as the player starts with the first word.
- Use Math.floor and Math.random to randomly select a quote from the
- UI setup:
- Create an array of
spanWords, where each word is wrapped in aspanelement for highlighting. - Use
jointo create a string and update theinnerHTMLofquoteElementto display the quote. - Highlight the first word by setting its
classNametohighlight. - Clear the
messageElementby settinginnerTextto an empty string.
- Create an array of
- Textbox setup:
- Clear the
valueoftypedValueElement. - Set focus to
typedValueElement.
- Clear the
- Start the timer: Call
getTime.
Add typing logic
As the player types, an input event is triggered. This event listener checks if the player is typing correctly and updates the game state. Add the following code to script.js, and we'll explain it afterward:
// at the end of script.js
typedValueElement.addEventListener('input', () => {
  // Get the current word
  const currentWord = words[wordIndex];
  // get the current value
  const typedValue = typedValueElement.value;

  if (typedValue === currentWord && wordIndex === words.length - 1) {
    // end of sentence
    // Display success
    const elapsedTime = new Date().getTime() - startTime;
    const message = `CONGRATULATIONS! You finished in ${elapsedTime / 1000} seconds.`;
    messageElement.innerText = message;
  } else if (typedValue.endsWith(' ') && typedValue.trim() === currentWord) {
    // end of word
    // clear the typedValueElement for the new word
    typedValueElement.value = '';
    // move to the next word
    wordIndex++;
    // reset the class name for all elements in quote
    for (const wordElement of quoteElement.childNodes) {
      wordElement.className = '';
    }
    // highlight the new word
    quoteElement.childNodes[wordIndex].className = 'highlight';
  } else if (currentWord.startsWith(typedValue)) {
    // currently correct
    // highlight the next word
    typedValueElement.className = '';
  } else {
    // error state
    typedValueElement.className = 'error';
  }
});
Breaking it down:
- Quote completion: If
typedValuematchescurrentWordandwordIndexis the last word:- Calculate
elapsedTimeby subtractingstartTimefrom the current time. - Convert
elapsedTimefrom milliseconds to seconds. - Display a success message.
- Calculate
- Word completion: If
typedValueends with a space and matchescurrentWord:- Clear the
valueoftypedElementfor the next word. - Increment
wordIndexto move to the next word. - Reset the
classNameof allchildNodesinquoteElement. - Highlight the next word by setting its
classNametohighlight.
- Clear the
- Correct typing: If
currentWordstarts withtypedValue:- Clear the
classNameoftypedValueElementto remove any error styling.
- Clear the
- Error: If none of the above conditions are met:
- Set the
classNameoftypedValueElementtoerror.
- Set the
Test your application
You're done! Test your application to ensure it works. Don't worry if there are errors—all developers encounter them. Debug as needed.
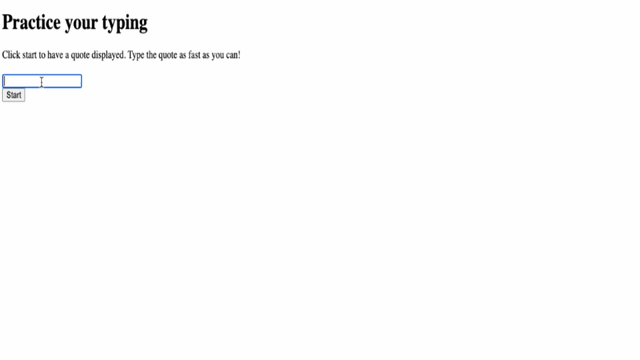
Click start and begin typing! It should look similar to the animation shown earlier.
🚀 Challenge
Add extra features:
- Disable the
inputevent listener when the game is complete, and re-enable it when the start button is clicked. - Disable the textbox after the player completes the quote.
- Display a modal dialog box with the success message.
- Use localStorage to store high scores.
Post-Lecture Quiz
Review & Self Study
Learn about all the events available to developers through the web browser, and think about the situations where each one would be applicable.
Assignment
Disclaimer:
This document has been translated using the AI translation service Co-op Translator. While we strive for accuracy, please note that automated translations may contain errors or inaccuracies. The original document in its native language should be regarded as the authoritative source. For critical information, professional human translation is recommended. We are not responsible for any misunderstandings or misinterpretations resulting from the use of this translation.