16 KiB
Build a Banking App Part 2: Build a Login and Registration Form
Pre-Lecture Quiz
Introduction
Most modern web apps allow users to create accounts to access their own private space. Since multiple users can interact with a web app simultaneously, there needs to be a way to store each user's personal data separately and determine what information to display. While we won't dive into the complexities of secure user authentication, we will ensure that users can create one (or more) bank accounts in our app.
In this section, we'll use HTML forms to add login and registration functionality to our web app. We'll learn how to send data to a server API programmatically and define basic validation rules for user inputs.
Prerequisite
Before starting this lesson, you should have completed the HTML templates and routing section of the web app. Additionally, you need to install Node.js and run the server API locally to send data for account creation.
Important Note
You will need two terminals running simultaneously:
- One for the main banking app created in the HTML templates and routing lesson.
- Another for the Bank App server API set up earlier.
Both servers need to be running to proceed with the lesson. They will operate on different ports (3000 and 5000), so there shouldn't be any conflicts.
To confirm the server is running correctly, execute the following command in a terminal:
curl http://localhost:5000/api
# -> should return "Bank API v1.0.0" as a result
Form and Controls
The <form> element defines a section of an HTML document where users can input and submit data using interactive controls. Forms can include various user interface (UI) controls, with <input> and <button> being the most common.
For example, to create a field where users can enter their username, you can use:
<input id="username" name="username" type="text">
The name attribute specifies the property name when the form data is sent. The id attribute links the <label> to the form control.
Explore the full list of
<input>types and other form controls to understand the native UI elements available for building your interface.
✅ Note that <input> is an empty element, meaning it doesn't require a closing tag. You can use the self-closing <input/> notation, but it's optional.
The <button> element within a form has a unique behavior. If you don't specify its type attribute, it will automatically submit the form data to the server when clicked. Here are the possible type values:
submit: The default type within a<form>, it triggers the form submission.reset: Resets all form controls to their initial values.button: Does not assign any default behavior. You can define custom actions using JavaScript.
Task
Start by adding a form to the login template. We'll need a username field and a Login button.
<template id="login">
  <h1>Bank App</h1>
  <section>
    <h2>Login</h2>
    <form id="loginForm">
      <label for="username">Username</label>
      <input id="username" name="user" type="text">
      <button>Login</button>
    </form>
  </section>
</template>
Notice the inclusion of a <label> element. <label> elements provide names for UI controls, such as the username field. Labels improve form readability and offer additional benefits:
- Associating a label with a form control helps users with assistive technologies (e.g., screen readers) understand the expected input.
- Clicking on the label focuses on the associated input, making it easier to interact with on touch-screen devices.
Accessibility is a crucial aspect of web development that is often overlooked. Using semantic HTML elements correctly makes it easier to create accessible content. Learn more about web accessibility to avoid common mistakes and become a responsible developer.
Next, add a second form for registration below the login form:
<hr/>
<h2>Register</h2>
<form id="registerForm">
  <label for="user">Username</label>
  <input id="user" name="user" type="text">
  <label for="currency">Currency</label>
  <input id="currency" name="currency" type="text" value="$">
  <label for="description">Description</label>
  <input id="description" name="description" type="text">
  <label for="balance">Current balance</label>
  <input id="balance" name="balance" type="number" value="0">
  <button>Register</button>
</form>
The value attribute sets a default value for an input field. Notice that the balance input uses the number type. Does it look different from the other inputs? Try interacting with it.
✅ Can you navigate and interact with the forms using only a keyboard? How would you do that?
Submitting Data to the Server
Now that we have a functional UI, the next step is to send the data to the server. Test the current code by clicking the Login or Register button. What happens?
Did you notice the change in your browser's URL?

By default, a <form> submits data to the current server URL using the GET method, appending the form data to the URL. However, this method has limitations:
- Limited data size (around 2000 characters).
- Data is visible in the URL (not ideal for sensitive information like passwords).
- Doesn't support file uploads.
To overcome these issues, you can use the POST method, which sends data in the HTTP request body without these limitations.
While POST is commonly used for sending data, in certain cases, the GET method is preferred, such as for search fields.
Task
Add action and method attributes to the registration form:
<form id="registerForm" action="//localhost:5000/api/accounts" method="POST">
Now try registering a new account with your name. After clicking the Register button, you should see something like this:
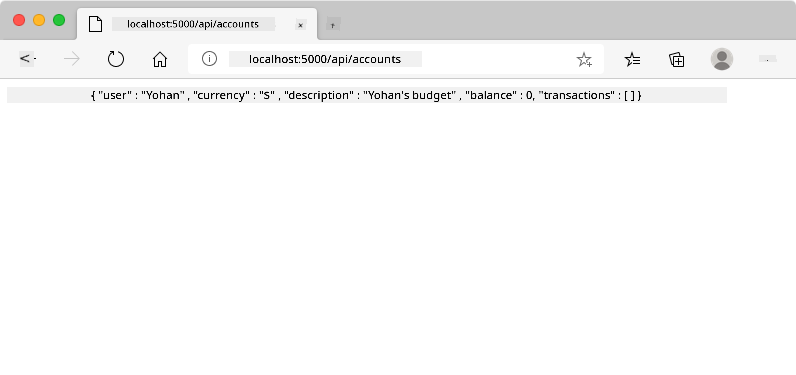
If successful, the server will respond with a JSON object containing the created account data.
✅ Try registering again with the same name. What happens?
Submitting Data Without Reloading the Page
You may have noticed an issue: submitting the form redirects the browser to the server URL, leaving the app. Since we're building a Single-page application (SPA), we want to avoid page reloads.
To send form data without reloading the page, we can use JavaScript. Instead of specifying a URL in the action attribute, you can use JavaScript code prefixed with javascript: to define custom actions. This approach requires implementing tasks that the browser would normally handle:
- Extracting form data.
- Encoding the data into a suitable format.
- Creating and sending the HTTP request.
Task
Replace the registration form's action attribute with:
<form id="registerForm" action="javascript:register()">
Open app.js and add a new function called register:
function register() {
  const registerForm = document.getElementById('registerForm');
  const formData = new FormData(registerForm);
  const data = Object.fromEntries(formData);
  const jsonData = JSON.stringify(data);
}
This function retrieves the form element using getElementById() and uses FormData to extract key/value pairs from the form controls. The data is converted to a regular object using Object.fromEntries() and serialized to JSON, a common format for web data exchange.
Next, create a function named createAccount:
async function createAccount(account) {
  try {
    const response = await fetch('//localhost:5000/api/accounts', {
      method: 'POST',
      headers: { 'Content-Type': 'application/json' },
      body: account
    });
    return await response.json();
  } catch (error) {
    return { error: error.message || 'Unknown error' };
  }
}
This function uses the async keyword, indicating it contains asynchronous code. The await keyword pauses execution until the asynchronous code completes, such as waiting for the server response.
Here's a quick video explaining async/await:

🎥 Click the image above for a video about async/await.
The fetch() API sends JSON data to the server. It requires two parameters:
- The server URL (
//localhost:5000/api/accounts). - Request settings, including the
POSTmethod and thebody. Since we're sending JSON, we set theContent-Typeheader toapplication/json.
The server responds with JSON, which we parse using await response.json(). This method is asynchronous, so we use await to handle potential errors during parsing.
Update the register function to call createAccount():
const result = await createAccount(jsonData);
Since await is used, add the async keyword to the register function:
async function register() {
Finally, add logs to check the result. The final function should look like this:
async function register() {
const registerForm = document.getElementById('registerForm');
const formData = new FormData(registerForm);
const jsonData = JSON.stringify(Object.fromEntries(formData));
const result = await createAccount(jsonData);
if (result.error) {
return console.log('An error occurred:', result.error);
}
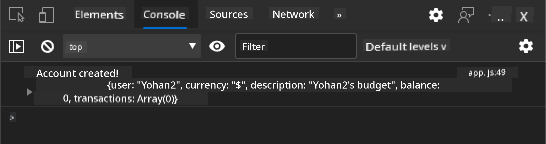
console.log('Account created!', result);
}
Now, if you open your browser developer tools and register a new account, the page won't reload, but you'll see a confirmation message in the console.
✅ Is the data sent to the server securely? What happens if someone intercepts the request? Learn more about HTTPS for secure data communication.
Data Validation
If you try registering without entering a username, the server will return a 400 (Bad Request) error.
Before sending data to the server, it's good practice to validate form data to ensure valid requests. HTML5 form controls offer built-in validation using attributes like:
required: Ensures the field is filled before submission.minlengthandmaxlength: Sets minimum and maximum character limits for text fields.minandmax: Defines numerical field limits.type: Specifies the expected data type (e.g.,number,email,file) and may alter the field's appearance.pattern: Allows validation using a regular expression. Tip: You can adjust the appearance of your form controls based on whether they are valid or invalid by using the:validand:invalidCSS pseudo-classes.
Task
There are 2 required fields to create a valid new account: the username and currency. The other fields are optional. Update the form's HTML by using both the required attribute and text in the field's label to indicate this:
<label for="user">Username (required)</label>
<input id="user" name="user" type="text" required>
...
<label for="currency">Currency (required)</label>
<input id="currency" name="currency" type="text" value="$" required>
Although this particular server implementation does not enforce specific limits on the maximum length of the fields, it's always a good practice to define reasonable limits for any user text entry.
Add a maxlength attribute to the text fields:
<input id="user" name="user" type="text" maxlength="20" required>
...
<input id="currency" name="currency" type="text" value="$" maxlength="5" required>
...
<input id="description" name="description" type="text" maxlength="100">
Now, if you press the Register button and a field does not comply with a validation rule we defined, you should see something like this:

Validation performed before sending any data to the server is called client-side validation. However, keep in mind that not all checks can be performed without sending the data. For instance, we cannot verify here if an account already exists with the same username without making a request to the server. Additional validation performed on the server is called server-side validation.
Typically, both types of validation need to be implemented. While client-side validation enhances the user experience by providing instant feedback, server-side validation is essential to ensure the user data you process is reliable and secure.
🚀 Challenge
Display an error message in the HTML if the user already exists.
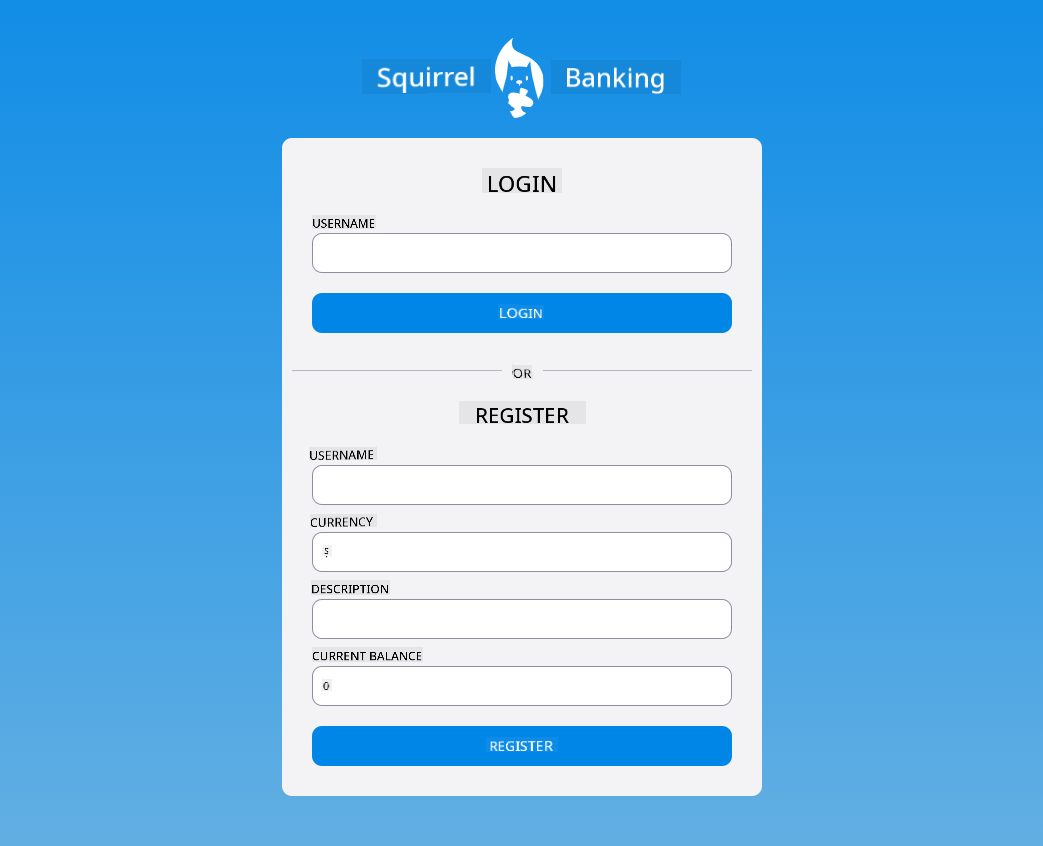
Here's an example of what the final login page might look like after applying some styling:
Post-Lecture Quiz
Review & Self Study
Developers have come up with very creative approaches to building forms, especially when it comes to validation strategies. Explore different form designs by browsing CodePen; can you find any interesting and inspiring examples?
Assignment
Disclaimer:
This document has been translated using the AI translation service Co-op Translator. While we aim for accuracy, please note that automated translations may include errors or inaccuracies. The original document in its native language should be regarded as the authoritative source. For critical information, professional human translation is advised. We are not responsible for any misunderstandings or misinterpretations resulting from the use of this translation.