
 localizeflow[bot]
9e661e295d
localizeflow[bot]
9e661e295d
|
8 months ago | |
|---|---|---|
| .. | ||
| solution | 8 months ago | |
| README.md | 8 months ago | |
README.md
Build a Chat Assistant wit AI
Remember wen dem for Star Trek dey casually yarn wit di ship computer, dem dey ask am complex questions an e dey give beta answers? Wetin look like pure science fiction for di 1960s don turn to wetin you fit build wit di web technologies wey you sabi.
For dis lesson, we go create AI chat assistant using HTML, CSS, JavaScript, plus some backend integration. You go see how di same skills wey you dey learn fit connect to powerful AI services wey fit understand context an generate meaningful responses.
Think AI like sey you get access to big library wey no just fit find information but fit combine am into better answers wey balance wetin you wan know. Instead make you dey search thousands pages, you go dey get direct, contextual answers.
Di integration dey happen through di familiar web technologies wey dey work together. HTML na di one wey create di chat interface, CSS dey handle di visual design, JavaScript dey manage user interactions, an backend API dey connect everything to AI services. E just be like di way different parts of orchestra dey join to create symphony.
We dey basically build bridge between human communication natural way an machine processing. You go learn both di technical way to integrate AI services an di design patterns wey make interactions feel natural.
When you finish dis lesson, AI integration no go be like mystery again but go be just another API wey you fit work wit. You go understand the base patterns wey dey power apps like ChatGPT an Claude, using di same web development principles wey you don dey learn.
⚡ Wetin You Fit Do for Di Next 5 Minutes
Quick Start Pathway for Busy Developers
flowchart LR
    A[⚡ 5 minutes] --> B[Get GitHub token]
    B --> C[Try AI playground]
    C --> D[Copy Python code]
    D --> E[See AI answers]
- Minute 1: Visit GitHub Models Playground an create your personal access token
- Minute 2: Test AI interactions direct inside di playground interface
- Minute 3: Click "Code" tab an copy di Python snippet
- Minute 4: Run di code locally wit your token:
GITHUB_TOKEN=your_token python test.py - Minute 5: Watch your first AI response generate from your own code
Quick Test Code:
import os
from openai import OpenAI

client = OpenAI(
    base_url="https://models.github.ai/inference",
    api_key="your_token_here"
)

response = client.chat.completions.create(
    messages=[{"role": "user", "content": "Hello AI!"}],
    model="openai/gpt-4o-mini"
)

print(response.choices[0].message.content)
Why Dis Matter: For 5 minutes, you go experience di magic of programmatic AI interaction. Dis one na di basic building block wey power every AI app wey you dey use.
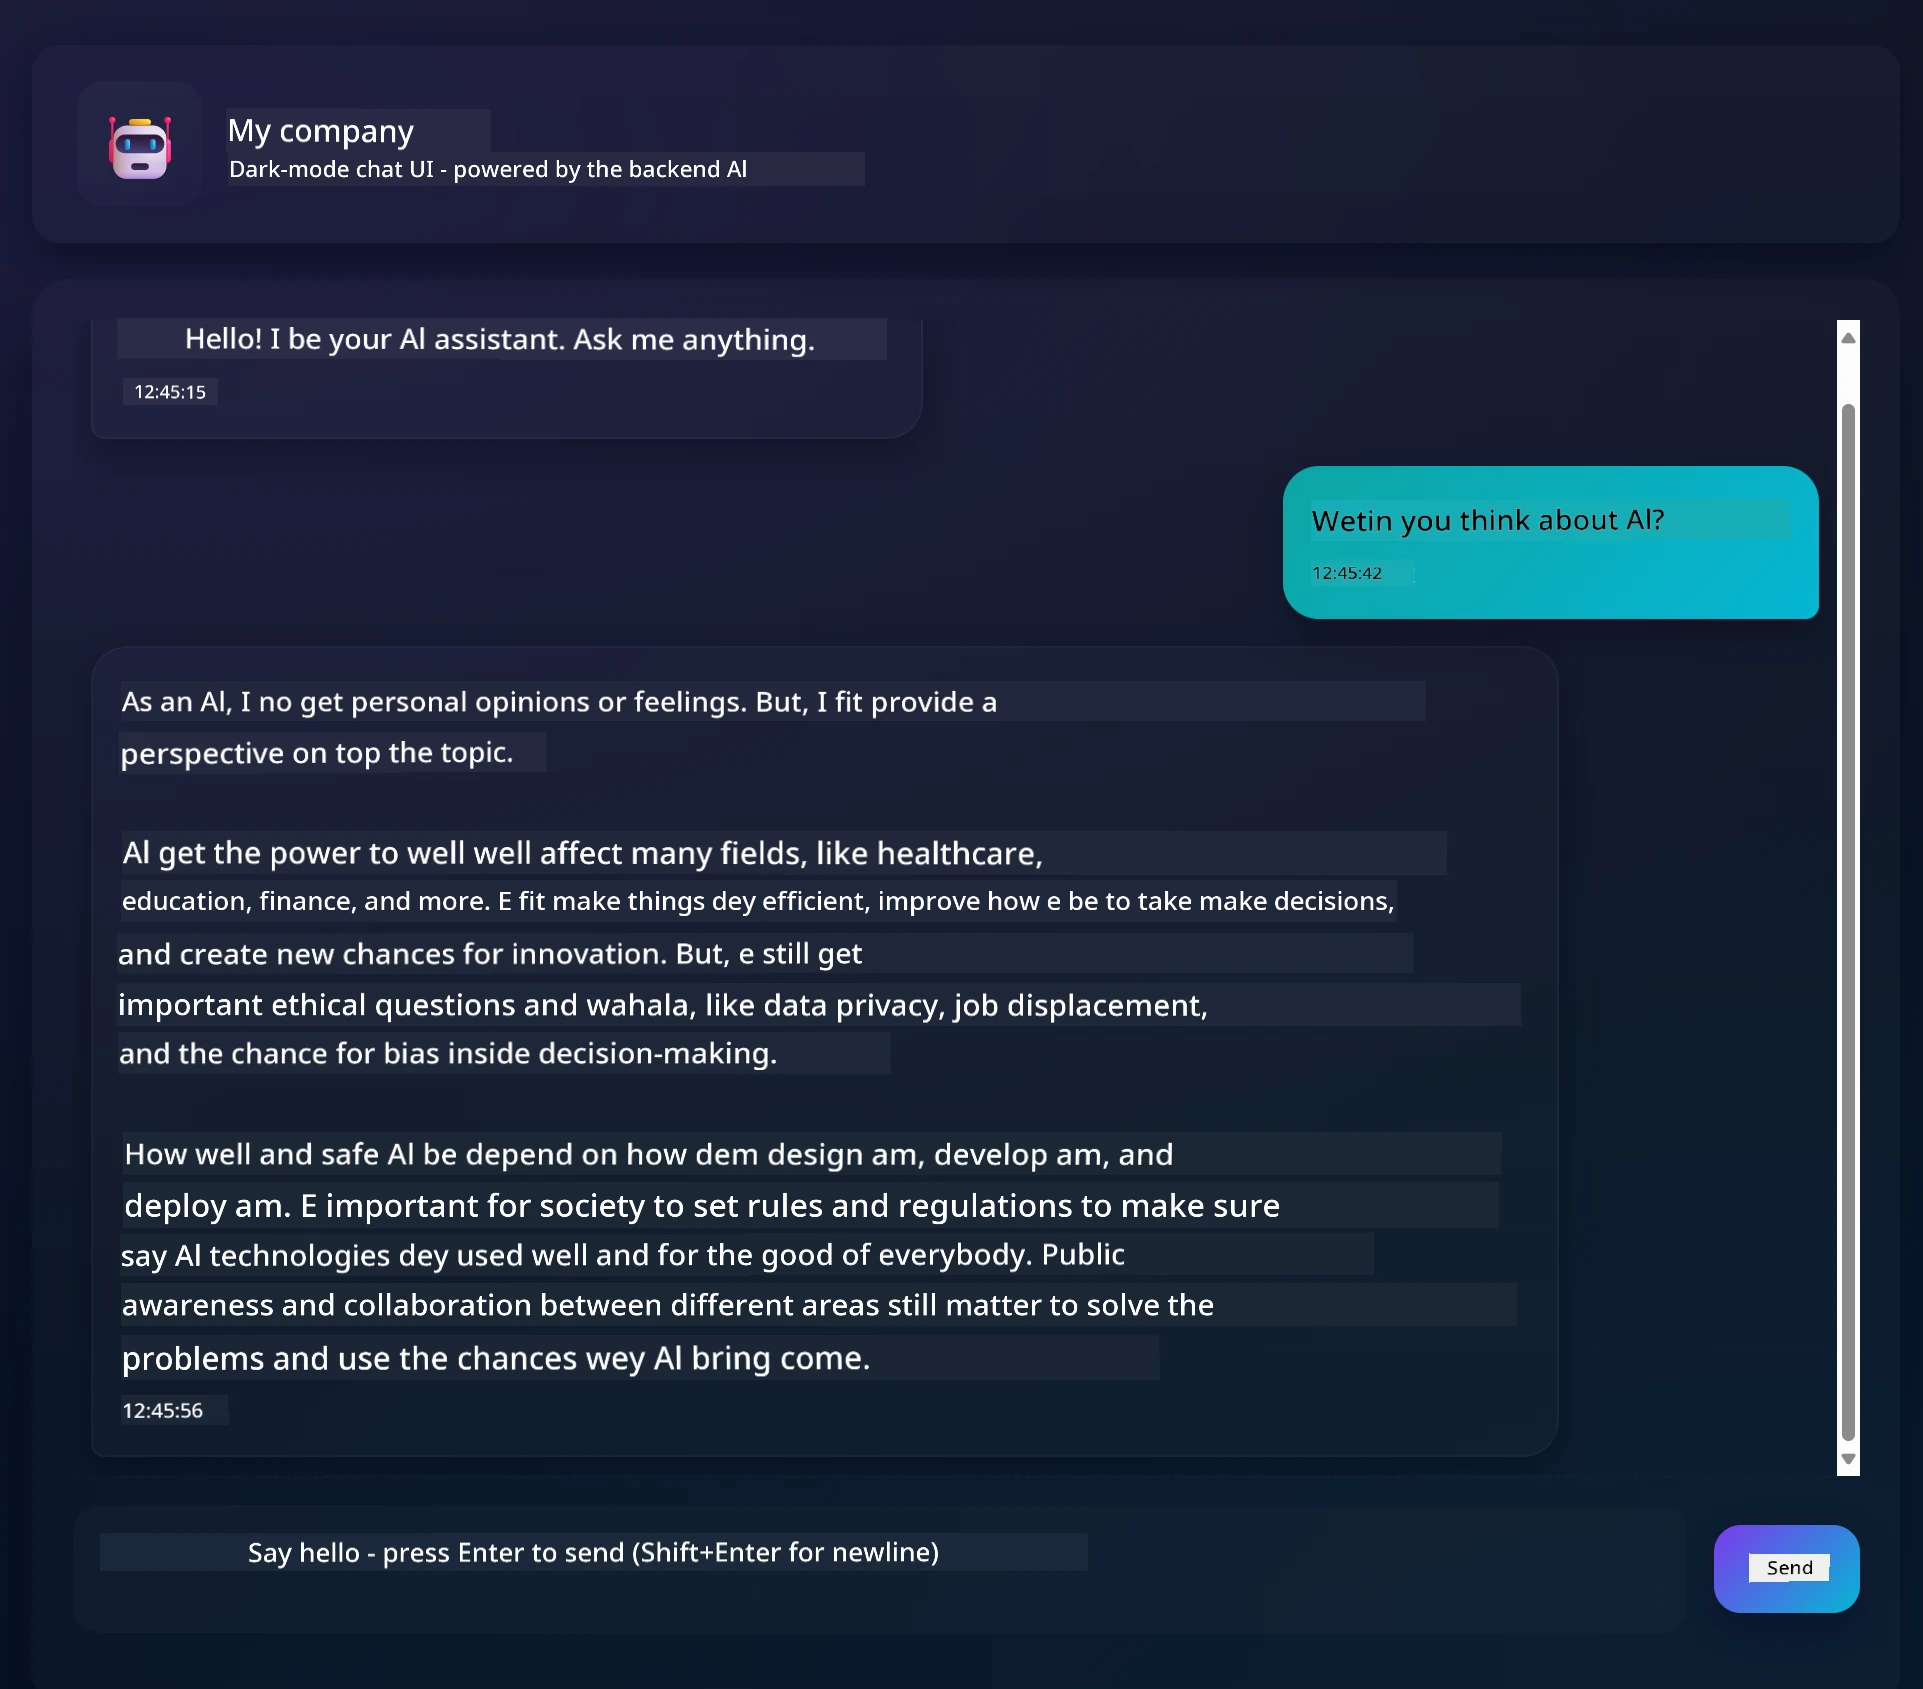
See wetin your finished project go look like:
🗺️ Your Learning Journey Through AI Application Development
journey
    title From Web Development to AI Integration
    section Understanding AI Foundations
      Discover generative AI concepts: 4: You
      Explore GitHub Models platform: 6: You
      Master AI parameters and prompts: 8: You
    section Backend Integration
      Build Python API server: 5: You
      Implement AI function calls: 7: You
      Handle async operations: 8: You
    section Frontend Development
      Create modern chat interface: 6: You
      Master real-time interactions: 8: You
      Build responsive user experience: 9: You
    section Professional Application
      Deploy complete AI system: 7: You
      Optimize performance patterns: 8: You
      Create production-ready app: 9: You
Your Journey Destination: By di end of dis lesson, you go don build complete AI-powered app using di same technologies an patterns wey power modern AI assistants like ChatGPT, Claude, an Google Bard.
Understanding AI: From Mystery to Mastery
Before we dive enter code, make we first understand wetin we dey work wit. If you don use APIs before, you know di basic pattern: send request, receive response.
AI APIs dey follow similar structure, but instead of dey fetch pre-stored data from database, dem go generate new responses based on patterns wey dem learn from plenty text. Think am like di difference between library catalog system an knowledgeable librarian wey fit combine info from many sources.
Wetin be "Generative AI" True True?
Think about how Rosetta Stone help scholars understand Egyptian hieroglyphics by finding patterns between languages wey dem know an wey dem no know. AI models dey work like dat – dem find patterns for plenty text to sabi how language dey work, then dem use those patterns to generate correct responses to new questions.
Make I break am down wit simple comparison:
- Traditional database: Na like to ask for your birth certificate – you go get di exact same document every time
- Search engine: Na like ask librarian to find books about cats – dem go show you wetin dem get
- Generative AI: Na like ask knowledgeable friend about cats – dem go tell you interesting tins wit their own words, fit how you wan know am
graph LR
    A[Your Question] --> B[AI Model]
    B --> C[Pattern Recognition]
    C --> D[Content Generation]
    D --> E[Contextual Response]

    F[Training Data<br/>Books, Articles, Web] --> B
How AI Models Dey Learn (Di Simple Version)
AI models dey learn through plenty exposure to huge datasets containing text from books, articles, an conversations. Through dis process, dem dey identify patterns for:
- How people dey structure their thoughts for writing
- Which words dem dey use together normally
- How conversations dey usually flow
- Contextual differences between formal an informal talk
E similar to how archaeologists dey decode ancient languages: dem go analyze thousands examples to understand grammar, vocabulary, an culture context, come finally fit interpret new texts using those learned patterns.
Why We Choose GitHub Models?
We dey use GitHub Models for practical reason – e give us enterprise-level AI access without make we set up our own AI infrastructure (trust me, you no go want do dat now!). Na like to use weather API instead of to dey try predict weather yourself by setting weather stations everywhere.
E be basically "AI-as-a-Service," an di best part? E free to start, so you fit experiment without fear say bill go high.
graph LR
    A[Frontend Chat UI] --> B[Your Backend API]
    B --> C[GitHub Models API]
    C --> D[AI Model Processing]
    D --> C
    C --> B
    B --> A
We go use GitHub Models for our backend integration, wey dey provide access to professional-grade AI capabilities through developer-friendly interface. Di GitHub Models Playground na testing environment wey you fit try different AI models an understand their power before you fit use dem for code.
🧠 AI Application Development Ecosystem
mindmap
  root((AI Development))
    Understanding AI
      Generative Models
        Pattern Recognition
        Content Generation
        Context Understanding
        Response Synthesis
      AI Parameters
        Temperature Control
        Token Limits
        Top-p Filtering
        System Prompts
    Backend Architecture
      API Integration
        GitHub Models
        Authentication
        Request Handling
        Error Management
      Python Infrastructure
        FastAPI Framework
        Async Operations
        Environment Security
        CORS Configuration
    Frontend Experience
      Chat Interface
        Real-time Updates
        Message History
        User Feedback
        Loading States
      Modern Web Tech
        ES6 Classes
        Async/Await
        DOM Manipulation
        Event Handling
    Professional Patterns
      Security Best Practices
        Token Management
        Input Validation
        XSS Prevention
        Error Boundaries
      Production Readiness
        Performance Optimization
        Responsive Design
        Accessibility
        Testing Strategies
Core Principle: AI application development dey combine traditional web development skills wit AI service integration, to create smart apps wey dey feel natural an dey quick respond to users.
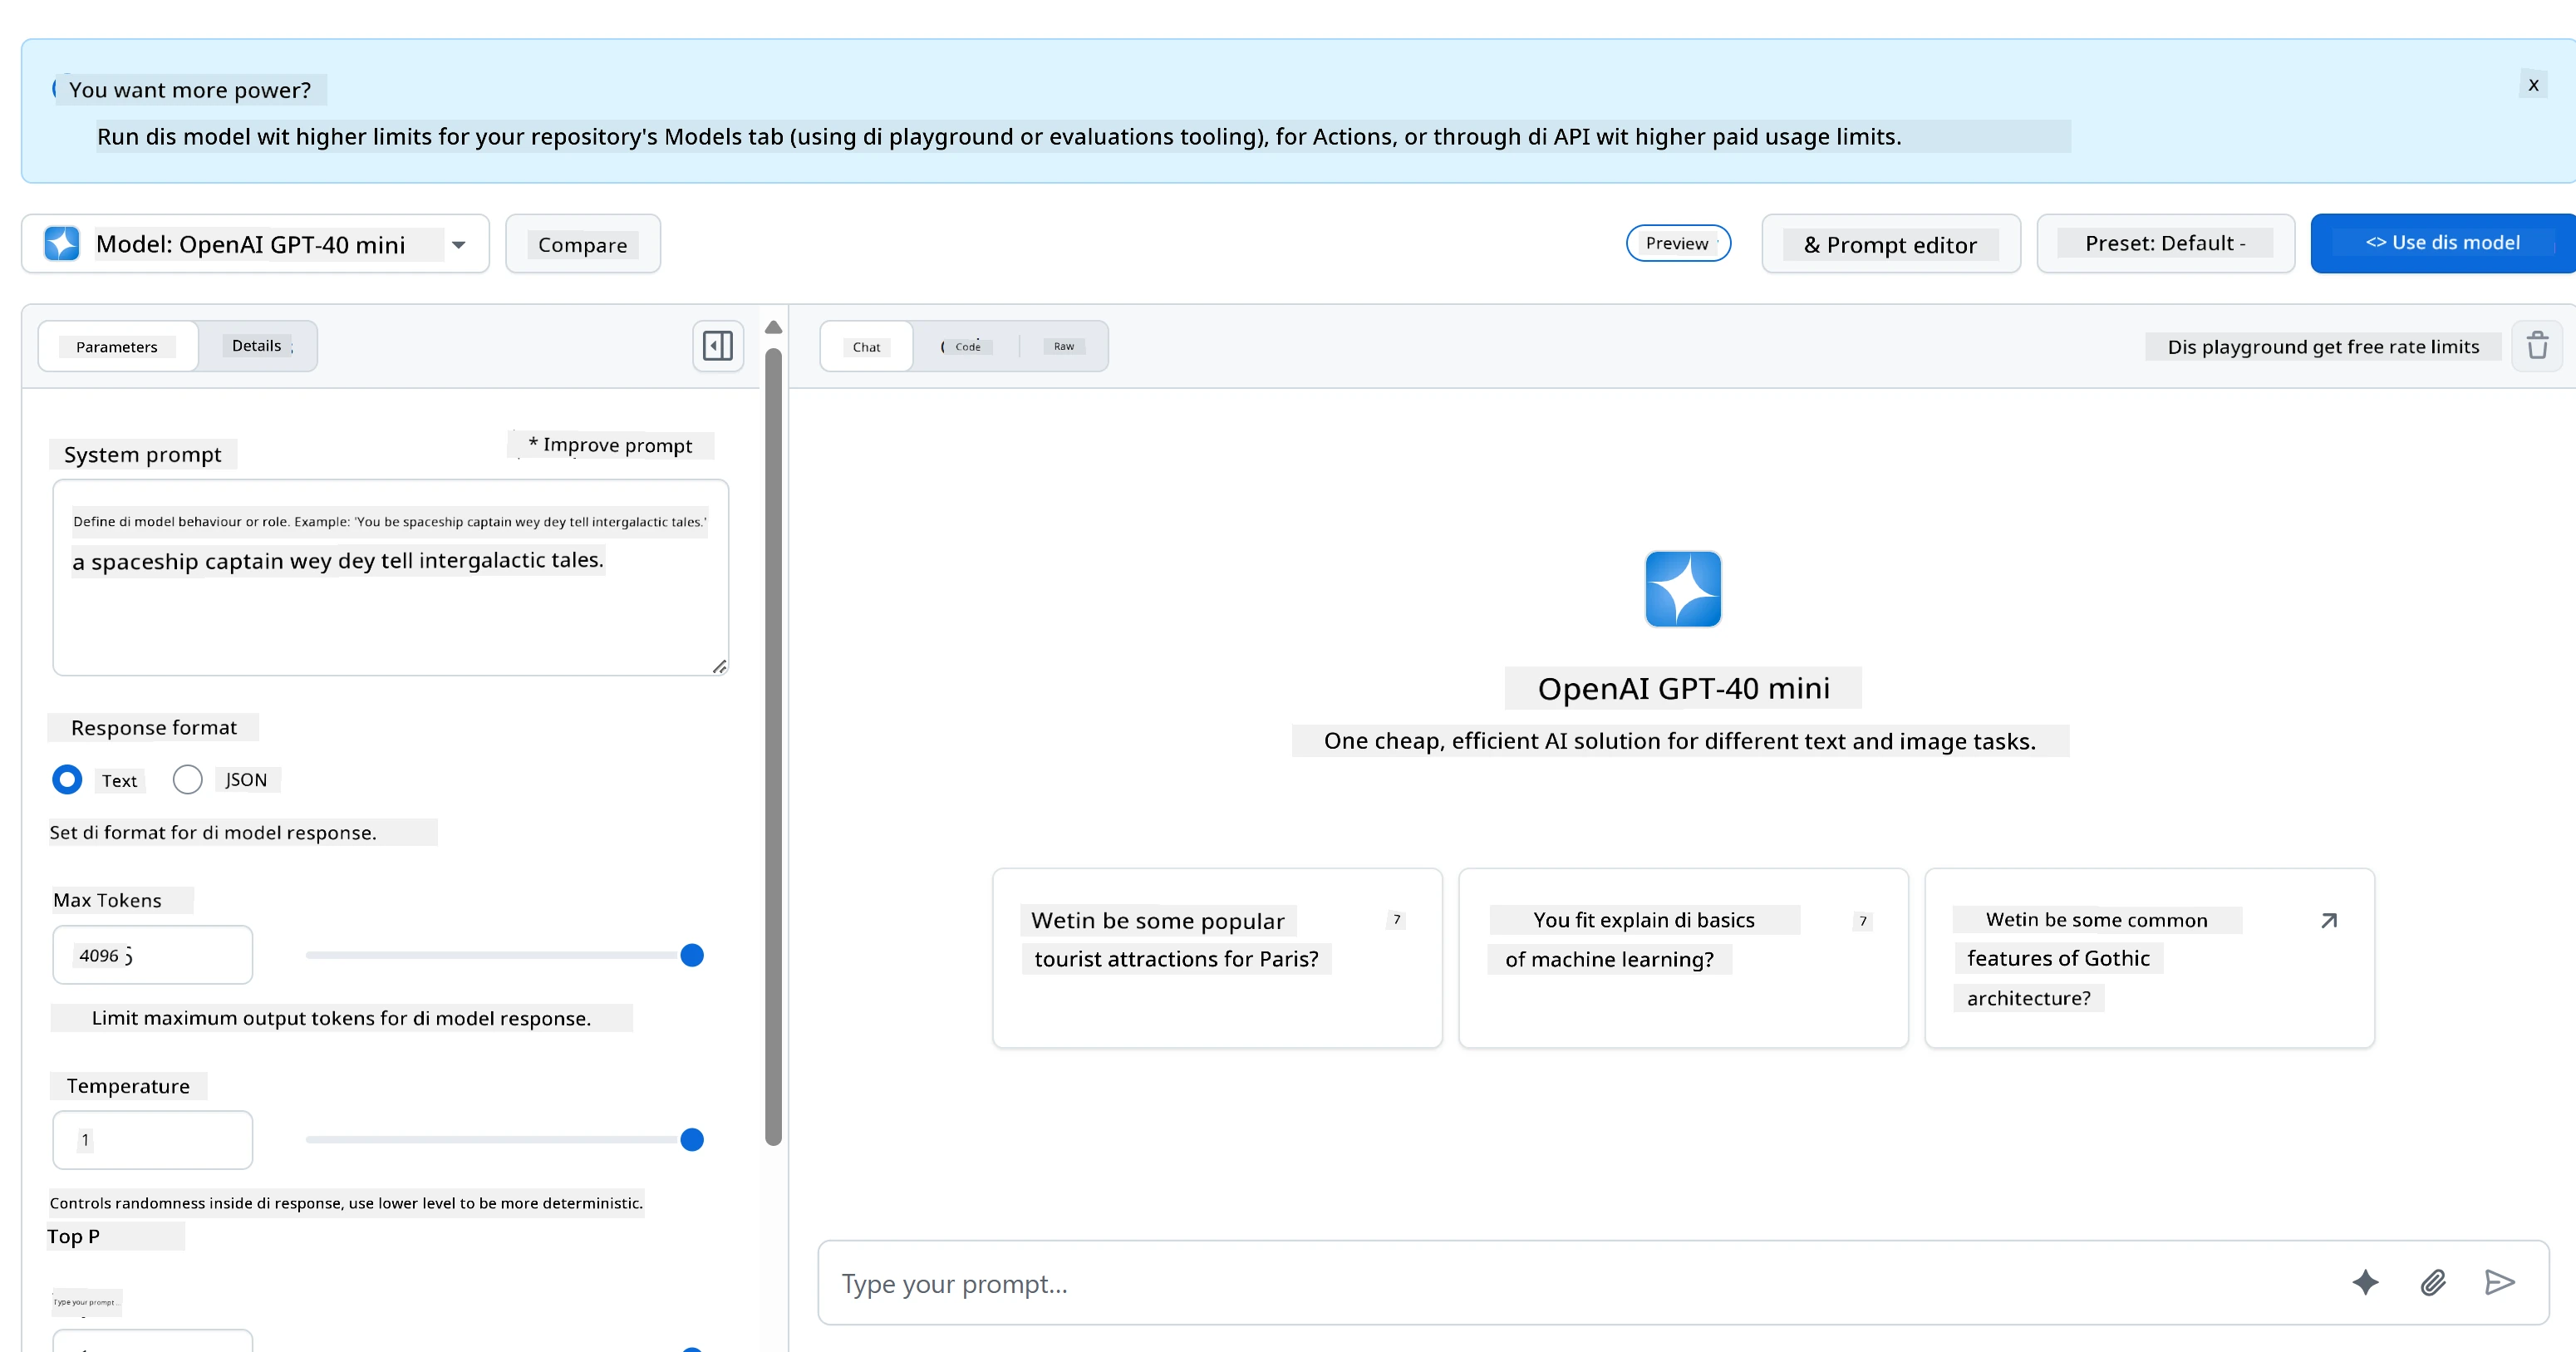
Na wetin make di playground dey so useful:
- Try out different AI models like GPT-4o-mini, Claude, an others (dem free!)
- Test your ideas an prompts before you write code
- Get ready-to-use code snippets for your preferred programming language
- Tweak settings like creativity level an response length to see how e fit change output
After you don play small, just click di "Code" tab an choose your programming language to get di code wey you need.

Setting Up the Python Backend Integration
Now make we implement AI integration using Python. Python perfect for AI apps because e get simple syntax an power libraries. We go start wit di code from GitHub Models playground then refactor am into reusable, production-ready function.
Understanding Di Base Implementation
When you grab di Python code from playground, e go look like dis. No worry if e look plenty for start – make we go through am step by step:
"""Run this model in Python

> pip install openai
"""
import os
from openai import OpenAI

# To fit authenticate wit di model, you go need make personal access token (PAT) for your GitHub settings.
# Make your PAT token by following di instructions wey dey here: https://docs.github.com/en/authentication/keeping-your-account-and-data-secure/managing-your-personal-access-tokens
client = OpenAI(
    base_url="https://models.github.ai/inference",
    api_key=os.environ["GITHUB_TOKEN"],
)

response = client.chat.completions.create(
    messages=[
        {
            "role": "system",
            "content": "",
        },
        {
            "role": "user",
            "content": "What is the capital of France?",
        }
    ],
    model="openai/gpt-4o-mini",
    temperature=1,
    max_tokens=4096,
    top_p=1
)

print(response.choices[0].message.content)
Wetin dey happen for dis code:
- We import di tools we need:
osto read environment variables anOpenAIto talk to AI - We set up OpenAI client to point GitHub AI servers instead of OpenAI direct
- We authenticate wit special GitHub token (more on dis later!)
- We structure conversation wit different "roles" – e be like setting stage for play
- We send our request to AI wit fine-tuning parameters
- We extract di actual response text from all di data wey come back
Understanding Message Roles: The AI Conversation Framework
AI conversations dey use specific structure wit different "roles" wey get special purposes:
messages=[
    {
        "role": "system",
        "content": "You are a helpful assistant who explains things simply."
    },
    {
        "role": "user",
        "content": "What is machine learning?"
    }
]
Think am like directing play:
- System role: Like stage directions for actor – e tell AI how e suppose behave, which personality to get, an how to respond
- User role: Na di actual question or message from person wey dey use your app
- Assistant role: Na AI response (you no send dis one, but e dey appear for conversation history)
Real-world example: Imagine you dey introduce friend for party:
- System message: "Dis na my friend Sarah, she be doctor wey sabi explain medical tins simply"
- User message: "How vaccines dey work?"
- Assistant response: Sarah go respond like friendly doctor, no be like lawyer or chef
Understanding AI Parameters: Fine-Tuning Response Behavior
Di number parameters for AI API calls dey control how AI model go generate responses. Dem settings fit adjust AI behavior for different use cases:
Temperature (0.0 to 2.0): The Creativity Dial
Wetin e dey do: Controls how creative or predictable AI response go be.
Think am like jazz musician improvisation level:
- Temperature = 0.1: Same melody every time (very predictable)
- Temperature = 0.7: Some nice variations but still balanced (balanced creativity)
- Temperature = 1.5: Full experimental jazz with unexpected things (very unpredictable)
# Plenti predictable ansa dem (beta for factual questions)
response = client.chat.completions.create(
    messages=[{"role": "user", "content": "What is 2+2?"}],
    temperature=0.1  # E go near always talk "4"
)

# Creative ansa dem (beta for brainstorming)
response = client.chat.completions.create(
    messages=[{"role": "user", "content": "Write a creative story opening"}],
    temperature=1.2  # E go create unique, unexpected tori dem
)
Max Tokens (1 to 4096+): The Response Length Controller
Wetin e dey do: Set limit on how long AI response fit be.
Think tokens as about like words (about 1 token = 0.75 words for English):
- max_tokens=50: Short an sweet (like text message)
- max_tokens=500: Small paragraph or two
- max_tokens=2000: Detailed explanation wit examples
# Short, quick answer dem
response = client.chat.completions.create(
    messages=[{"role": "user", "content": "Explain JavaScript"}],
    max_tokens=100  # Make pipo talk small small
)

# Full ground, detailed answer
response = client.chat.completions.create(
    messages=[{"role": "user", "content": "Explain JavaScript"}],
    max_tokens=1500  # Fit talk well, add example join am
)
Top_p (0.0 to 1.0): The Focus Parameter
Wetin e dey do: Controls how focused AI go stay on di most likely responses.
Picture say AI get big vocabulary ranked by how likely each word be:
- top_p=0.1: Only consider top 10% most likely words (very focused)
- top_p=0.9: Consider 90% possible words (more creative)
- top_p=1.0: Consider everything (maximum variety)
Example: If you ask "The sky is usually..."
- Low top_p: Almost sure na "blue" e go talk
- High top_p: Fit talk "blue", "cloudy", "vast", "changing", "beautiful", etc.
Putting It All Together: Parameter Combinations for Different Use Cases
# For true-true, steady answer dem (like one documentation bot)
factual_params = {
    "temperature": 0.2,
    "max_tokens": 300,
    "top_p": 0.3
}

# For kreatif raiting help
creative_params = {
    "temperature": 1.1,
    "max_tokens": 1000,
    "top_p": 0.9
}

# For yan yan, helpfull answer dem (balance)
conversational_params = {
    "temperature": 0.7,
    "max_tokens": 500,
    "top_p": 0.8
}
quadrantChart
    title AI Parameter Optimization Matrix
    x-axis Low Creativity --> High Creativity
    y-axis Short Response --> Long Response

    quadrant-1 Creative Content
    quadrant-2 Detailed Analysis
    quadrant-3 Quick Facts
    quadrant-4 Conversational AI

    Documentation Bot: [0.2, 0.3]
    Customer Service: [0.4, 0.4]
    General Assistant: [0.7, 0.5]
    Creative Writer: [0.9, 0.9]
    Brainstorming Tool: [0.8, 0.8]
Why dem parameters matter: Different apps need different type responses. Customer service bot suppose dey consistent an factual (low temperature), creative writing assistant go want imaginative an varied (high temperature). If you sabi these parameters, you fit control AI personality an response style.
**Here's what's happening in this code:**
- **We import** the tools we need: `os` for reading environment variables and `OpenAI` for talking to the AI
- **We set up** the OpenAI client to point to GitHub's AI servers instead of OpenAI directly
- **We authenticate** using a special GitHub token (more on that in a minute!)
- **We structure** our conversation with different "roles" – think of it like setting the scene for a play
- **We send** our request to the AI with some fine-tuning parameters
- **We extract** the actual response text from all the data that comes back

> 🔐 **Security Note**: Never hardcode API keys in your source code! Always use environment variables to store sensitive credentials like your `GITHUB_TOKEN`.

### Creating a Reusable AI Function

Let's refactor this code into a clean, reusable function that we can easily integrate into our web application:

```python
import asyncio
from openai import AsyncOpenAI

# Use AsyncOpenAI for better performance
client = AsyncOpenAI(
    base_url="https://models.github.ai/inference",
    api_key=os.environ["GITHUB_TOKEN"],
)

async def call_llm_async(prompt: str, system_message: str = "You are a helpful assistant."):
    """
    Sends a prompt to the AI model asynchronously and returns the response.

    Args:
        prompt: The user's question or message
        system_message: Instructions that define the AI's behavior and personality

    Returns:
        str: The AI's response to the prompt
    """
    try:
        response = await client.chat.completions.create(
            messages=[
                {
                    "role": "system",
                    "content": system_message,
                },
                {
                    "role": "user",
                    "content": prompt,
                }
            ],
            model="openai/gpt-4o-mini",
            temperature=1,
            max_tokens=4096,
            top_p=1
        )
        return response.choices[0].message.content
    except Exception as e:
        logger.error(f"AI API error: {str(e)}")
        return "I'm sorry, I'm having trouble processing your request right now."

# Backward compatibility function for synchronous calls
def call_llm(prompt: str, system_message: str = "You are a helpful assistant."):
    """Synchronous wrapper for async AI calls."""
    return asyncio.run(call_llm_async(prompt, system_message))
Understand dis improved function:
- Accepts two parameters: user prompt an optional system message
- Gives default system message for general assistant behavior
- Use proper Python type hints for better documentation
- Include detailed docstring wey explain function purpose an parameters
- Return only response content, make am easy to use for web API
- Maintain same model parameters for consistent AI behavior
Di Magic of System Prompts: Programming AI Personality
If parameters control how AI thinks, system prompts control who AI thinks e be. Dis na one of di coolest tins for AI – you dey give AI whole personality, expertise, an communication style.
Think system prompts like casting actors for different roles: Instead make you get one generic assistant, you fit create special experts for different situations. Need patient teacher? Creative brainstorming partner? No-nonsense business advisor? Just change system prompt!
Why System Prompts dey Powerful
Here na di interesting part: AI models don train on countless conversations wen people dey do different roles an expertise levels. When you give AI specific role, e be like you dey flip switch wey activate all those learned patterns.
E be like method acting for AI: tell actor "you be wise old professor" an observe how e adjust posture, vocabulary, an mannerisms. AI dey do something similar wit language patterns.
Crafting Effective System Prompts: The Art an Science
Anatomy of fine system prompt:
- Role/Identity: Who AI be?
- Expertise: Wetin e sabi?
- Communication style: How e dey talk?
- Specific instructions: Wetin e suppose focus on?
# ❌ Nobi clear system prompt
"You are helpful."

# ✅ Clear, correct system prompt wey work well well
"You are Dr. Sarah Chen, a senior software engineer with 15 years of experience at major tech companies. You explain programming concepts using real-world analogies and always provide practical examples. You're patient with beginners and enthusiastic about helping them understand complex topics."
System Prompt Examples with Context
Make we see how different system prompts fit create different AI personalities:
# Example 1: Di Patient Teacher
teacher_prompt = """
You are an experienced programming instructor who has taught thousands of students.
You break down complex concepts into simple steps, use analogies from everyday life,
and always check if the student understands before moving on. You're encouraging
and never make students feel bad for not knowing something.
"""

# Example 2: Di Creative Collaborator
creative_prompt = """
You are a creative writing partner who loves brainstorming wild ideas. You're
enthusiastic, imaginative, and always build on the user's ideas rather than
replacing them. You ask thought-provoking questions to spark creativity and
offer unexpected perspectives that make stories more interesting.
"""

# Example 3: Di Strategic Business Advisor
business_prompt = """
You are a strategic business consultant with an MBA and 20 years of experience
helping startups scale. You think in frameworks, provide structured advice,
and always consider both short-term tactics and long-term strategy. You ask
probing questions to understand the full business context before giving advice.
"""
Seeing System Prompts in Action
Make we test one question wit different system prompts to see di strong difference:
Question: "How do I handle user authentication in my web app?"
# Wit teacher prompt:
teacher_response = call_llm(
    "How do I handle user authentication in my web app?",
    teacher_prompt
)
# Typical response: "Great question! Make we break authentication down into simple steps.
# Think am like how nightclub bouncer dey check ID..."

# Wit business prompt:
business_response = call_llm(
    "How do I handle user authentication in my web app?",
    business_prompt
)
# Typical response: "From strategy side, authentication na important for user
# trust and regulatory compliance. Make I show framework wey consider security,
# user experience, and scalability..."
Advanced System Prompt Techniques
1. Context Setting: Give AI background information
system_prompt = """
You are helping a junior developer who just started their first job at a startup.
They know basic HTML/CSS/JavaScript but are new to backend development and databases.
Be encouraging and explain things step-by-step without being condescending.
"""
2. Output Formatting: Tell di AI how to structure di responses
system_prompt = """
You are a technical mentor. Always structure your responses as:
1. Quick Answer (1-2 sentences)
2. Detailed Explanation
3. Code Example
4. Common Pitfalls to Avoid
5. Next Steps for Learning
"""
3. Constraint Setting: Define wetin di AI no suppose do
system_prompt = """
You are a coding tutor focused on teaching best practices. Never write complete
solutions for the user - instead, guide them with hints and questions so they
learn by doing. Always explain the 'why' behind coding decisions.
"""
Why Dis Matter for Your Chat Assistant
Understanding system prompts dey give you strong power to create specialized AI assistants:
- Customer service bot: Helpful, patient, sabi policy well well
- Learning tutor: Encouraging, step-by-step, dey check if you understand
- Creative partner: Imaginative, dey build on ideas, dey ask "wetin if?"
- Technical expert: Precise, detail, dey careful for security
Di main point: You no just dey call AI API – you dey create custom AI personality wey go serve your special work. Na wetin dey make modern AI apps feel like dem tailor am and e dey useful, no be just generic.
🎯 Pedagogical Check-in: AI Personality Programming
Pause and Reflect: You don learn how to program AI personalities through system prompts. Na important skill for modern AI app development.
Quick Self-Assessment:
- You fit explain how system prompts different from normal user messages?
- Wetin be di difference between temperature and top_p parameters?
- How you go create system prompt for one specific use case (like coding tutor)?
Real-World Connection: Di system prompt skills you learn dey used for every major AI app – from GitHub Copilot wey dey help code to ChatGPT chat interface. You dey master di same way wey AI product teams for big tech companies dey use.
Challenge Question: How you go design different AI personalities for different user types (beginner vs expert)? Think how same AI model fit serve different people through prompt engineering.
Building di Web API with FastAPI: Your High-Performance AI Communication Hub
Now mek we build di backend wey go connect your frontend to AI services. We go use FastAPI, modern Python framework wey dey excel for building API for AI apps.
FastAPI get plenty advantage for dis kain project: e get async support to handle many requests at once, e dey generate API docs automatically, and e fast well well. Your FastAPI server dey act as middle man wey dey receive request from frontend, dey talk to AI services, then dey give back well-formatted response.
Why FastAPI for AI Applications?
You fit dey wonder: "I no fit just call AI direct from my frontend JavaScript?" or "Why FastAPI no be Flask or Django?" Correct questions!
Na why FastAPI perfect for wetin we dey build:
- Async by default: Fit handle many AI requests at once without delay
- Automatic docs: Just open
/docsto get sharp, interactive API documentation page no extra cost - Built-in validation: E dey catch errors before wahala come
- Lightning fast: One of di fastest Python frameworks
- Modern Python: E use all di latest Python features
And why we need backend at all:
Security: Your AI API key be like password – if you put am for frontend JavaScript, anybody wey see your website source code fit take am and use your AI credits. Backend dey keep your secret safe.
Rate Limiting & Control: Backend fit control how many requests user fit make, add user authentication, and log usage.
Data Processing: You fit wan save conversations, filter bad content, or join multiple AI services. Backend na place for dis kind logic.
Architecture look like client-server model:
- Frontend: User interface layer for interaction
- Backend API: Request processing and routing layer
- AI Service: External computation and response generation
- Environment Variables: Secure configuration and secret storage
Understanding di Request-Response Flow
Mek we follow wetin happen when user send message:
sequenceDiagram
    participant User as 👤 User
    participant Frontend as 🌐 Frontend
    participant API as 🔧 FastAPI Server
    participant AI as 🤖 AI Service

    User->>Frontend: Types "Hello AI!"
    Frontend->>API: POST /hello {"message": "Hello AI!"}
    Note over API: Validates request<br/>Adds system prompt
    API->>AI: Sends formatted request
    AI->>API: Returns AI response
    Note over API: Processes response<br/>Logs conversation
    API->>Frontend: {"response": "Hello! How can I help?"}
    Frontend->>User: Displays AI message
Understand each step:
- User interaction: Person dey type for chat interface
- Frontend processing: JavaScript go collect the input, format am as JSON
- API validation: FastAPI go check if request correct using Pydantic models
- AI integration: Backend go add context (system prompt) then call AI service
- Response handling: API go receive AI response and fit change am if need be
- Frontend display: JavaScript go show di response for chat interface
Understanding API Architecture
sequenceDiagram
    participant Frontend
    participant FastAPI
    participant AI Function
    participant GitHub Models

    Frontend->>FastAPI: POST /hello {"message": "Hello AI!"}
    FastAPI->>AI Function: call_llm(message, system_prompt)
    AI Function->>GitHub Models: API request
    GitHub Models->>AI Function: AI response
    AI Function->>FastAPI: response text
    FastAPI->>Frontend: {"response": "Hello! How I fit help?"}
flowchart TD
    A[User Input] --> B[Frontend Validation]
    B --> C[HTTP POST Request]
    C --> D[FastAPI Router]
    D --> E[Pydantic Validation]
    E --> F[AI Function Call]
    F --> G[GitHub Models API]
    G --> H[Response Processing]
    H --> I[JSON Response]
    I --> J[Frontend Update]

    subgraph "Security Layer"
        K[CORS Middleware]
        L[Environment Variables]
        M[Error Handling]
    end

    D --> K
    F --> L
    H --> M
Creating di FastAPI Application
Make we build API step by step. Create file wey name api.py with this FastAPI code:
# api.py
from fastapi import FastAPI, HTTPException
from fastapi.middleware.cors import CORSMiddleware
from pydantic import BaseModel
from llm import call_llm
import logging

# Set up logging
logging.basicConfig(level=logging.INFO)
logger = logging.getLogger(__name__)

# Make FastAPI app
app = FastAPI(
    title="AI Chat API",
    description="A high-performance API for AI-powered chat applications",
    version="1.0.0"
)

# Set up CORS
app.add_middleware(
    CORSMiddleware,
    allow_origins=["*"],  # Set am well for production
    allow_credentials=True,
    allow_methods=["*"],
    allow_headers=["*"],
)

# Pydantic models wey dey check request/response correct
class ChatMessage(BaseModel):
    message: str

class ChatResponse(BaseModel):
    response: str

@app.get("/")
async def root():
    """Root endpoint providing API information."""
    return {
        "message": "Welcome to the AI Chat API",
        "docs": "/docs",
        "health": "/health"
    }

@app.get("/health")
async def health_check():
    """Health check endpoint."""
    return {"status": "healthy", "service": "ai-chat-api"}

@app.post("/hello", response_model=ChatResponse)
async def chat_endpoint(chat_message: ChatMessage):
    """Main chat endpoint that processes messages and returns AI responses."""
    try:
        # Comot and check message
        message = chat_message.message.strip()
        if not message:
            raise HTTPException(status_code=400, detail="Message cannot be empty")

        logger.info(f"Processing message: {message[:50]}...")

        # Call AI service (note: call_llm suppose be async for better performance)
        ai_response = await call_llm_async(message, "You are a helpful and friendly assistant.")

        logger.info("AI response generated successfully")
        return ChatResponse(response=ai_response)

    except HTTPException:
        raise
    except Exception as e:
        logger.error(f"Error processing chat message: {str(e)}")
        raise HTTPException(status_code=500, detail="Internal server error")

if __name__ == "__main__":
    import uvicorn
    uvicorn.run(app, host="0.0.0.0", port=5000, reload=True)
Understanding di FastAPI code:
- Imports FastAPI for modern web framework function and Pydantic for data validation
- Creates automatic API documentation (available at
/docswhen server run) - Enables CORS middleware to allow frontend requests from different places
- Defines Pydantic models for automatic request/response validation and docs
- Uses async endpoints for better speed handling many requests at once
- Implements proper HTTP status codes and error handling with HTTPException
- Includes structured logging for monitoring and debugging
- Provides health check endpoint to monitor service status
Key FastAPI advantages over old frameworks:
- Automatic validation: Pydantic models make sure data correct before process
- Interactive docs: Visit
/docsfor auto-generated, testable API docs - Type safety: Python type hints prevent runtime errors and improve code quality
- Async support: Fit handle many AI requests at the same time without delay
- Performance: Fast well well for real-time apps
Understanding CORS: Web Security Guard
CORS (Cross-Origin Resource Sharing) be like security guard for building wey check if visitors fit enter. Mek we understand why e matter and how e affect your app.
Wetin CORS be and Why E Dey?
Di problem: Imagine if any website fit do request to your bank website on your behalf without permission. E go be big security wahala! Browsers dey stop dis by default with "Same-Origin Policy."
Same-Origin Policy: Browsers only allow web page to send request to same domain, port and protocol wey e load from.
Real-life example: Na like apartment security – only residents (same origin) fit enter building. If you wan allow friend (different origin) enter, you gots tell security say e okay.
CORS for Your Development Environment
For development, your frontend and backend dey run for different ports:
- Frontend:
http://localhost:3000(or file:// if you open HTML direct) - Backend:
http://localhost:5000
Even if dem dey same computer, browsers go treat dem as "different origins"!
from fastapi.middleware.cors import CORSMiddleware

app = FastAPI(__name__)
CORS(app)   # Dis dey tell browser dem: "E no wahala for oda place wey no be here to make request go dis API"
Wetind CORS configuration do for real:
- Adds special HTTP headers to API responses wey dey tell browser "this cross-origin request dey allowed"
- Handles "preflight" requests (browser check permissions before sending real request)
- Stops "blocked by CORS policy" error for browser console
CORS Security: Development vs Production
# 🚨 Development: E dey allow ALL origins (e easy but e no too safe)
CORS(app)

# ✅ Production: Na only your own frontend domain e go allow
CORS(app, origins=["https://yourdomain.com", "https://www.yourdomain.com"])

# 🔒 Advanced: Different origins for different environment dem
if app.debug:  # Development mode
    CORS(app, origins=["http://localhost:3000", "http://127.0.0.1:3000"])
else:  # Production mode
    CORS(app, origins=["https://yourdomain.com"])
Why e matter: For development, CORS(app) na like you leave front door unlocked – e easy but no secure. For production, you go specify which websites fit talk to your API.
Common CORS Wahala and Solutions
| Scenario | Wahala | Solution |
|---|---|---|
| Local Development | Frontend no fit reach backend | Add CORSMiddleware to FastAPI |
| GitHub Pages + Heroku | Deployed frontend no fit reach API | Add your GitHub Pages URL to CORS origins |
| Custom Domain | CORS errors for production | Update CORS origins to your domain |
| Mobile App | App no fit reach web API | Add your app domain or use * carefully |
Pro tip: You fit check CORS headers for browser Developer Tools under Network tab. Look for headers like Access-Control-Allow-Origin inside responses.
Error Handling and Validation
Notice how our API get proper error handling:
# Make sure say we don get message
if not message:
    return jsonify({"error": "Message field is required"}), 400
Key validation principles:
- Checks for required fields before processing requests
- Returns meaningful error messages as JSON
- Uses correct HTTP status codes (400 for bad request)
- Gives clear feedback to help frontend developers do debugging
Setting Up and Running Your Backend
Now we get AI integration and FastAPI server ready, make we start everything. Setup go involve installing Python dependencies, environment variables config, and running your dev server.
Python Environment Setup
Make we set up your Python development environment. Virtual environments like di Manhattan Project plan – every project get im own isolated space with tools and dependencies to stop conflict between projects.
# Comot go your backend directory
cd backend

# Make virtual environment (like make clean room for your project)
python -m venv venv

# Turn am on (Linux/Mac)
source ./venv/bin/activate

# For Windows, use:
# venv\Scripts\activate

# Install correct tin dem
pip install openai fastapi uvicorn python-dotenv
Wetin we just do:
- Create our own small Python bubble where we fit install packages without affect others
- Activate am so our terminal go sabi say na this environment to use
- Install the important ones: OpenAI for AI magic, FastAPI for web API, Uvicorn to run am, and python-dotenv for secret management
Key dependencies meaning:
- FastAPI: Modern, fast web framework with automatic docs
- Uvicorn: Lightning-fast ASGI server for FastAPI apps
- OpenAI: Official library for GitHub Models and OpenAI API
- python-dotenv: Secure env var loading from .env files
Environment Configuration: Keep Secrets Safe
Before we start API, make we talk one important lesson for web dev: how to keep your secrets really secret. Environment variables like secure vault wey only your app fit open.
Wetin be Environment Variables?
Think environment variables like safety deposit box – you put your important things there, and only you (and your app) get key to open. Instead to write secret info directly for code (wey anybody fit see), you put am for environment.
Difference be say:
- Wrong way: You write password for sticky note put for your monitor
- Right way: You keep password for secure password manager wey only you fit use
Why Environment Variables Important
# 🚨 NO DEY DO DIS - API key dey show for everywhere
client = OpenAI(
    api_key="ghp_1234567890abcdef...",  # Anybody fit comot am!
    base_url="https://models.github.ai/inference"
)

# ✅ DEY DO DIS - API key store well well
client = OpenAI(
    api_key=os.environ["GITHUB_TOKEN"],  # Na only your app fit access am
    base_url="https://models.github.ai/inference"
)
Wetin happen if you hardcode secrets:
- Version control exposure: Anybody wey get access to your Git repo fit see your API key
- Public repos: If you push to GitHub, your key dey visible to whole internet
- Team sharing: Other developers fit see your personal API key
- Security breach: If person thief your API key, dem fit use your AI credits
Setting Up Your Environment File
Create .env file for your backend folder. This file dey hold your secrets locally:
# .env file - Dis one no suppose eber put for Git
GITHUB_TOKEN=your_github_personal_access_token_here
FASTAPI_DEBUG=True
ENVIRONMENT=development
Understanding .env file:
- One secret per line in
KEY=valueformat - No spaces around equal sign
- No quotes needed for values (usually)
- Comments start with
#
Making Your GitHub Personal Access Token
Your GitHub token na special password wey give app permission to use GitHub AI services:
Step-by-step token creation:
- Go GitHub Settings → Developer settings → Personal access tokens → Tokens (classic)
- Click "Generate new token (classic)"
- Set expiration (30 days for test, longer for production)
- Select scopes: Check "repo" and other permissions you need
- Generate token and copy am quick (you no fit see am again!)
- Paste am inside your .env file
# Example of wetin your token go look like (dis one fake!)
GITHUB_TOKEN=ghp_1A2B3C4D5E6F7G8H9I0J1K2L3M4N5O6P7Q8R
Loading Environment Variables in Python
import os
from dotenv import load_dotenv

# Load environment variables from .env file
load_dotenv()

# Now you fit access dem safe safe
api_key = os.environ.get("GITHUB_TOKEN")
if not api_key:
    raise ValueError("GITHUB_TOKEN not found in environment variables!")

client = OpenAI(
    api_key=api_key,
    base_url="https://models.github.ai/inference"
)
Wetin dis code dey do:
- Load your .env file make variables available to Python
- Check if token dey (good error handling!)
- Raise clear error if token no dey
- Use token safely without show am for code
Git Security: The .gitignore File
Your .gitignore tells Git which files to never track or upload:
# .gitignore - Add dis kin lines
.env
*.env
.env.local
.env.production
__pycache__/
venv/
.vscode/
Why this important: If you add .env to .gitignore, Git no go upload your secret env file to GitHub by mistake.
Different Environments, Different Secrets
Professional apps use different API keys for different environments:
# .env.development
GITHUB_TOKEN=your_development_token
DEBUG=True

# .env.production
GITHUB_TOKEN=your_production_token
DEBUG=False
Why e important: You no want your development tests to affect your production AI quota, and you want different security level for different environment.
Starting Your Development Server: Bring Your FastAPI to Life
Now na di kain beta moment – wen you start your FastAPI development server and see how your AI integration dey work! FastAPI dey use Uvicorn, wey na fast-fast ASGI server specially made for async Python applications.
Understanding di FastAPI Server Startup Process
# Method 1: Direct Python run (e get auto-reload)
python api.py

# Method 2: Use Uvicorn direct (you get more control)
uvicorn api:app --host 0.0.0.0 --port 5000 --reload
When you run dis command, na wetin dey happen behind di scenes be dis:
1. Python dey load your FastAPI application:
- E import all di libraries wey e need (FastAPI, Pydantic, OpenAI, etc.)
- E carry environment variables from your
.envfile - E create di FastAPI application instance with automatic documentation
2. Uvicorn dey configure di ASGI server:
- E bind for port 5000 with async request handling powers
- E set up request routing with automatic validation
- E enable hot reload for development (e restart when you change file)
- E generate interactive API documentation
3. Server begin listen:
- Your terminal go show:
INFO: Uvicorn running on http://0.0.0.0:5000 - Di server fit handle many AI requests at di same time
- Your API don ready with automatic docs for
http://localhost:5000/docs
Wetin You Go See When Everything Dey Work
$ python api.py
INFO:     Will watch for changes in these directories: ['/your/project/path']
INFO:     Uvicorn running on http://0.0.0.0:5000 (Press CTRL+C to quit)
INFO:     Started reloader process [12345] using WatchFiles
INFO:     Started server process [12346]
INFO:     Waiting for application startup.
INFO:     Application startup complete.
Understanding di FastAPI output:
- Go dey watch for changes: Auto-reload dey enabled for development
- Uvicorn dey run: High-performance ASGI server dey active
- Reloader process don start: File watcher dey do automatic restarts
- Application startup don complete: FastAPI app don initialize well
- Interactive docs dey available: Visit
/docsfor automatic API documentation
Testing Your FastAPI: Multiple Powerful Ways
FastAPI get many convenient ways to test your API, including automatic interactive documentation:
Method 1: Interactive API Documentation (Recommended)
- Open your browser go
http://localhost:5000/docs - You go see Swagger UI with all your endpoints documented
- Click on
/hello→ "Try it out" → Put test message → "Execute" - See di response straight for browser with proper format
Method 2: Basic Browser Test
- Go to
http://localhost:5000for root endpoint - Go
http://localhost:5000/healthmake you check server health - This one go confirm say your FastAPI server dey run well
Method 2: Command Line Test (Advanced)
# Test wit curl (if e dey)
curl -X POST http://localhost:5000/hello \
  -H "Content-Type: application/json" \
  -d '{"message": "Hello AI!"}'

# Wetin we expect as answer:
# {"response": "Hello! I be your AI assistant. How I fit help you today?"}
Method 3: Python Test Script
# test_api.py - Make dis file to test your API
import requests
import json

# Test di API endpoint
url = "http://localhost:5000/hello"
data = {"message": "Tell me a joke about programming"}

response = requests.post(url, json=data)
if response.status_code == 200:
    result = response.json()
    print("AI Response:", result['response'])
else:
    print("Error:", response.status_code, response.text)
Troubleshooting Common Startup Issues
| Error Message | Wetin E Mean | How to Fix |
|---|---|---|
ModuleNotFoundError: No module named 'fastapi' |
FastAPI never install | Run pip install fastapi uvicorn for your virtual environment |
ModuleNotFoundError: No module named 'uvicorn' |
ASGI server never install | Run pip install uvicorn for your virtual environment |
KeyError: 'GITHUB_TOKEN' |
Environment variable no dey | Check your .env file and load_dotenv() call |
Address already in use |
Port 5000 don dey busy | Kill other processes wey dey use port 5000 or change di port |
ValidationError |
Request data no match Pydantic model | Check your request format to make e fit di expected schema |
HTTPException 422 |
Unprocessable entity | Request validation fail, check /docs for correct format |
OpenAI API error |
AI service authentication fail | Confirm your GitHub token correct and get proper permissions |
Development Best Practices
Hot Reloading: FastAPI with Uvicorn dey do automatic reload anytime you save change for your Python files. Dis mean say you fit change code and test am sharp sharp without restarting manually.
# Make hot reloading work for sure
if __name__ == "__main__":
    app.run(host="0.0.0.0", port=5000, debug=True)  # debug=True dey enable hot reload
Logging for Development: Add logging so that you fit sabi wetin dey happen:
import logging

# Make we set logging up
logging.basicConfig(level=logging.INFO)
logger = logging.getLogger(__name__)

@app.route("/hello", methods=["POST"])
def hello():
    data = request.get_json()
    message = data.get("message", "")

    logger.info(f"Received message: {message}")

    if not message:
        logger.warning("Empty message received")
        return jsonify({"error": "Message field is required"}), 400

    try:
        response = call_llm(message, "You are a helpful and friendly assistant.")
        logger.info(f"AI response generated successfully")
        return jsonify({"response": response})
    except Exception as e:
        logger.error(f"AI API error: {str(e)}")
        return jsonify({"error": "AI service temporarily unavailable"}), 500
Why logging dey help: During development, you fit see exactly which requests dey come, how AI dey respond, and where errors dey. Dis one dey make debugging faster.
Configuring for GitHub Codespaces: Cloud Development Made Easy
GitHub Codespaces be like say you get powerful development computer for cloud wey you fit access from any browser. If you dey work for Codespaces, you need small extra steps to make backend dey accessible to frontend.
Understanding Codespaces Networking
For local development environment, everything dey run for the same computer:
- Backend:
http://localhost:5000 - Frontend:
http://localhost:3000(or file://)
For Codespaces, your development environment dey run on GitHub servers, so "localhost" get different meaning. GitHub dey create public URLs automatically for your services, but you need configure them well.
Step-by-Step Codespaces Configuration
1. Start your backend server:
cd backend
python api.py
You go see familiar FastAPI/Uvicorn startup message but e dey run inside Codespace environment.
2. Configure port visibility:
- Find "Ports" tab for the bottom panel of VS Code
- Locate port 5000 for the list
- Right-click on port 5000
- Choose "Port Visibility" → "Public"
Why make am public? By default, Codespace ports be private (only you fit access). Making am public allow your frontend (wey dey run for browser) to talk to your backend.
3. Get your public URL: After you make port public, you go see URL like:
https://your-codespace-name-5000.app.github.dev
4. Update your frontend configuration:
// For your frontend app.js, change the BASE_URL:
this.BASE_URL = "https://your-codespace-name-5000.app.github.dev";
Understanding Codespace URLs
Codespace URLs dey follow pattern:
https://[codespace-name]-[port].app.github.dev
Break am down:
codespace-name: Unique identifier for your Codespace (normally e carry your username)port: Di port number wey your service dey run on (5000 for our FastAPI app)app.github.dev: GitHub domain for Codespace apps
Testing Your Codespace Setup
1. Test the backend direct: Open your public URL for new browser tab. You suppose see:
Welcome to the AI Chat API. Send POST requests to /hello with JSON payload containing 'message' field.
2. Test with browser developer tools:
// Open browser console and try ur API out
fetch('https://your-codespace-name-5000.app.github.dev/hello', {
  method: 'POST',
  headers: {'Content-Type': 'application/json'},
  body: JSON.stringify({message: 'Hello from Codespaces!'})
})
.then(response => response.json())
.then(data => console.log(data));
Codespaces vs Local Development
| Aspect | Local Development | GitHub Codespaces |
|---|---|---|
| Setup Time | Long (install Python, dependencies) | Instant (pre-configured environment) |
| URL Access | http://localhost:5000 |
https://xyz-5000.app.github.dev |
| Port Configuration | Automatic | Manual (make ports public) |
| File Persistence | Local machine | GitHub repository |
| Collaboration | Hard to share environment | Easy to share Codespace link |
| Internet Dependency | Only for AI API calls | Needed for everything |
Codespace Development Tips
Environment Variables in Codespaces:
Your .env file dey work same way for Codespaces, but you fit also set environment variables direct inside Codespace:
# Set environment variable for dis session we dey run now
export GITHUB_TOKEN="your_token_here"

# Or put am for your .bashrc make e remain dey permanent
echo 'export GITHUB_TOKEN="your_token_here"' >> ~/.bashrc
Port Management:
- Codespaces dey auto-detect anytime your app start to listen on port
- You fit forward many ports at once (useful if you add database later)
- Ports dey accessible as long as your Codespace dey run
Development Workflow:
- Change code inside VS Code
- FastAPI auto-reloads (thanks to Uvicorn reload mode)
- Test changes quick quick through the public URL
- Commit and push when you ready
💡 Pro Tip: Bookmark your Codespace backend URL during development. Since one Codespace name dey steady, your URL no go change as long as you dey use the same Codespace.
Creating the Frontend Chat Interface: Where Humans Meet AI
Now we go build di user interface – di part wey dey determine how people go interact with your AI assistant. Like how dem design di original iPhone interface, we dey focus on how to make complex technology feel natural and easy to use.
Understanding Modern Frontend Architecture
Our chat interface na wetin we dey call "Single Page Application" or SPA. Instead of old style wey every click dey load new page, our app dey update smooth and instant:
Old websites: Like say you dey read physical book – you go flip to new pages Our chat app: Like using your phone – everything dey flow and update without yawa
graph TD
    A[User Types Message] --> B[JavaScript Captures Input]
    B --> C[Validate & Format Data]
    C --> D[Send to Backend API]
    D --> E[Display Loading State]
    E --> F[Receive AI Response]
    F --> G[Update Chat Interface]
    G --> H[Ready for Next Message]
classDiagram
    class ChatApp {
        +messages: HTMLElement
        +form: HTMLElement
        +input: HTMLElement
        +sendButton: HTMLElement
        +BASE_URL: string
        +API_ENDPOINT: string

        +constructor()
        +initializeEventListeners()
        +handleSubmit(event)
        +callAPI(message)
        +appendMessage(text, role)
        +escapeHtml(text)
        +scrollToBottom()
        +setLoading(isLoading)
    }

    ChatApp --> DOM : dey manipulate
    ChatApp --> FastAPI : dey send request
The Three Pillars of Frontend Development
Every frontend app – from simple websites to complex apps like Discord or Slack – dey built on three core technologies. Think am as the foundation of everything wey you dey see and interact within web:
HTML (Structure): Na di foundation
- Decides which elements dey (buttons, text areas, containers)
- Gives meaning to content (this one na header, dis na form, etc.)
- Creates di basic structure wey everything else go build on top
CSS (Presentation): Na your interior designer
- Makes everything fine fine (colors, fonts, layouts)
- Handle different screen sizes (phone vs laptop vs tablet)
- Creates smooth animations and visual feedback
JavaScript (Behavior): Na your brain
- Respond to wetin users dey do (clicks, typing, scrolling)
- Talk to your backend and dey update di page
- Make everything interactive and dynamic
Think am like architectural design:
- HTML: Di structural blueprint (defining spaces and relationships)
- CSS: Di aesthetic and environmental design (visual style and user experience)
- JavaScript: Di mechanical systems (function and interactivity)
Why Modern JavaScript Architecture Matter
Our chat app go use modern JavaScript patterns wey you go see for professional apps. If you understand these concepts, e go help you grow as developer:
Class-Based Architecture: We go organize code inside classes, like we dey create blueprint for objects Async/Await: Modern way to handle things wey take time (like API calls) Event-Driven Programming: Our app go respond to user actions (clicks, key press) instead of running loop DOM Manipulation: Dynamically update webpage content based on user interaction and API response
Project Structure Setup
Create frontend directory wey get organized structure like dis:
frontend/
├── index.html      # Main HTML structure
├── app.js          # JavaScript functionality
└── styles.css      # Visual styling
Understanding di architecture:
- Separate concerns between structure (HTML), behavior (JavaScript), and presentation (CSS)
- Maintain simple file structure wey easy to navigate and modify
- Follow web development best practice for organization and maintainability
Building di HTML Foundation: Semantic Structure for Accessibility
Make we start with HTML structure. Modern web development dey emphasize "semantic HTML" – wey mean to use HTML elements wey clear about wetin dem mean, not only how dem look. Dis one dey make your app accessible to screen readers, search engines, and other tools.
Why semantic HTML matter: Imagine sey you dey describe your chat app to person over phone. You go talk say "e get header with title, main area wey conversations dey, and form for bottom to type message." Semantic HTML dey use elements wey match this natural description.
Create index.html with this well-thought markup:
<!DOCTYPE html>
<html lang="en">
<head>
    <meta charset="UTF-8">
    <meta name="viewport" content="width=device-width, initial-scale=1.0">
    <title>AI Chat Assistant</title>
    <link rel="stylesheet" href="styles.css">
</head>
<body>
    <div class="chat-container">
        <header class="chat-header">
            <h1>AI Chat Assistant</h1>
            <p>Ask me anything!</p>
        </header>

        <main class="chat-messages" id="messages" role="log" aria-live="polite">
            <!-- Messages will be dynamically added here -->
        </main>

        <form class="chat-form" id="chatForm">
            <div class="input-group">
                <input
                    type="text"
                    id="messageInput"
                    placeholder="Type your message here..."
                    required
                    aria-label="Chat message input"
                >
                <button type="submit" id="sendBtn" aria-label="Send message">
                    Send
                </button>
            </div>
        </form>
    </div>
    <script src="app.js"></script>
</body>
</html>
Understanding every HTML element and wetin e mean:
Document Structure
<!DOCTYPE html>: Tells browser say na modern HTML5 you dey use<html lang="en">: Specify page language for screen readers and translation tools<meta charset="UTF-8">: Make sure character encoding correct for international text<meta name="viewport"...>: Make page mobile-responsive by controlling zoom and scale
Semantic Elements
<header>: Clear top section with title and description<main>: Primary content area (where conversations happen)<form>: Semantically correct for user input, help proper keyboard navigation
Accessibility Features
role="log": Tell screen readers say this area get chronological log of messagesaria-live="polite": Tell new messages go announce to screen readers without interruptionaria-label: Provide descriptive labels for form controlsrequired: Browser go check say users put message before sending
CSS and JavaScript Integration
classattributes: Provide styling hooks for CSS (likechat-container,input-group)idattributes: Allow JavaScript to find and manipulate particular elements- Script placement: JavaScript file dey load at end so HTML go load first
Why dis structure work:
- Logical flow: Header → Main content → Input form dey follow natural reading order
- Keyboard accessible: Users fit tab through all interactive elements
- Screen reader friendly: Clear landmarks and descriptions for visually impaired users
- Mobile responsive: Viewport meta tag give responsive design
- Progressive enhancement: E go still work even if CSS or JavaScript fail to load
Adding Interactive JavaScript: Modern Web Application Logic
Now make we build di JavaScript weh go bring our chat interface come alive. We go use modern JavaScript patterns weh you go see for professional web development, including ES6 classes, async/await, and event-driven programming.
Understanding Modern JavaScript Architecture
Instead of to dey write procedural code (series of functions weh dey run one after di oda), we go create class-based architecture. Think of class as blueprint for to create objects – like how architect blueprint fit take build many houses.
Why dem dey use classes for web applications?
- Organization: All di related functionality dem dey put together
- Reusability: You fit create many chat instances for di same page
- Maintainability: E go easy to debug and modify specific features
- Professional standard: Dis kain pattern dey used for frameworks like React, Vue, and Angular
Create app.js with dis modern, well-structured JavaScript:
// app.js - Modern chat app logik

class ChatApp {
    constructor() {
        // Get di DOM tins we go need fo manipulate
        this.messages = document.getElementById("messages");
        this.form = document.getElementById("chatForm");
        this.input = document.getElementById("messageInput");
        this.sendButton = document.getElementById("sendBtn");

        // Set your backend URL na here
        this.BASE_URL = "http://localhost:5000"; // Change dis one for your environment
        this.API_ENDPOINT = `${this.BASE_URL}/hello`;

        // Arrange event listeners wen di chat app don create
        this.initializeEventListeners();
    }

    initializeEventListeners() {
        // Listen for form submit (wen user click Send or press Enter)
        this.form.addEventListener("submit", (e) => this.handleSubmit(e));

        // Also listen for Enter key for di input field (better UX)
        this.input.addEventListener("keypress", (e) => {
            if (e.key === "Enter" && !e.shiftKey) {
                e.preventDefault();
                this.handleSubmit(e);
            }
        });
    }

    async handleSubmit(event) {
        event.preventDefault(); // Stop form from make di page refresh

        const messageText = this.input.value.trim();
        if (!messageText) return; // No send empty message

        // Show user say sometin dey happen
        this.setLoading(true);

        // Add user message to chat sharp sharp (optimistic UI)
        this.appendMessage(messageText, "user");

        // Clear input field so user fit type next message
        this.input.value = '';

        try {
            // Call AI API and wait for reply
            const reply = await this.callAPI(messageText);

            // Add AI reply to chat
            this.appendMessage(reply, "assistant");
        } catch (error) {
            console.error('API Error:', error);
            this.appendMessage("Sorry, I'm having trouble connecting right now. Please try again.", "error");
        } finally {
            // Make di interface work again no matter success or failure
            this.setLoading(false);
        }
    }

    async callAPI(message) {
        const response = await fetch(this.API_ENDPOINT, {
            method: "POST",
            headers: {
                "Content-Type": "application/json"
            },
            body: JSON.stringify({ message })
        });

        if (!response.ok) {
            throw new Error(`HTTP error! status: ${response.status}`);
        }

        const data = await response.json();
        return data.response;
    }

    appendMessage(text, role) {
        const messageElement = document.createElement("div");
        messageElement.className = `message ${role}`;
        messageElement.innerHTML = `
            <div class="message-content">
                <span class="message-text">${this.escapeHtml(text)}</span>
                <span class="message-time">${new Date().toLocaleTimeString()}</span>
            </div>
        `;

        this.messages.appendChild(messageElement);
        this.scrollToBottom();
    }

    escapeHtml(text) {
        const div = document.createElement('div');
        div.textContent = text;
        return div.innerHTML;
    }

    scrollToBottom() {
        this.messages.scrollTop = this.messages.scrollHeight;
    }

    setLoading(isLoading) {
        this.sendButton.disabled = isLoading;
        this.input.disabled = isLoading;
        this.sendButton.textContent = isLoading ? "Sending..." : "Send";
    }
}

// Start di chat app wen di page load
document.addEventListener("DOMContentLoaded", () => {
    new ChatApp();
});
Understanding Each JavaScript Concept
ES6 Class Structure:
class ChatApp {
    constructor() {
        // Dis dey run wen you create new ChatApp instance
        // E be like di "setup" function for your chat
    }

    methodName() {
        // Methods na functions wey belong to di class
        // Dem fit access class properties using "this"
    }
}
Async/Await Pattern:
// Old way (callback hell):
fetch(url)
  .then(response => response.json())
  .then(data => console.log(data))
  .catch(error => console.error(error));

// Modern way (async/await):
try {
    const response = await fetch(url);
    const data = await response.json();
    console.log(data);
} catch (error) {
    console.error(error);
}
Event-Driven Programming: Instead of to dey always check if something happen, we dey "listen" for events:
// Wen di form don submit, make e run handleSubmit
this.form.addEventListener("submit", (e) => this.handleSubmit(e));

// Wen Enter key press, make e run handleSubmit too
this.input.addEventListener("keypress", (e) => { /* ... */ });
DOM Manipulation:
// Make new tins dem
const messageElement = document.createElement("div");

// Change how dem be
messageElement.className = "message user";
messageElement.innerHTML = "Hello world!";

// Put am for di page
this.messages.appendChild(messageElement);
Security and Best Practices
XSS Prevention:
escapeHtml(text) {
    const div = document.createElement('div');
    div.textContent = text;  // Dis dey automatically escape HTML
    return div.innerHTML;
}
Why this matters: If user type <script>alert('hack')</script>, dis function go make sure say e show as text and e no go run as code.
Error Handling:
try {
    const reply = await this.callAPI(messageText);
    this.appendMessage(reply, "assistant");
} catch (error) {
    // Show beta beta error wey easy for user understand instead make app kpafuka
    this.appendMessage("Sorry, I'm having trouble...", "error");
}
User Experience Considerations:
- Optimistic UI: Add user message immediately, no wait server response
- Loading states: Disable buttons and show "Sending..." while you dey wait
- Auto-scroll: Make newest messages dey visible
- Input validation: No send empty messages
- Keyboard shortcuts: Enter key send messages (like real chat apps)
Understanding the Application Flow
- Page load →
DOMContentLoadedevent fire →new ChatApp()create - Constructor run → Get DOM element references → Set up event listeners
- User type message → Press Enter or click Send →
handleSubmitrun - handleSubmit → Validate input → Show loading state → Call API
- API respond → Add AI message to chat → Re-enable interface
- Ready for next message → User fit continue chat
Dis architecture dey scalable – you fit easily add features like message editing, file uploads, or many conversation threads without to rewrite di core structure.
🎯 Pedagogical Check-in: Modern Frontend Architecture
Architecture Understanding: You don implement full single-page application wen use modern JavaScript patterns. Dis represent professional-level frontend development.
Key Concepts Mastered:
- ES6 Class Architecture: Organized, maintainable code structure
- Async/Await Patterns: Modern asynchronous programming
- Event-Driven Programming: User interface design wey respond fast
- Security Best Practices: XSS prevention and input validation
Industry Connection: Di patterns wey you don learn (class-based architecture, async operations, DOM manipulation) na di foundation for modern frameworks like React, Vue, and Angular. You dey build wit di same architectural thinking weh dem dey use for real production apps.
Reflection Question: How you go take extend dis chat application to handle multiple conversations or user authentication? Think about di architectural changes wey you need and how di class structure go dey evolve.
Styling Your Chat Interface
Now make we create modern, fine-fine chat interface with CSS. Good styling dey make your application feel professional and e dey improve overall user experience. We go use modern CSS things like Flexbox, CSS Grid, and custom properties for responsive, accessible design.
Create styles.css with these comprehensive styles:
/* styles.css - Modern chat interface styling */

:root {
    --primary-color: #2563eb;
    --secondary-color: #f1f5f9;
    --user-color: #3b82f6;
    --assistant-color: #6b7280;
    --error-color: #ef4444;
    --text-primary: #1e293b;
    --text-secondary: #64748b;
    --border-radius: 12px;
    --shadow: 0 4px 6px -1px rgba(0, 0, 0, 0.1);
}

* {
    margin: 0;
    padding: 0;
    box-sizing: border-box;
}

body {
    font-family: -apple-system, BlinkMacSystemFont, 'Segoe UI', Roboto, sans-serif;
    background: linear-gradient(135deg, #667eea 0%, #764ba2 100%);
    min-height: 100vh;
    display: flex;
    align-items: center;
    justify-content: center;
    padding: 20px;
}

.chat-container {
    width: 100%;
    max-width: 800px;
    height: 600px;
    background: white;
    border-radius: var(--border-radius);
    box-shadow: var(--shadow);
    display: flex;
    flex-direction: column;
    overflow: hidden;
}

.chat-header {
    background: var(--primary-color);
    color: white;
    padding: 20px;
    text-align: center;
}

.chat-header h1 {
    font-size: 1.5rem;
    margin-bottom: 5px;
}

.chat-header p {
    opacity: 0.9;
    font-size: 0.9rem;
}

.chat-messages {
    flex: 1;
    padding: 20px;
    overflow-y: auto;
    display: flex;
    flex-direction: column;
    gap: 15px;
    background: var(--secondary-color);
}

.message {
    display: flex;
    max-width: 80%;
    animation: slideIn 0.3s ease-out;
}

.message.user {
    align-self: flex-end;
}

.message.user .message-content {
    background: var(--user-color);
    color: white;
    border-radius: var(--border-radius) var(--border-radius) 4px var(--border-radius);
}

.message.assistant {
    align-self: flex-start;
}

.message.assistant .message-content {
    background: white;
    color: var(--text-primary);
    border-radius: var(--border-radius) var(--border-radius) var(--border-radius) 4px;
    border: 1px solid #e2e8f0;
}

.message.error .message-content {
    background: var(--error-color);
    color: white;
    border-radius: var(--border-radius);
}

.message-content {
    padding: 12px 16px;
    box-shadow: var(--shadow);
    position: relative;
}

.message-text {
    display: block;
    line-height: 1.5;
    word-wrap: break-word;
}

.message-time {
    display: block;
    font-size: 0.75rem;
    opacity: 0.7;
    margin-top: 5px;
}

.chat-form {
    padding: 20px;
    border-top: 1px solid #e2e8f0;
    background: white;
}

.input-group {
    display: flex;
    gap: 10px;
    align-items: center;
}

#messageInput {
    flex: 1;
    padding: 12px 16px;
    border: 2px solid #e2e8f0;
    border-radius: var(--border-radius);
    font-size: 1rem;
    outline: none;
    transition: border-color 0.2s ease;
}

#messageInput:focus {
    border-color: var(--primary-color);
}

#messageInput:disabled {
    background: #f8fafc;
    opacity: 0.6;
    cursor: not-allowed;
}

#sendBtn {
    padding: 12px 24px;
    background: var(--primary-color);
    color: white;
    border: none;
    border-radius: var(--border-radius);
    font-size: 1rem;
    font-weight: 600;
    cursor: pointer;
    transition: background-color 0.2s ease;
    min-width: 80px;
}

#sendBtn:hover:not(:disabled) {
    background: #1d4ed8;
}

#sendBtn:disabled {
    background: #94a3b8;
    cursor: not-allowed;
}

@keyframes slideIn {
    from {
        opacity: 0;
        transform: translateY(10px);
    }
    to {
        opacity: 1;
        transform: translateY(0);
    }
}

/* Responsive design for mobile devices */
@media (max-width: 768px) {
    body {
        padding: 10px;
    }

    .chat-container {
        height: calc(100vh - 20px);
        border-radius: 8px;
    }

    .message {
        max-width: 90%;
    }

    .input-group {
        flex-direction: column;
        gap: 10px;
    }

    #messageInput {
        width: 100%;
    }

    #sendBtn {
        width: 100%;
    }
}

/* Accessibility improvements */
@media (prefers-reduced-motion: reduce) {
    .message {
        animation: none;
    }

    * {
        transition: none !important;
    }
}

/* Dark mode support */
@media (prefers-color-scheme: dark) {
    .chat-container {
        background: #1e293b;
        color: #f1f5f9;
    }

    .chat-messages {
        background: #0f172a;
    }

    .message.assistant .message-content {
        background: #334155;
        color: #f1f5f9;
        border-color: #475569;
    }

    .chat-form {
        background: #1e293b;
        border-color: #475569;
    }

    #messageInput {
        background: #334155;
        color: #f1f5f9;
        border-color: #475569;
    }
}
Understanding the CSS architecture:
- Uses CSS custom properties (variables) for consistent theming and easier maintenance
- Implements Flexbox layout for responsive design and correct alignment
- Includes smooth animations for message appearance without distraction
- Provides visual difference between user messages, AI responses, and error states
- Supports responsive design weh go work for desktop and mobile devices
- Considers accessibility with reduced motion preferences and correct contrast levels
- Offers dark mode support based on user system preferences
Configuring Your Backend URL
Last step na to update BASE_URL for your JavaScript to match your backend server:
// For local development
this.BASE_URL = "http://localhost:5000";

// For GitHub Codespaces (change am wit your correct URL)
this.BASE_URL = "https://your-codespace-name-5000.app.github.dev";
How to determine your backend URL:
- Local development: Use
http://localhost:5000if na both frontend and backend you dey run locally - Codespaces: Find your backend URL for Ports tab after you expose port 5000
- Production: Replace am with your real domain wen you deploy for hosting service
💡 Testing Tip: You fit test your backend directly by to visit di root URL for your browser. You suppose see welcome message from your FastAPI server.
Testing and Deployment
Now you get frontend and backend dem all build, make we test say everything dey work well together, plus explore options to deploy and share your chat assistant with others.
Local Testing Workflow
Follow these steps make you test your complete application:
graph TD
    A[Start Backend Server] --> B[Set Environment Variables]
    B --> C[Test API Endpoints]
    C --> D[Open Frontend for Browser]
    D --> E[Test Chat Function]
    E --> F[Debug Any Wahala]
Step-by-step testing process:
-
Start your backend server:
cd backend source venv/bin/activate # or venv\Scripts\activate for Windows python api.py -
Verify the API is working:
- Open
http://localhost:5000for your browser - You go see welcome message from your FastAPI server
- Open
-
Open your frontend:
- Go your frontend directory
- Open
index.htmlfor your web browser - Or use VS Code Live Server extension to get better development experience
-
Test the chat functionality:
- Type message for input field
- Click "Send" or press Enter
- Verify say AI respond correct
- Check browser console for any JavaScript error
Troubleshooting Common Issues
| Problem | Symptoms | Solution |
|---|---|---|
| CORS Error | Frontend no fit reach backend | Make sure say FastAPI CORSMiddleware dey properly configured |
| API Key Error | 401 Unauthorized responses | Check your GITHUB_TOKEN environment variable |
| Connection Refused | Network errors for frontend | Confirm backend URL and say Flask server dey run |
| No AI Response | Empty or error responses | Check backend logs for API quota or authentication problems |
Common debugging steps:
- Check browser Developer Tools Console for JavaScript errors
- Verify Network tab dey show successful API requests and responses
- Review backend terminal output for Python errors or API issues
- Confirm environment variables dey properly loaded and accessible
📈 Your AI Application Development Mastery Timeline
timeline
    title Complete AI Application Development Journey

    section AI Foundations
        Understanding Generative AI
            : Grasp pattern recognition concepts
            : Master AI parameter control
            : Learn prompt engineering techniques

        GitHub Models Integration
            : Navigate AI service platforms
            : Handle authentication securely
            : Optimize model parameters

    section Backend Development
        Python API Architecture
            : Build FastAPI applications
            : Implement async operations
            : Create secure endpoints

        AI Service Integration
            : Connect to external AI APIs
            : Handle rate limiting
            : Implement error boundaries

    section Frontend Mastery
        Modern JavaScript Patterns
            : Master ES6 class architecture
            : Implement async/await flows
            : Build responsive interfaces

        Real-time User Experience
            : Create dynamic chat interfaces
            : Handle loading states
            : Optimize user interactions

    section Production Readiness
        Security & Performance
            : Implement secure token management
            : Prevent XSS vulnerabilities
            : Optimize API performance

        Professional Deployment
            : Build scalable architectures
            : Create maintainable code
            : Document development processes
🎓 Graduation Milestone: You don successfully build complete AI-powered application using same technologies and architectural patterns wey dey power modern AI assistants. These skills be di junction of traditional web development and cutting-edge AI integration.
🔄 Next Level Capabilities:
- Ready to explore advanced AI frameworks (LangChain, LangGraph)
- Prepared to build multi-modal AI applications (text, image, voice)
- Equipped to implement vector databases and retrieval systems
- Foundation set for machine learning and AI model fine-tuning
GitHub Copilot Agent Challenge 🚀
Use Agent mode to complete this challenge:
Description: Improve di chat assistant by adding conversation history and message persistence. Dis challenge go help you understand how to manage state for chat applications and implement data storage for better user experience.
Prompt: Modify di chat application to dey include conversation history weh dey persist between sessions. Add function to save chat messages for local storage, show conversation history when page load, and put "Clear History" button. Also implement typing indicators and message timestamps to make di chat experience more real.
Learn more about agent mode here.
Assignment: Build Your Personal AI Assistant
Now you go create your own AI assistant implementation. Instead of to just copy tutorial code, dis na chance to apply di concepts as you build something weh reflect your own interests and use cases.
Project Requirements
Make we set up your project with clean, organized structure:
my-ai-assistant/
├── backend/
│   ├── api.py          # Your FastAPI server
│   ├── llm.py          # AI integration functions
│   ├── .env            # Your secrets (keep this safe!)
│   └── requirements.txt # Python dependencies
├── frontend/
│   ├── index.html      # Your chat interface
│   ├── app.js          # The JavaScript magic
│   └── styles.css      # Make it look amazing
└── README.md           # Tell the world about your creation
Core Implementation Tasks
Backend Development:
- Take our FastAPI code and make am your own
- Create unique AI personality – maybe helpful cooking assistant, creative writing partner, or study buddy?
- Add solid error handling make your app no break when wahala happen
- Write clear documentation for anybody wey wan understand how your API dey work
Frontend Development:
- Build chat interface wey dey intuitive and welcoming
- Write clean, modern JavaScript weh you fit proud to show other developers
- Design custom styling weh reflect your AI personality – fun and colorful? Clean and minimal? Na you dey decide!
- Make sure e dey work well for both phones and computers
Personalization Requirements:
- Choose unique name and personality for your AI assistant – maybe something weh represent your interests or problems you wan solve
- Customize visual design to match your assistant's vibe
- Write compelling welcome message wey go make people wan start chatting
- Test your assistant with different kind questions to see how e respond
Enhancement Ideas (Optional)
You want take your project higher? Here be fun ideas to explore:
| Feature | Description | Skills You'll Practice |
|---|---|---|
| Message History | Remember conversations even after page refresh | Work with localStorage, JSON handling |
| Typing Indicators | Show "AI dey type..." while you dey wait for response | CSS animations, async programming |
| Message Timestamps | Show when each message dem send | Date/time formatting, UX design |
| Export Chat | Let users download their conversation | File handling, data export |
| Theme Switching | Light/dark mode toggle | CSS variables, user preferences |
| Voice Input | Add speech-to-text functionality | Web APIs, accessibility |
Testing and Documentation
Quality Assurance:
- Test your application with different input types and edge cases
- Verify responsive design dey work for different screen sizes
- Check accessibility with keyboard navigation and screen readers
- Validate HTML and CSS for standards compliance
Documentation Requirements:
- Write README.md weh explain your project and how to run am
- Include screenshots of your chat interface in action
- Document any unique features or customizations you add
- Provide clear setup instructions for other developers
Submission Guidelines
Project Deliverables:
- Complete project folder with all source code
- README.md with project description and setup instructions
- Screenshots wey show your chat assistant dey work
- Small reflection on wetin you learn and challenges you face
Evaluation Criteria:
- Functionality: The chat assistant dey work as expected?
- Code Quality: Code well-organized, commented, maintainable?
- Design: Interface fine to look and easy to use?
- Creativity: How unique and personalized your implementation be?
- Documentation: Instructions clear and complete?
💡 Success Tip: Start with basic requirements first, then add enhancements after everything dey work. Focus on to create solid core experience before add advanced features.
Solution
Bonus Challenges
Ready to take your AI assistant higher? Try these advanced challenges to deepen your understanding of AI integration and web development.
Personality Customization
Real magic dey happen when you give your AI assistant unique personality. Test different system prompts to create special assistants:
Professional Assistant Example:
call_llm(message, "You are a professional business consultant with 20 years of experience. Provide structured, actionable advice with specific steps and considerations.")
Creative Writing Helper Example:
call_llm(message, "You are an enthusiastic creative writing coach. Help users develop their storytelling skills with imaginative prompts and constructive feedback.")
Technical Mentor Example:
call_llm(message, "You are a patient senior developer who explains complex programming concepts using simple analogies and practical examples.")
Frontend Enhancements
Transform your chat interface with these visual and functional improvements:
Advanced CSS Features:
- Implement smooth message animations and transitions
- Add custom chat bubble designs with CSS shapes and gradients
- Create typing indicator animation for when AI dey "think"
- Design emoji reactions or message rating system
JavaScript Enhancements:
- Add keyboard shortcuts (Ctrl+Enter to send, Escape to clear input)
- Implement message search and filtering functionality
- Create conversation export feature (download as text or JSON)
- Add auto-save to localStorage to prevent message loss
Advanced AI Integration
Multiple AI Personalities:
- Create dropdown to switch between different AI personalities
- Save user preferred personality for localStorage
- Implement context switching wey maintain conversation flow
Smart Response Features:
- Add conversation context awareness (AI go remember previous messages)
- Implement smart suggestions wey based on conversation topic
- Create quick reply buttons for common questions
🎯 Learning Goal: These bonus challenges dey help you sabi advanced web development patterns and AI integration techniques wey dem dey use for production applications.
Summary and Next Steps
Congratulations! You don successfully build complete AI-powered chat assistant from scratch. This project don give you hands-on experience with modern web development technologies and AI integration – skills wey dey get more value for today's tech world.
Wetin You Don Accomplish
For this lesson, you don master plenty important technologies and concepts:
Backend Development:
- Integrated with GitHub Models API for AI functionality
- Built RESTful API using Flask with correct error handling
- Implemented secure authentication using environment variables
- Configured CORS for cross-origin requests between frontend and backend
Frontend Development:
- Created responsive chat interface using semantic HTML
- Implemented modern JavaScript with async/await and class-based architecture
- Designed engaging user interface with CSS Grid, Flexbox, and animations
- Added accessibility features and responsive design principles
Full-Stack Integration:
- Connected frontend and backend through HTTP API calls
- Handled real-time user interactions and asynchronous data flow
- Implemented error handling and user feedback throughout the application
- Tested the complete application workflow from user input to AI response
Key Learning Outcomes
mindmap
  root((AI Chat App Skills))
    API Integration
      Authentication
      Error Handling
      Async Programming
    Web Development
      HTML5 Semantics
      Modern CSS
      ES6+ JavaScript
    User Experience
      Responsive Design
      Accessibility
      Real-time Interaction
    AI Understanding
      Prompt Engineering
      Model Parameters
      Conversation Flow
This project don introduce you to the fundamentals of building AI-powered applications, wey be the future of web development. You don sabi how to integrate AI capabilities into traditional web applications, creating engaging user experiences wey dey feel intelligent and responsive.
Professional Applications
The skills wey you develop for this lesson fit directly apply for modern software development careers:
- Full-stack web development using modern frameworks and APIs
- AI integration for web applications and mobile apps
- API design and development for microservices architectures
- User interface development with focus on accessibility and responsive design
- DevOps practices including environment configuration and deployment
Continuing Your AI Development Journey
Next Learning Steps:
- Explore more advanced AI models and APIs (GPT-4, Claude, Gemini)
- Learn about prompt engineering techniques for better AI responses
- Study conversation design and chatbot user experience principles
- Investigate AI safety, ethics, and responsible AI development practices
- Build more complex applications with conversation memory and context awareness
Advanced Project Ideas:
- Multi-user chat rooms with AI moderation
- AI-powered customer service chatbots
- Educational tutoring assistants with personalized learning
- Creative writing collaborators with different AI personalities
- Technical documentation assistants for developers
Getting Started with GitHub Codespaces
You want try this project for cloud development environment? GitHub Codespaces dey provide complete development setup inside your browser, perfect for experiment with AI applications without local setup wahala.
Setting Up Your Development Environment
Step 1: Create from Template
- Navigate go the Web Dev For Beginners repository
- Click "Use this template" for top-right corner (make sure say you don login for GitHub)
Step 2: Launch Codespaces
- Open your new repository
- Click green "Code" button and select "Codespaces"
- Choose "Create codespace on main" to start your development environment
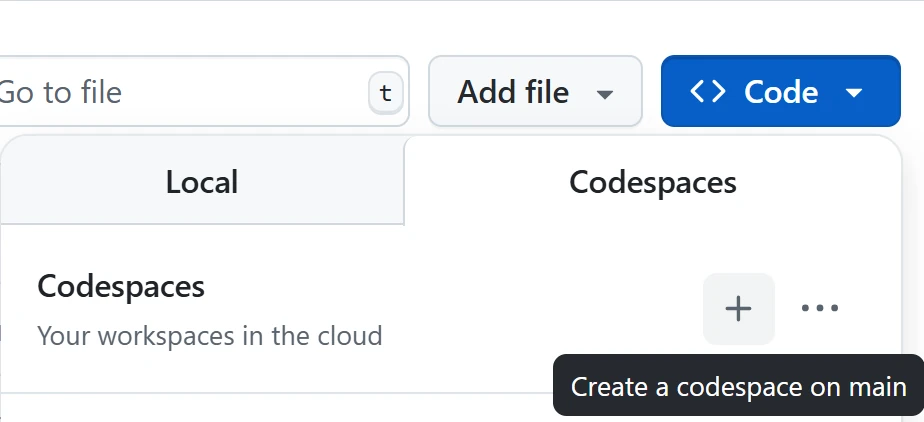
Step 3: Environment Configuration As your Codespace load, you go get access to:
- Pre-installed Python, Node.js, and all necessary development tools
- VS Code interface with extensions for web development
- Terminal access to run backend and frontend servers
- Port forwarding for testing your applications
Wetn Codespaces dey provide:
- Eliminates local environment setup and configuration wahala
- Provides consistent development environment across different devices
- Includes pre-configured tools and extensions for web development
- Offers seamless integration with GitHub for version control and collaboration
🚀 Pro Tip: Codespaces perfect for learning and prototyping AI applications because e dey handle all the complex environment setup automatically, make you fit focus on building and learning instead of configuration troubleshooting.
Disclaimer: Dis document dem don translate am wit AI translation service wey dem dey call Co-op Translator. Even though we try make everything correct, abeg sabi say automated translation fit get some mistakes or no too correct. Di original document wey e dey for e own language na im be di correct one. If na important matter, e better make human professional translate am. We no go carry any blame if person no too understand or if dem misinterpret tins because of dis translation.