4.7 KiB
分類影像 - 虛擬 IoT 硬體與 Raspberry Pi
在本課程的這部分,你將把相機捕捉的影像發送到 Custom Vision 服務進行分類。
發送影像到 Custom Vision
Custom Vision 服務提供了一個 Python SDK,可用於分類影像。
任務 - 發送影像到 Custom Vision
-
在 VS Code 中打開
fruit-quality-detector資料夾。如果你使用的是虛擬 IoT 裝置,請確保虛擬環境已在終端機中運行。 -
用於發送影像到 Custom Vision 的 Python SDK 可作為 Pip 套件安裝。使用以下指令進行安裝:
pip3 install azure-cognitiveservices-vision-customvision -
在
app.py文件的頂部添加以下匯入語句:from msrest.authentication import ApiKeyCredentials from azure.cognitiveservices.vision.customvision.prediction import CustomVisionPredictionClient這將引入 Custom Vision 庫中的一些模組,一個用於使用預測金鑰進行身份驗證,另一個提供可調用 Custom Vision 的預測客戶端類別。
-
在文件末尾添加以下程式碼:
prediction_url = '<prediction_url>'
prediction_key = '<prediction key>'
將
<prediction_url>替換為你在本課程早些時候從 Prediction URL 對話框中複製的 URL。將<prediction key>替換為你從同一對話框中複製的預測金鑰。 -
Prediction URL 對話框提供的預測 URL 是設計用於直接調用 REST 端點的。Python SDK 在不同的地方使用 URL 的部分。添加以下程式碼以分解此 URL 為所需的部分:
parts = prediction_url.split('/')
endpoint = 'https://' + parts[2]
project_id = parts[6]
iteration_name = parts[9]
這將分解 URL,提取出端點
https://<location>.api.cognitive.microsoft.com、專案 ID 和已發佈的迭代名稱。 -
使用以下程式碼建立一個預測器物件來執行預測:
prediction_credentials = ApiKeyCredentials(in_headers={"Prediction-key": prediction_key}) predictor = CustomVisionPredictionClient(endpoint, prediction_credentials)prediction_credentials將預測金鑰封裝起來。然後使用這些金鑰建立一個指向端點的預測客戶端物件。 -
使用以下程式碼將影像發送到 Custom Vision:
image.seek(0)
results = predictor.classify_image(project_id, iteration_name, image)
這會將影像回卷到起始位置,然後將其發送到預測客戶端。
-
最後,使用以下程式碼顯示結果:
for prediction in results.predictions:
    print(f'{prediction.tag_name}:\t{prediction.probability * 100:.2f}%')
這將迴圈遍歷所有返回的預測並在終端機上顯示它們。返回的概率是 0-1 的浮點數,其中 0 表示與標籤匹配的可能性為 0%,1 表示與標籤匹配的可能性為 100%。
💁 影像分類器將返回所有使用過的標籤的百分比。每個標籤都會有影像與該標籤匹配的概率。
-
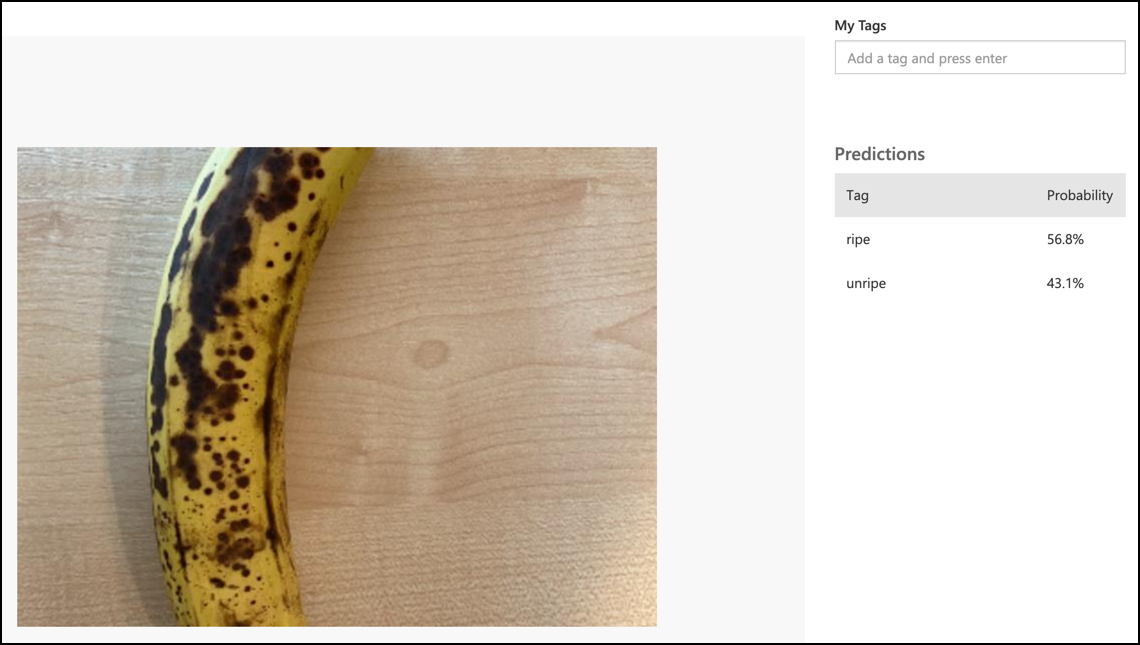
執行你的程式碼,讓相機對準一些水果,或者使用適當的影像集,或者如果使用虛擬 IoT 硬體,讓水果在你的網路攝影機中可見。你將在控制台中看到輸出:
(.venv) ➜  fruit-quality-detector python app.py
ripe:   56.84%
unripe: 43.16%
你將能看到拍攝的影像,以及這些值在 Custom Vision 的 Predictions 標籤中顯示。
💁 你可以在 code-classify/pi 或 code-classify/virtual-iot-device 資料夾中找到這段程式碼。
😀 你的水果品質分類程式大功告成!
免責聲明:
本文件使用 AI 翻譯服務 Co-op Translator 進行翻譯。雖然我們致力於提供準確的翻譯,但請注意,自動翻譯可能包含錯誤或不準確之處。原始文件的母語版本應被視為權威來源。對於關鍵資訊,建議使用專業人工翻譯。我們對因使用此翻譯而引起的任何誤解或錯誤解釋不承擔責任。