5.2 KiB
Call your object detector from your IoT device - Wio Terminal
Once your object detector has been published, you can use it with your IoT device.
Copy the image classifier project
Most of your stock detector will be based on the image classifier you created in a previous lesson.
Task - Copy the image classifier project
-
Connect your ArduCam to your Wio Terminal by following the steps in lesson 2 of the manufacturing project.
You might also want to secure the camera in a fixed position, for example, by hanging the cable over a box or can, or attaching the camera to a box with double-sided tape.
-
Create a new Wio Terminal project using PlatformIO. Name this project
stock-counter. -
Follow the steps in lesson 2 of the manufacturing project to capture images from the camera.
-
Repeat the steps in lesson 2 of the manufacturing project to call the image classifier. Most of this code will be reused for object detection.
Modify the code from a classifier to an object detector
The code used for classifying images is very similar to the code for detecting objects. The main difference lies in the URL provided by Custom Vision and the results returned from the call.
Task - Modify the code from a classifier to an object detector
-
Add the following include directive at the top of the
main.cppfile:#include <vector> -
Rename the
classifyImagefunction todetectStock, updating both the function name and its call in thebuttonPressedfunction. -
Above the
detectStockfunction, define a threshold to filter out detections with low probabilities:const float threshold = 0.3f;Unlike an image classifier, which returns one result per tag, the object detector returns multiple results. Detections with low probabilities need to be filtered out.
-
Above the
detectStockfunction, define a function to process the predictions:void processPredictions(std::vector<JsonVariant> &predictions) { for(JsonVariant prediction : predictions) { String tag = prediction["tagName"].as<String>(); float probability = prediction["probability"].as<float>(); char buff[32]; sprintf(buff, "%s:\t%.2f%%", tag.c_str(), probability * 100.0); Serial.println(buff); } }This function takes a list of predictions and prints them to the serial monitor.
-
In the
detectStockfunction, replace the contents of theforloop that iterates through the predictions with the following:std::vector<JsonVariant> passed_predictions; for(JsonVariant prediction : predictions) { float probability = prediction["probability"].as<float>(); if (probability > threshold) { passed_predictions.push_back(prediction); } } processPredictions(passed_predictions);This loop goes through the predictions, compares their probabilities to the threshold, and adds those with higher probabilities to a
list. Thelistis then passed to theprocessPredictionsfunction. -
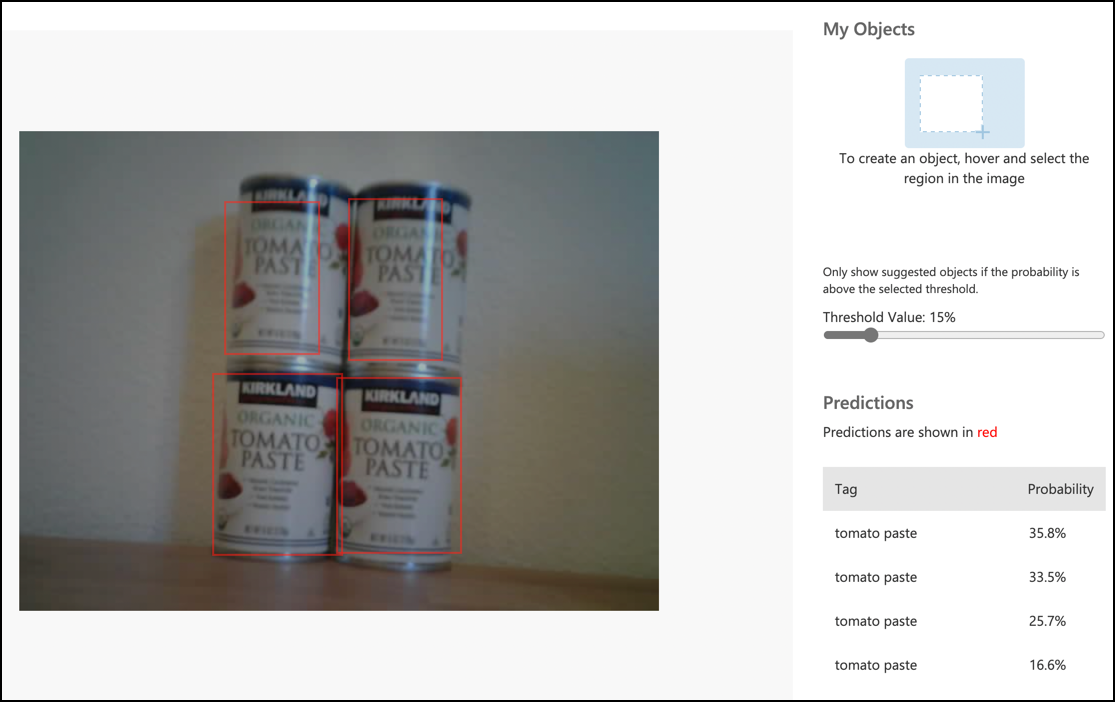
Upload and run your code. Point the camera at objects on a shelf and press the C button. The output will appear in the serial monitor:
Connecting to WiFi..
Connected!
Image captured
Image read to buffer with length 17416
tomato paste:   35.84%
tomato paste:   35.87%
tomato paste:   34.11%
tomato paste:   35.16%
💁 You may need to adjust the
thresholdto suit your images.You will also be able to view the captured image and these values in the Predictions tab in Custom Vision.
💁 You can find this code in the code-detect/wio-terminal folder.
😀 Congratulations! Your stock counter program is working successfully!
Disclaimer:
This document has been translated using the AI translation service Co-op Translator. While we aim for accuracy, please note that automated translations may include errors or inaccuracies. The original document in its native language should be regarded as the authoritative source. For critical information, professional human translation is advised. We are not responsible for any misunderstandings or misinterpretations resulting from the use of this translation.