5.6 KiB
Measure soil moisture - Wio Terminal
In this part of the lesson, you will add a capacitive soil moisture sensor to your Wio Terminal and read values from it.
Hardware
The Wio Terminal requires a capacitive soil moisture sensor.
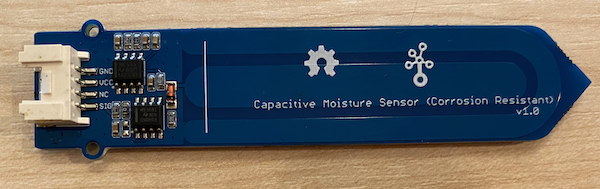
The sensor you'll use is a Capacitive Soil Moisture Sensor, which measures soil moisture by detecting the capacitance of the soil, a property that changes as the soil's moisture level changes. As the soil moisture increases, the voltage decreases.
This is an analog sensor, so it connects to the analog pins on the Wio Terminal, using an onboard ADC to generate a value between 0 and 1,023.
Connect the soil moisture sensor
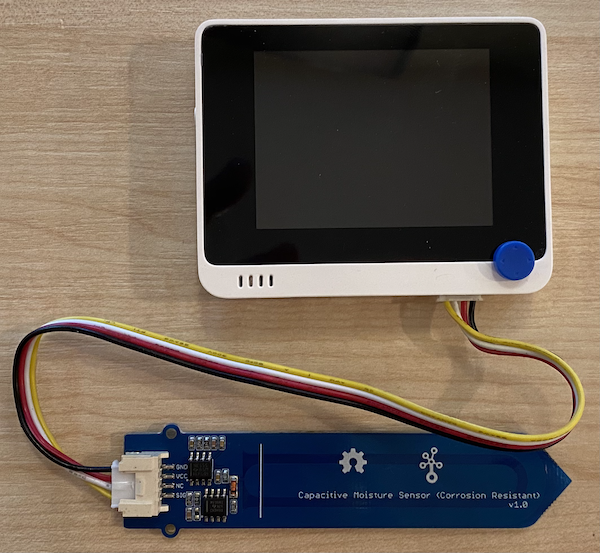
The Grove soil moisture sensor can be connected to the Wio Terminal's configurable analog/digital port.
Task - connect the soil moisture sensor
Connect the soil moisture sensor.
-
Insert one end of a Grove cable into the socket on the soil moisture sensor. It will only fit in one way.
-
With the Wio Terminal disconnected from your computer or any other power source, connect the other end of the Grove cable to the right-hand side Grove socket on the Wio Terminal as you face the screen. This is the socket farthest from the power button.
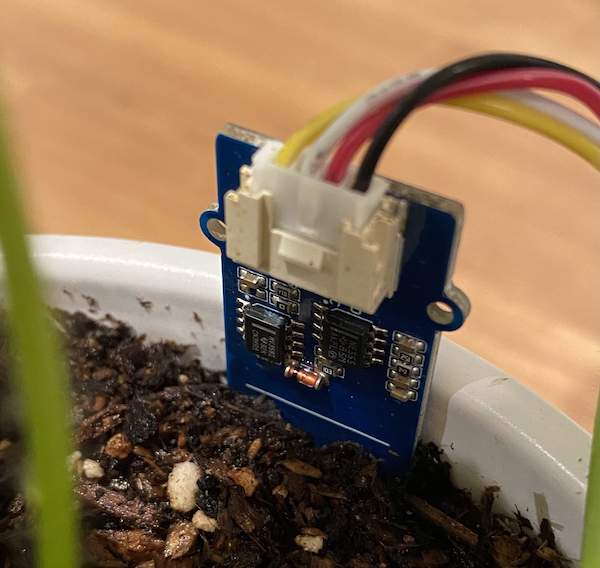
- Insert the soil moisture sensor into the soil. The sensor has a 'highest position line'—a white line across it. Insert the sensor up to, but not beyond, this line.
- You can now connect the Wio Terminal to your computer.
Program the soil moisture sensor
The Wio Terminal can now be programmed to use the attached soil moisture sensor.
Task - program the soil moisture sensor
Program the device.
-
Create a new Wio Terminal project using PlatformIO. Name this project
soil-moisture-sensor. Add code in thesetupfunction to configure the serial port.⚠️ You can refer to the instructions for creating a PlatformIO project in project 1, lesson 1 if needed.
-
There isn't a library for this sensor, but you can read from the analog pin using the built-in Arduino
analogReadfunction. Start by configuring the analog pin for input so values can be read from it by adding the following to thesetupfunction.pinMode(A0, INPUT);This sets the
A0pin, the combined analog/digital pin, as an input pin from which voltage can be read. -
Add the following to the
loopfunction to read the voltage from this pin:int soil_moisture = analogRead(A0); -
Below this code, add the following code to print the value to the serial port:
Serial.print("Soil Moisture: "); Serial.println(soil_moisture); -
Finally, add a delay of 10 seconds at the end:
delay(10000); -
Build and upload the code to the Wio Terminal.
⚠️ You can refer to the instructions for creating a PlatformIO project in project 1, lesson 1 if needed.
-
Once uploaded, you can monitor the soil moisture using the serial monitor. Add some water to the soil or remove the sensor from the soil and observe the value change.
> Executing task: platformio device monitor <

--- Available filters and text transformations: colorize, debug, default, direct, hexlify, log2file, nocontrol, printable, send_on_enter, time
--- More details at http://bit.ly/pio-monitor-filters
--- Miniterm on /dev/cu.usbmodem1201  9600,8,N,1 ---
--- Quit: Ctrl+C | Menu: Ctrl+T | Help: Ctrl+T followed by Ctrl+H ---
Soil Moisture: 526
Soil Moisture: 529
Soil Moisture: 521
Soil Moisture: 494
Soil Moisture: 454
Soil Moisture: 456
Soil Moisture: 395
Soil Moisture: 388
Soil Moisture: 394
Soil Moisture: 391
In the example output above, you can see the voltage drop as water is added.
💁 You can find this code in the code/wio-terminal folder.
😀 Your soil moisture sensor program was a success!
Disclaimer:
This document has been translated using the AI translation service Co-op Translator. While we aim for accuracy, please note that automated translations may include errors or inaccuracies. The original document in its native language should be regarded as the authoritative source. For critical information, professional human translation is advised. We are not responsible for any misunderstandings or misinterpretations resulting from the use of this translation.