10 KiB
Control your nightlight over the Internet - Wio Terminal
The IoT device needs to be programmed to communicate with test.mosquitto.org using MQTT to send telemetry data based on the light sensor readings and receive commands to control the LED.
In this part of the lesson, you will connect your Wio Terminal to an MQTT broker.
Install the WiFi and MQTT Arduino libraries
To communicate with the MQTT broker, you need to install some Arduino libraries to use the WiFi chip in the Wio Terminal and interact with MQTT. When developing for Arduino devices, you can leverage a wide range of libraries containing open-source code that implement various functionalities. Seeed provides libraries for the Wio Terminal that enable WiFi communication. Other developers have created libraries for interacting with MQTT brokers, which you will use with your device.
These libraries are available as source code that can be automatically imported into PlatformIO and compiled for your device. This ensures Arduino libraries work on any device supporting the Arduino framework, provided the device has the necessary hardware for the library. Some libraries, like the Seeed WiFi libraries, are specific to certain hardware.
Libraries can be installed globally for reuse or directly into a specific project. For this assignment, the libraries will be installed into the project.
✅ You can learn more about library management and how to find and install libraries in the PlatformIO library documentation.
Task - install the WiFi and MQTT Arduino libraries
Install the Arduino libraries.
-
Open the nightlight project in VS Code.
-
Add the following to the end of the
platformio.inifile:lib_deps = seeed-studio/Seeed Arduino rpcWiFi @ 1.0.5 seeed-studio/Seeed Arduino FS @ 2.1.1 seeed-studio/Seeed Arduino SFUD @ 2.0.2 seeed-studio/Seeed Arduino rpcUnified @ 2.1.3 seeed-studio/Seeed_Arduino_mbedtls @ 3.0.1This imports the Seeed WiFi libraries. The
@ <number>syntax specifies a particular version of the library.💁 You can remove the
@ <number>to always use the latest version of the libraries, but there’s no guarantee that newer versions will work with the code below. The code provided here has been tested with this specific version of the libraries.This is all you need to do to add the libraries. The next time PlatformIO builds the project, it will download the source code for these libraries and compile them into your project.
-
Add the following to the
lib_deps:knolleary/PubSubClient @ 2.8This imports PubSubClient, an Arduino MQTT client.
Connect to WiFi
The Wio Terminal can now be connected to WiFi.
Task - connect to WiFi
Connect the Wio Terminal to WiFi.
-
Create a new file in the
srcfolder calledconfig.h. You can do this by selecting thesrcfolder or themain.cppfile inside it, and clicking the New file button in the explorer. This button appears when your cursor hovers over the explorer.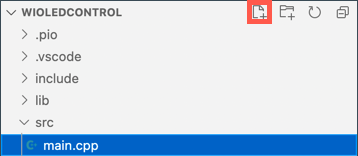
-
Add the following code to this file to define constants for your WiFi credentials:
#pragma once

#include <string>

using namespace std;

// WiFi credentials
const char *SSID = "<SSID>";
const char *PASSWORD = "<PASSWORD>";
Replace
<SSID>with your WiFi network name. Replace<PASSWORD>with your WiFi password. -
Open the
main.cppfile. -
Add the following
#includedirectives to the top of the file:#include <PubSubClient.h> #include <rpcWiFi.h> #include <SPI.h> #include "config.h"This includes header files for the libraries you added earlier, as well as the config header file. These header files are necessary to instruct PlatformIO to include the code from the libraries. Without explicitly including these header files, some code won’t be compiled, resulting in compiler errors.
-
Add the following code above the
setupfunction:void connectWiFi() { while (WiFi.status() != WL_CONNECTED) { Serial.println("Connecting to WiFi.."); WiFi.begin(SSID, PASSWORD); delay(500); } Serial.println("Connected!"); }This code loops while the device is not connected to WiFi and attempts to connect using the SSID and password from the config header file.
-
Add a call to this function at the bottom of the
setupfunction, after the pins have been configured.connectWiFi(); -
Upload this code to your device to verify the WiFi connection. You should see the output in the serial monitor.
> Executing task: platformio device monitor <

--- Available filters and text transformations: colorize, debug, default, direct, hexlify, log2file, nocontrol, printable, send_on_enter, time
--- More details at http://bit.ly/pio-monitor-filters
--- Miniterm on /dev/cu.usbmodem1101  9600,8,N,1 ---
--- Quit: Ctrl+C | Menu: Ctrl+T | Help: Ctrl+T followed by Ctrl+H ---
Connecting to WiFi..
Connected!
Connect to MQTT
Once the Wio Terminal is connected to WiFi, it can connect to the MQTT broker.
Task - connect to MQTT
Connect to the MQTT broker.
-
Add the following code to the bottom of the
config.hfile to define the connection details for the MQTT broker:// MQTT settings const string ID = "<ID>"; const string BROKER = "test.mosquitto.org"; const string CLIENT_NAME = ID + "nightlight_client";Replace
<ID>with a unique ID that will serve as the name of this device client and later for the topics this device publishes and subscribes to. The test.mosquitto.org broker is public and used by many people, including other students working on this assignment. Using a unique MQTT client name and topic names ensures your code won’t interfere with others. You will also need this ID when creating the server code later in this assignment.💁 You can use a website like GUIDGen to generate a unique ID.
The
BROKERis the URL of the MQTT broker.The
CLIENT_NAMEis a unique name for this MQTT client on the broker. -
Open the
main.cppfile, and add the following code below theconnectWiFifunction and above thesetupfunction:WiFiClient wioClient; PubSubClient client(wioClient);This code creates a WiFi client using the Wio Terminal WiFi libraries and uses it to create an MQTT client.
-
Below this code, add the following:
void reconnectMQTTClient()
{
    while (!client.connected())
    {
        Serial.print("Attempting MQTT connection...");

        if (client.connect(CLIENT_NAME.c_str()))
        {
            Serial.println("connected");
        }
        else
        {
            Serial.print("Retying in 5 seconds - failed, rc=");
            Serial.println(client.state());

            delay(5000);
        }
    }
}
This function tests the connection to the MQTT broker and reconnects if it is not connected. It loops continuously while disconnected and attempts to connect using the unique client name defined in the config header file.
If the connection fails, it retries after 5 seconds.
-
Add the following code below the
reconnectMQTTClientfunction:void createMQTTClient() { client.setServer(BROKER.c_str(), 1883); reconnectMQTTClient(); }This code sets the MQTT broker for the client, configures the callback for incoming messages, and attempts to connect to the broker.
-
Call the
createMQTTClientfunction in thesetupfunction after the WiFi connection is established. -
Replace the entire
loopfunction with the following:void loop() { reconnectMQTTClient(); client.loop(); delay(2000); }This code starts by reconnecting to the MQTT broker. MQTT connections can be easily disrupted, so it’s important to regularly check and reconnect if necessary. It then calls the
loopmethod on the MQTT client to process any incoming messages on the subscribed topic. Since this app is single-threaded, messages cannot be received in the background, so time on the main thread must be allocated to handle any waiting messages.Finally, a 2-second delay ensures the light levels are not sent too frequently, reducing the device’s power consumption.
-
Upload the code to your Wio Terminal, and use the Serial Monitor to observe the device connecting to WiFi and MQTT.
> Executing task: platformio device monitor <

source /Users/jimbennett/GitHub/IoT-For-Beginners/1-getting-started/lessons/4-connect-internet/code-mqtt/wio-terminal/nightlight/.venv/bin/activate
--- Available filters and text transformations: colorize, debug, default, direct, hexlify, log2file, nocontrol, printable, send_on_enter, time
--- More details at http://bit.ly/pio-monitor-filters
--- Miniterm on /dev/cu.usbmodem1201  9600,8,N,1 ---
--- Quit: Ctrl+C | Menu: Ctrl+T | Help: Ctrl+T followed by Ctrl+H ---
Connecting to WiFi..
Connected!
Attempting MQTT connection...connected
💁 You can find this code in the code-mqtt/wio-terminal folder.
😀 You have successfully connected your device to an MQTT broker.
Disclaimer:
This document has been translated using the AI translation service Co-op Translator. While we aim for accuracy, please note that automated translations may include errors or inaccuracies. The original document in its native language should be regarded as the authoritative source. For critical information, professional human translation is advised. We are not responsible for any misunderstandings or misinterpretations resulting from the use of this translation.