|
|
3 weeks ago | |
|---|---|---|
| .. | ||
| README.md | 3 weeks ago | |
| assignment.md | 3 weeks ago | |
README.md
Data Science in the Cloud: The "Azure ML SDK" way
 |
|---|
| Data Science In The Cloud: Azure ML SDK - Sketchnote by @nitya |
Table of contents:
- Data Science in the Cloud: The "Azure ML SDK" way
Pre-Lecture Quiz
1. Introduction
1.1 What is Azure ML SDK?
Data scientists and AI developers use the Azure Machine Learning SDK to create and manage machine learning workflows with the Azure Machine Learning service. You can interact with the service in any Python environment, such as Jupyter Notebooks, Visual Studio Code, or your preferred Python IDE.
Key features of the SDK include:
- Explore, prepare, and manage the lifecycle of datasets used in machine learning experiments.
- Manage cloud resources for monitoring, logging, and organizing machine learning experiments.
- Train models locally or using cloud resources, including GPU-accelerated training.
- Use automated machine learning, which takes configuration parameters and training data, and automatically tests algorithms and hyperparameter settings to find the best model for predictions.
- Deploy web services to turn trained models into RESTful services that can be used in any application.
Learn more about the Azure Machine Learning SDK
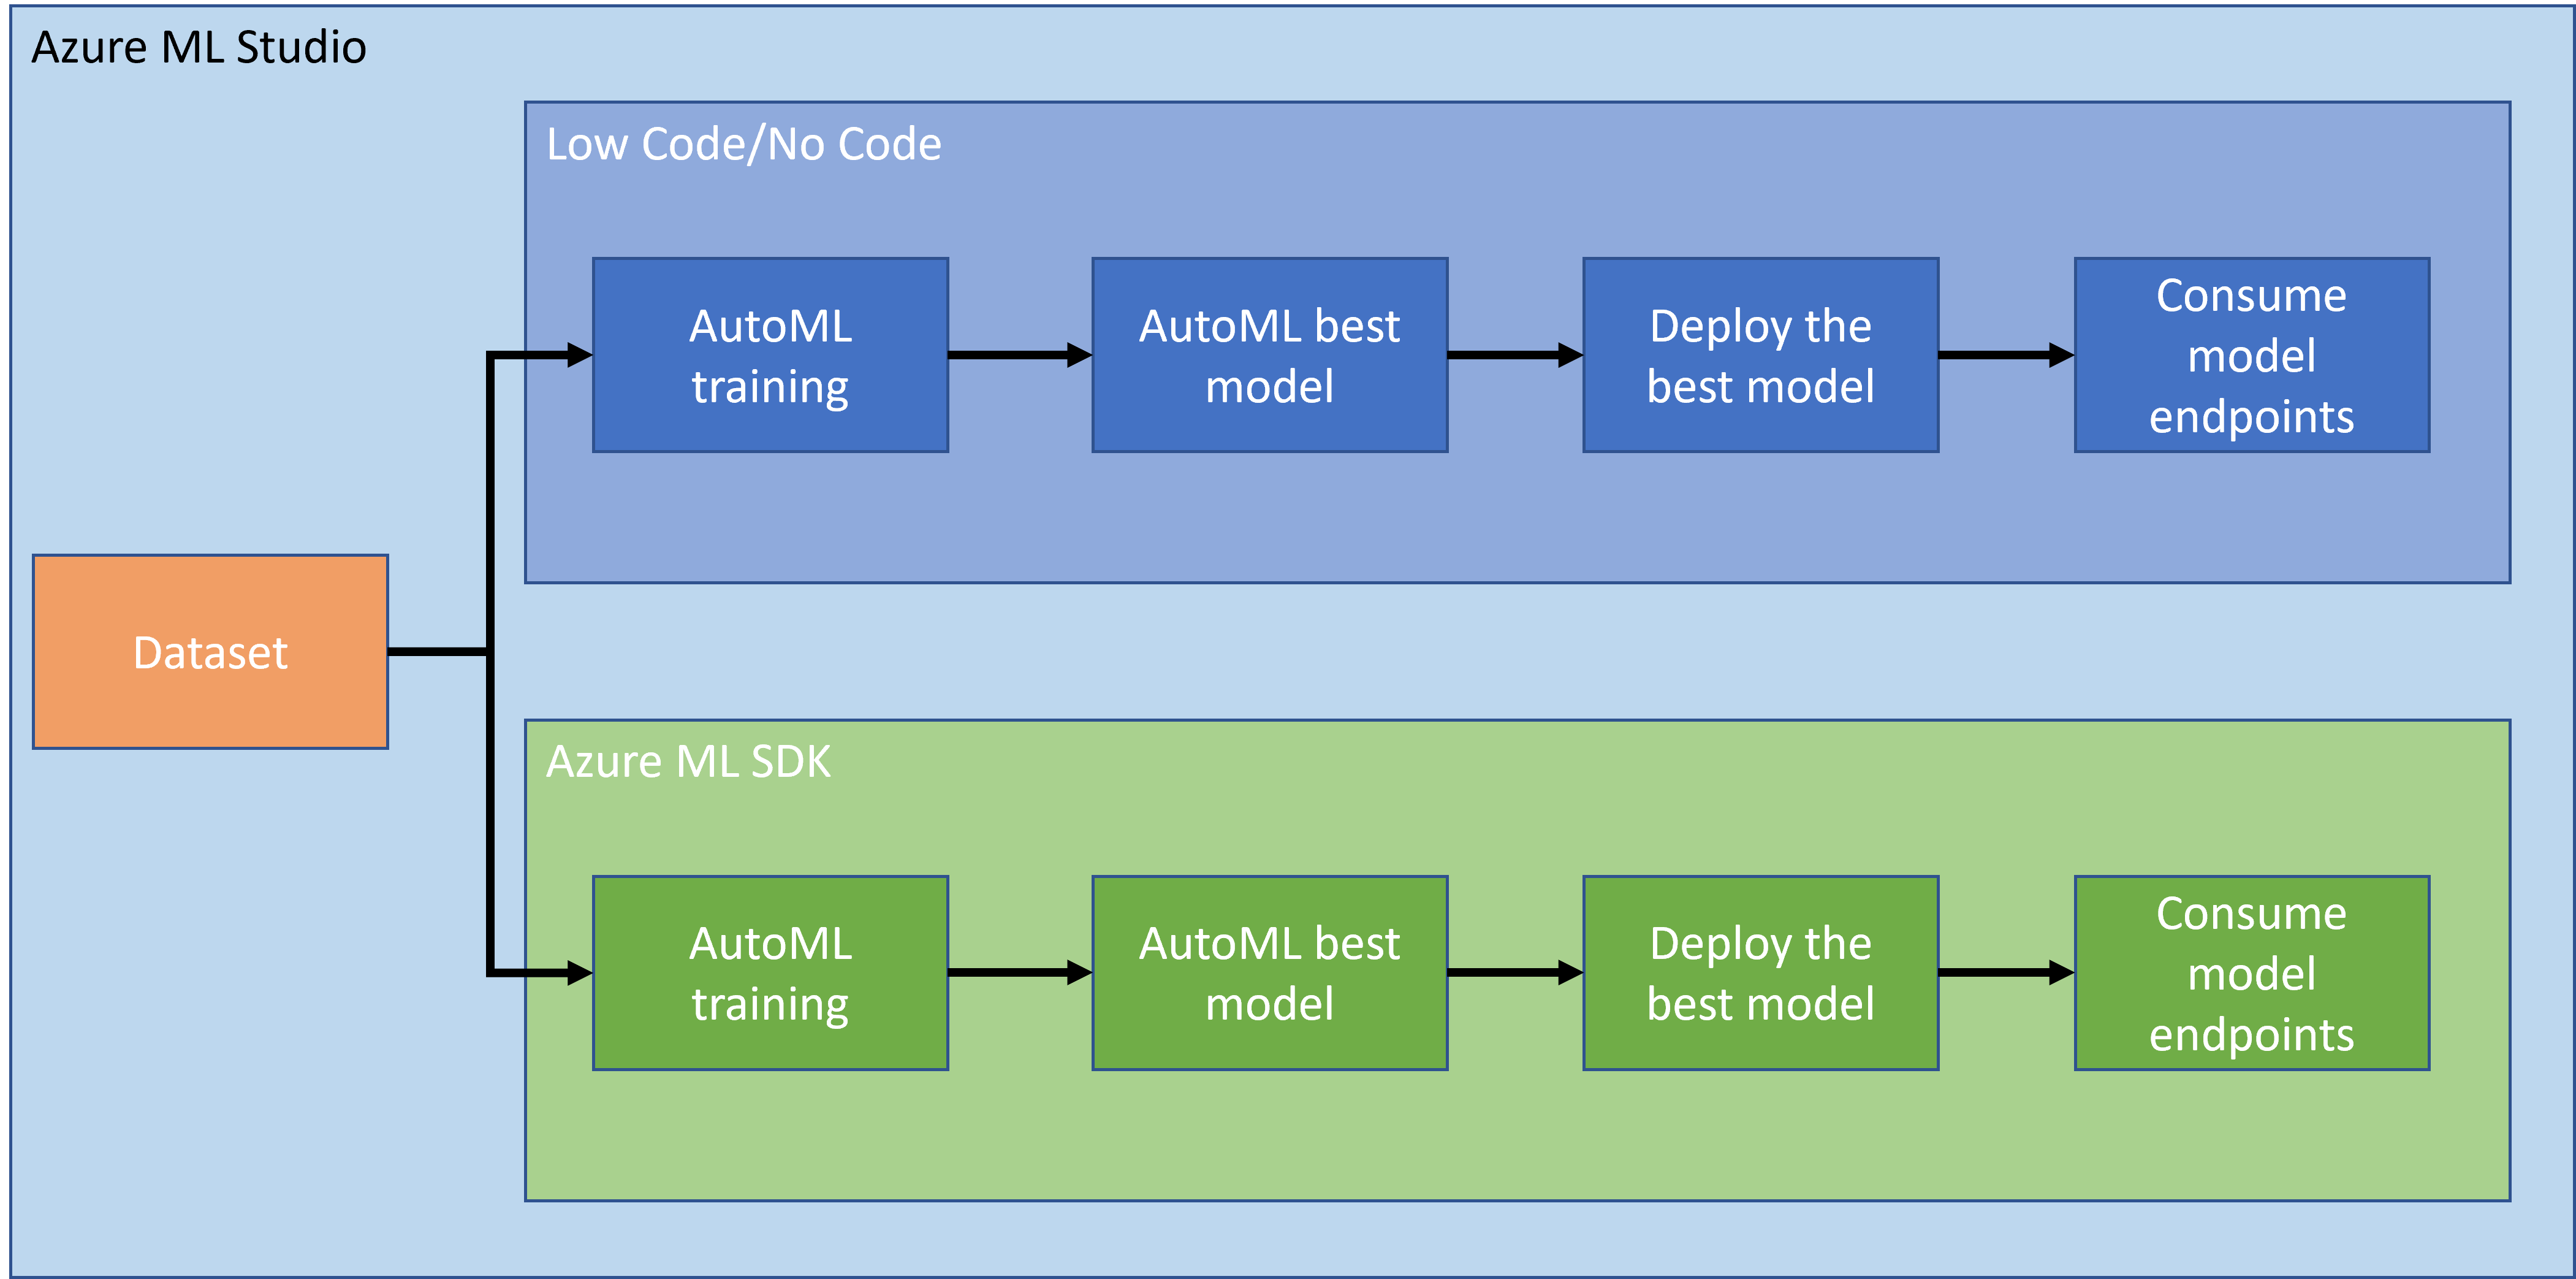
In the previous lesson, we learned how to train, deploy, and consume a model using a Low code/No code approach. We used the Heart Failure dataset to create a heart failure prediction model. In this lesson, we will achieve the same goal but using the Azure Machine Learning SDK.
1.2 Heart failure prediction project and dataset introduction
Refer to this section for an introduction to the Heart Failure prediction project and dataset.
2. Training a model with the Azure ML SDK
2.1 Create an Azure ML workspace
For simplicity, we will work in a Jupyter notebook. This assumes you already have a Workspace and a compute instance. If you already have a Workspace, you can skip to section 2.3 Notebook creation.
If not, follow the instructions in the section 2.1 Create an Azure ML workspace in the previous lesson to create a workspace.
2.2 Create a compute instance
In the Azure ML workspace we created earlier, go to the Compute menu to see the available compute resources.
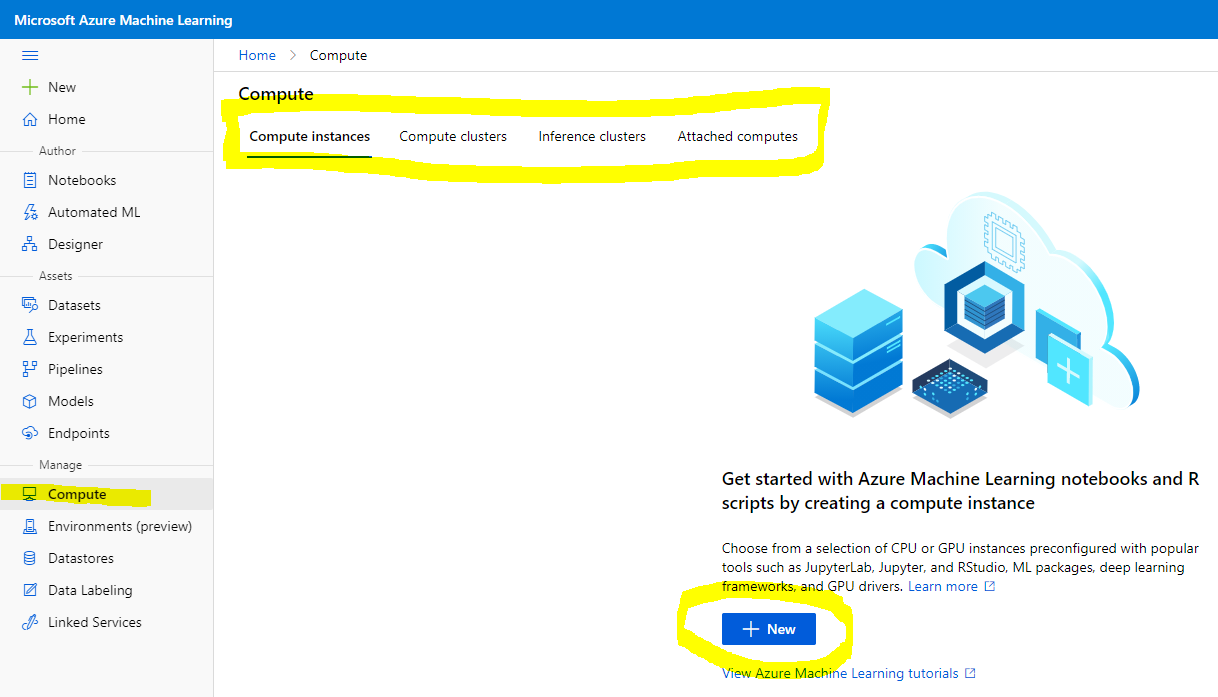
Let’s create a compute instance to host a Jupyter notebook.
- Click the + New button.
- Name your compute instance.
- Choose your options: CPU or GPU, VM size, and core count.
- Click the Create button.
Congratulations! You’ve created a compute instance. We’ll use this instance to create a Notebook in the Creating Notebooks section.
2.3 Loading the Dataset
If you haven’t uploaded the dataset yet, refer to the previous lesson in the section 2.3 Loading the Dataset.
2.4 Creating Notebooks
NOTE: For the next step, you can either create a new notebook from scratch or upload the notebook we created into your Azure ML Studio. To upload it, click on the "Notebook" menu and upload the file.
Notebooks are a crucial part of the data science process. They can be used for Exploratory Data Analysis (EDA), training models on a compute cluster, or deploying endpoints on an inference cluster.
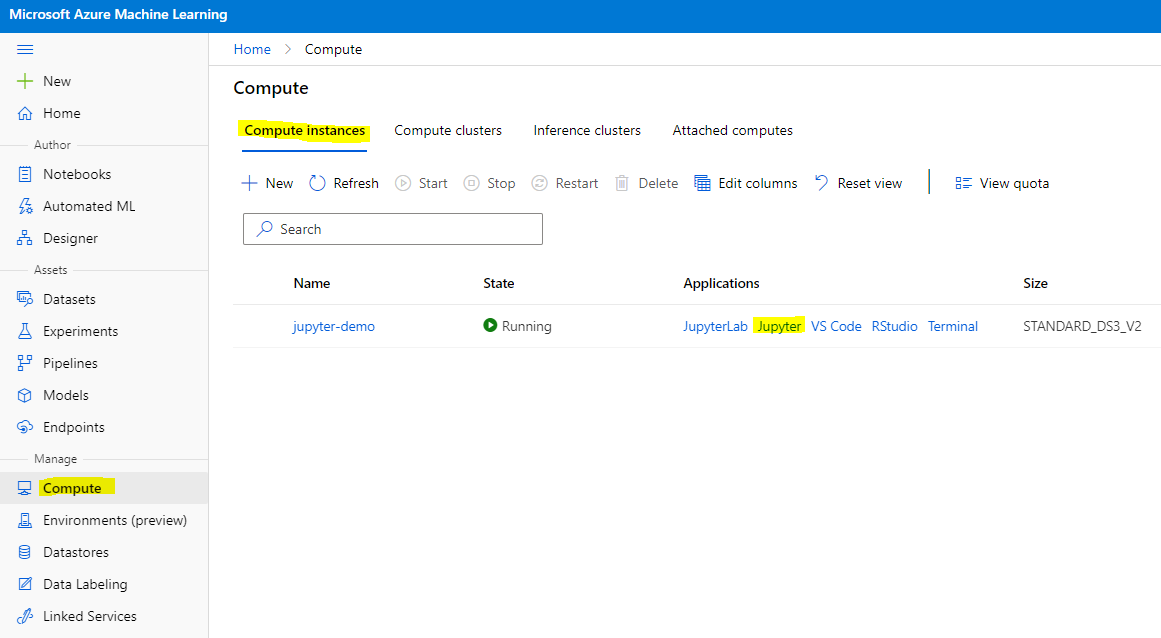
To create a Notebook, we need a compute node running the Jupyter notebook instance. Go back to the Azure ML workspace and click on Compute instances. In the list of compute instances, you should see the compute instance we created earlier.
- In the Applications section, click on the Jupyter option.
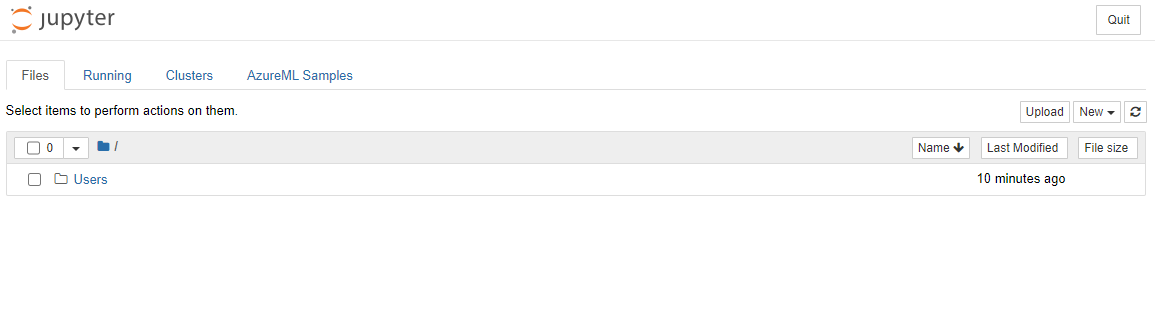
- Tick the "Yes, I understand" box and click Continue.
- This will open a new browser tab with your Jupyter notebook instance. Click the "New" button to create a notebook.
Now that we have a Notebook, we can start training the model with the Azure ML SDK.
2.5 Training a model
If you have any doubts, refer to the Azure ML SDK documentation. It contains all the necessary information about the modules we’ll use in this lesson.
2.5.1 Setup Workspace, experiment, compute cluster, and dataset
Load the workspace from the configuration file using the following code:
from azureml.core import Workspace
ws = Workspace.from_config()
This returns a Workspace object representing the workspace. Next, create an experiment using the following code:
from azureml.core import Experiment
experiment_name = 'aml-experiment'
experiment = Experiment(ws, experiment_name)
To get or create an experiment in a workspace, request the experiment by name. Experiment names must be 3-36 characters long, start with a letter or number, and only contain letters, numbers, underscores, and dashes. If the experiment doesn’t exist in the workspace, a new one is created.
Now, create a compute cluster for training using the following code. Note that this step may take a few minutes.
from azureml.core.compute import AmlCompute

aml_name = "heart-f-cluster"
try:
    aml_compute = AmlCompute(ws, aml_name)
    print('Found existing AML compute context.')
except:
    print('Creating new AML compute context.')
    aml_config = AmlCompute.provisioning_configuration(vm_size = "Standard_D2_v2", min_nodes=1, max_nodes=3)
    aml_compute = AmlCompute.create(ws, name = aml_name, provisioning_configuration = aml_config)
    aml_compute.wait_for_completion(show_output = True)

cts = ws.compute_targets
compute_target = cts[aml_name]
Retrieve the dataset from the workspace using its name:
dataset = ws.datasets['heart-failure-records']
df = dataset.to_pandas_dataframe()
df.describe()
2.5.2 AutoML Configuration and training
Set the AutoML configuration using the AutoMLConfig class.
As described in the documentation, there are many parameters you can configure. For this project, we’ll use the following:
experiment_timeout_minutes: Maximum time (in minutes) the experiment can run before stopping automatically.max_concurrent_iterations: Maximum number of concurrent training iterations allowed.primary_metric: The primary metric used to evaluate the experiment.compute_target: The Azure Machine Learning compute target for the experiment.task: The type of task to perform ('classification', 'regression', or 'forecasting').training_data: The training data, including features and a label column (optionally a sample weights column).label_column_name: The name of the label column.path: Full path to the Azure Machine Learning project folder.enable_early_stopping: Whether to stop early if the score doesn’t improve in the short term.featurization: Whether to perform automatic featurization or use custom settings.debug_log: Log file for debug information.
from azureml.train.automl import AutoMLConfig

project_folder = './aml-project'

automl_settings = {
    "experiment_timeout_minutes": 20,
    "max_concurrent_iterations": 3,
    "primary_metric" : 'AUC_weighted'
}

automl_config = AutoMLConfig(compute_target=compute_target,
                             task = "classification",
                             training_data=dataset,
                             label_column_name="DEATH_EVENT",
                             path = project_folder,
                             enable_early_stopping= True,
                             featurization= 'auto',
                             debug_log = "automl_errors.log",
                             **automl_settings
                            )
Once configured, train the model using the following code. This step may take up to an hour, depending on your cluster size.
remote_run = experiment.submit(automl_config)
Run the RunDetails widget to display the different experiments.
from azureml.widgets import RunDetails
RunDetails(remote_run).show()
3. Model deployment and endpoint consumption with the Azure ML SDK
3.1 Saving the best model
The remote_run is an object of type AutoMLRun. This object has a get_output() method that returns the best run and the corresponding fitted model.
best_run, fitted_model = remote_run.get_output()
You can view the parameters of the best model by printing the fitted_model and check its properties using the get_properties() method.
best_run.get_properties()
Register the model using the register_model method.
model_name = best_run.properties['model_name']
script_file_name = 'inference/score.py'
best_run.download_file('outputs/scoring_file_v_1_0_0.py', 'inference/score.py')
description = "aml heart failure project sdk"
model = best_run.register_model(model_name = model_name,
                                model_path = './outputs/',
                                description = description,
                                tags = None)
3.2 Model Deployment
Once the best model is saved, deploy it using the InferenceConfig class. InferenceConfig defines the settings for a custom environment used for deployment. The AciWebservice class represents a machine learning model deployed as a web service endpoint on Azure Container Instances. A deployed service is a load-balanced HTTP endpoint with a REST API. You can send data to this API and receive predictions from the model.
Deploy the model using the deploy method.
from azureml.core.model import InferenceConfig, Model
from azureml.core.webservice import AciWebservice

inference_config = InferenceConfig(entry_script=script_file_name, environment=best_run.get_environment())

aciconfig = AciWebservice.deploy_configuration(cpu_cores = 1,
                                               memory_gb = 1,
                                               tags = {'type': "automl-heart-failure-prediction"},
                                               description = 'Sample service for AutoML Heart Failure Prediction')

aci_service_name = 'automl-hf-sdk'
aci_service = Model.deploy(ws, aci_service_name, [model], inference_config, aciconfig)
aci_service.wait_for_deployment(True)
print(aci_service.state)
This step may take a few minutes.
3.3 Endpoint consumption
Consume your endpoint by creating a sample input:
data = {
    "data":
    [
        {
            'age': "60",
            'anaemia': "false",
            'creatinine_phosphokinase': "500",
            'diabetes': "false",
            'ejection_fraction': "38",
            'high_blood_pressure': "false",
            'platelets': "260000",
            'serum_creatinine': "1.40",
            'serum_sodium': "137",
            'sex': "false",
            'smoking': "false",
            'time': "130",
        },
    ],
}

test_sample = str.encode(json.dumps(data))
Then send this input to your model for prediction:
response = aci_service.run(input_data=test_sample)
response
This should output '{"result": [false]}'. This means that the patient input we sent to the endpoint generated the prediction false, indicating that this person is not likely to have a heart attack.
Congratulations! You have successfully used the model deployed and trained on Azure ML with the Azure ML SDK!
NOTE: Once you finish the project, remember to delete all the resources.
🚀 Challenge
There are many other things you can do with the SDK, but unfortunately, we can't cover them all in this lesson. The good news is that learning how to navigate the SDK documentation can help you explore further on your own. Check out the Azure ML SDK documentation and look for the Pipeline class, which allows you to create pipelines. A pipeline is a sequence of steps that can be executed as a workflow.
HINT: Visit the SDK documentation and use keywords like "Pipeline" in the search bar. You should find the azureml.pipeline.core.Pipeline class in the search results.
Post-lecture quiz
Review & Self Study
In this lesson, you learned how to train, deploy, and consume a model to predict heart failure risk using the Azure ML SDK in the cloud. Refer to this documentation for more details about the Azure ML SDK. Try creating your own model using the Azure ML SDK.
Assignment
Data Science project using Azure ML SDK
Disclaimer:
This document has been translated using the AI translation service Co-op Translator. While we strive for accuracy, please note that automated translations may contain errors or inaccuracies. The original document in its native language should be regarded as the authoritative source. For critical information, professional human translation is recommended. We are not responsible for any misunderstandings or misinterpretations resulting from the use of this translation.