9.4 KiB
<< Day 22 | Day 24 >>
Day 22
DOM(Document Object Model)-Day 3
Event Listeners
Common HTML events:onclick, onchange, onmouseover, onmouseout, onkeydown, onkeyup, onload. We can add event listener method to any DOM object. We use addEventListener() method to listen different event types on HTML elements. The addEventListener() method takes two arguments, an event listener and a callback function.
selectedElement.addEventListener('eventlistner', function(e) {
  // the activity you want to occur after the event will be in here
})
// or

selectedElement.addEventListener('eventlistner', e => {
  // the activity you want to occur after the event will be in here
})
Click
To attach an event listener to an element, first we select the element then we attach the addEventListener method. The event listener takes event type and callback functions as argument.
The following is an example of click type event.
Example: click
<!DOCTYPE html>
<html>
  <head>
    <title>Document Object Model</title>
  </head>

  <body>
    <button>Click Me</button>

    <script>
      const button = document.querySelector('button')
      button.addEventListener('click', e => {
        console.log('e gives the event listener object:', e)
        console.log('e.target gives the selected element: ', e.target)
        console.log(
          'e.target.textContent gives content of selected element: ',
          e.target.textContent
        )
      })
    </script>
  </body>
</html>
An event can be also attached directly to the HTML element as inline script.
Example: onclick
<!DOCTYPE html>
<html>
  <head>
    <title>Document Object Model</title>
  </head>

  <body>
    <button onclick="clickMe()">Click Me</button>
    <script>
      const clickMe = () => {
        alert('We can attach event on HTML element')
      }
    </script>
  </body>
</html>
Double Click
To attach an event listener to an element, first we select the element then we attach the addEventListener method. The event listener takes event type and callback functions as argument.
The following is an example of click type event. Example: dblclick
<!DOCTYPE html>
<html>
  <head>
    <title>Document Object Model</title>
  </head>

  <body>
    <button>Click Me</button>

    <script>
      const button = document.querySelector('button')
      button.addEventListener('dblclick', e => {
        console.log('e gives the event listener object:', e)
        console.log('e.target gives the selected element: ', e.target)
        console.log(
          'e.target.textContent gives content of selected element: ',
          e.target.textContent
        )
      })
    </script>
  </body>
</html>
Mouse enter
To attach an event listener to an element, first we select the element then we attach the addEventListener method. The event listener takes event type and callback functions as argument.
The following is an example of click type event.
Example: mouseenter
<!DOCTYPE html>
<html>
  <head>
    <title>Document Object Model</title>
  </head>

  <body>
    <button>Click Me</button>

    <script>
      const button = document.querySelector('button')
      button.addEventListener('mouseenter', e => {
        console.log('e gives the event listener object:', e)
        console.log('e.target gives the selected element: ', e.target)
        console.log(
          'e.target.textContent gives content of selected element: ',
          e.target.textContent
        )
      })
    </script>
  </body>
</html>
By now you are familiar with addEventListen method and how to attach event listener. There are many types of event listeners. But in this challenge we will focus the most common important events. List of events:
- click - when the element clicked
- dbclick - when the element double clicked
- mouseenter - when the mouse point enter to the element
- mouseleave - when the mouse pointer leave the element
- mousemove - when the mouse pointer move on the element
- mouseover - when the mouse pointer move on the element
- mouseout -when the mouse pointer out from the element
- input -when value enter to input field
- change -when value change on input field
- blur -when the element is not focused
- keydown - when a key is down
- keyup - when a key is up
- keypress - when we press any key
- onload - when the browser has finished loading a page
Test the above event types by replacing event type in the above snippet code.
Getting value from an input element
We usually fill forms and forms accept data. Form fields are created using input HTML element. Let us build a small application which allow us to calculate body mas index of a person using two input fields, one button and one p tag.
input value
<!DOCTYPE html>
<html>
  <head>
    <title>Document Object Model:30 Days Of JavaScript</title>
  </head>

  <body>
    <h1>Body Mass Index Calculator</h1>

    <input type="text" id="mass" placeholder="Mass in Kilogram" />
    <input type="text" id="height" placeholder="Height in meters" />
    <button>Calculate BMI</button>

    <script>
      const mass = document.querySelector('#mass')
      const height = document.querySelector('#height')
      const button = document.querySelector('button')

      let bmi
      button.addEventListener('click', () => {
        bmi = mass.value / height.value ** 2
        alert(`your bmi is ${bmi.toFixed(2)}`)
        console.log(bmi)
      })
    </script>
  </body>
</html>
input event and change
In the above example, we managed to get input values from two input fields by clicking button. How about if we want to get value without click the button. We can use the change or input event type to get data right away from the input field when the field is on focus. Let us see how we will handle that.
<!DOCTYPE html>
<html>
  <head>
    <title>Document Object Model:30 Days Of JavaScript</title>
  </head>

  <body>
    <h1>Data Binding using input or change event</h1>

    <input type="text" placeholder="say something" />
    <p></p>

    <script>
      const input = document.querySelector('input')
      const p = document.querySelector('p')

      input.addEventListener('input', e => {
        p.textContent = e.target.value
      })
    </script>
  </body>
</html>
blur event
In contrast to input or change, the blur event occur when the input field is not on focus.
<!DOCTYPE html>
<html>

<head>
    <title>Document Object Model:30 Days Of JavaScript</title>
</head>

<body>
    <h1>Giving feedback using blur event</h1>

    <input type="text" id="mass" placeholder="say something" />
    <p></p>

    <script>
        const input = document.querySelector('input')
        const p = document.querySelector('p')

        input.addEventListener('blur', (e) => {
            p.textContent = 'Field is required'
            p.style.color = 'red'

        })
    </script>
</body>

</html>
keypress, keydow and keyup
We can access all the key numbers of the keyboard using different event listener types. Let us use keypress and get the keyCode of each keyboard keys.
<!DOCTYPE html>
<html>
  <head>
    <title>Document Object Model:30 Days Of JavaScript</title>
  </head>

  <body>
    <h1>Key events: Press any key</h1>

    <script>
      document.body.addEventListener('keypress', e => {
        alert(e.keyCode)
      })
    </script>
  </body>
</html>
🌕 You are so special, you are progressing everyday. Now, you knew how handle any kind of DOM events. . You are left with only seven days to your way to greatness. Now do some exercises for your brain and for your muscle.
Exercises
Exercise: Level 1
- Generating numbers and marking evens, odds and prime numbers with three different colors. See the image below.
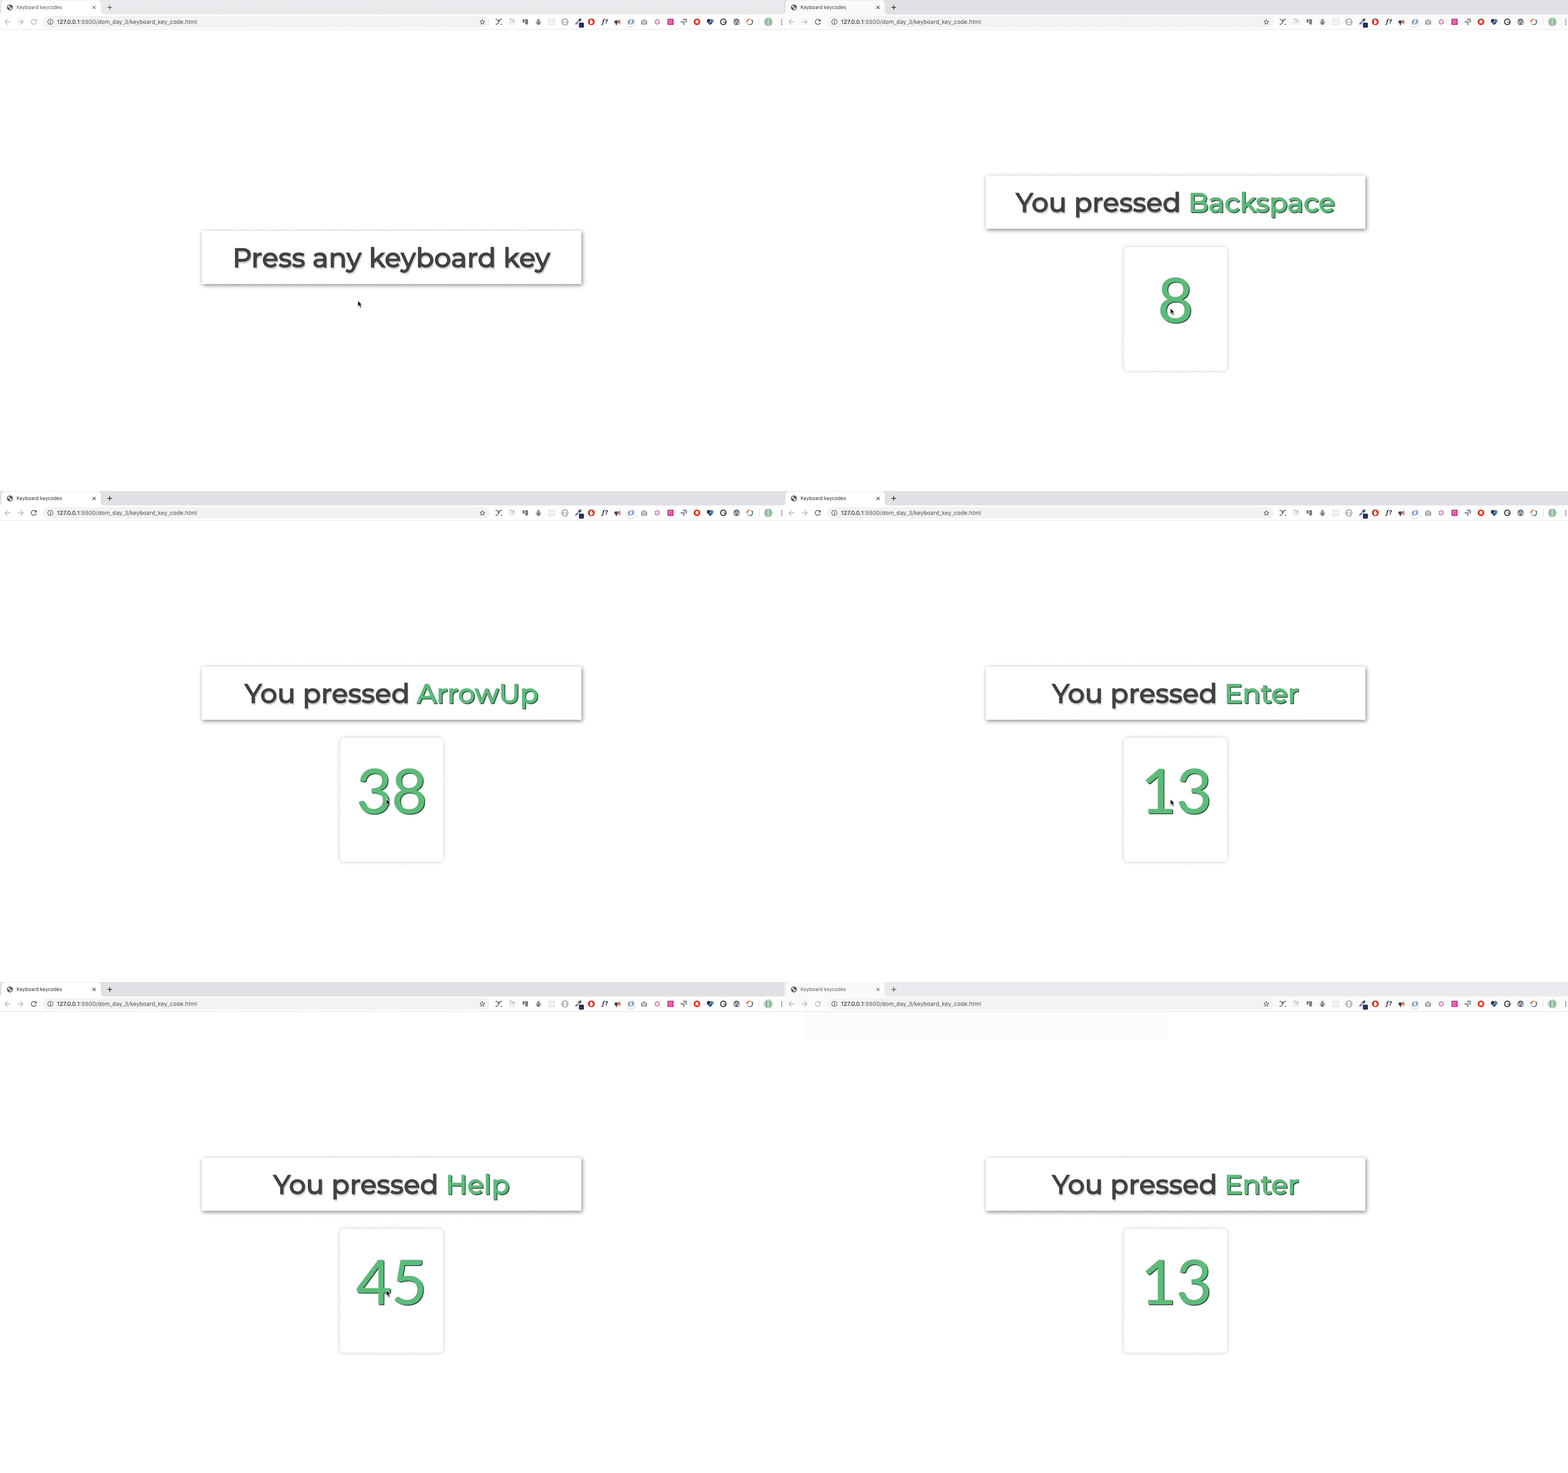
- Generating the keyboard code code using even listener. The image below.
🎉 CONGRATULATIONS ! 🎉
<< Day 22 | Day 24 >>


