78 KiB
建立一個 AI 聊天助手
還記得《星際迷航》中,船員隨意與船上的電腦交談,提出複雜的問題並獲得深思熟慮的回答嗎?在 1960 年代看似純粹的科幻情節,現在你可以使用已知的網頁技術來實現。
在這堂課中,我們將使用 HTML、CSS、JavaScript 和一些後端整合來創建一個 AI 聊天助手。你會發現,自己所學的技能如何與強大的 AI 服務相結合,從而理解上下文並生成有意義的回答。
可以把 AI 想像成一個龐大的圖書館,它不僅能找到信息,還能根據你的具體問題將信息合成為連貫的答案。與其在成千上萬的頁面中搜索,你可以直接獲得有針對性的上下文回答。
整合過程是通過熟悉的網頁技術共同完成的。HTML 創建聊天界面,CSS 處理視覺設計,JavaScript 管理用戶交互,而後端 API 將所有內容連接到 AI 服務。這就像樂團的不同部分共同合作創造交響樂一樣。
我們本質上是在構建自然人類交流與機器處理之間的橋樑。你將學習 AI 服務整合的技術實現以及使交互感覺直觀的設計模式。
在課程結束時,AI 整合將不再是一個神秘的過程,而是另一個你可以使用的 API。你將了解支持像 ChatGPT 和 Claude 這樣的應用程序的基礎模式,並使用你一直在學習的網頁開發原則。
以下是完成的項目外觀:

理解 AI:從神秘到掌握
在深入編碼之前,讓我們先了解一下我們正在處理的內容。如果你之前使用過 API,你應該知道基本模式:發送請求,接收回應。
AI API 遵循類似的結構,但它們不是從數據庫中檢索預存數據,而是根據從大量文本中學到的模式生成新的回答。可以將其想像成圖書館目錄系統與能夠從多個來源合成信息的知識豐富的圖書館員之間的區別。
那麼什麼是「生成式 AI」?
想想羅塞塔石碑如何幫助學者通過找到已知和未知語言之間的模式來理解埃及象形文字。AI 模型的工作方式類似——它們在大量文本中尋找模式以理解語言的運作方式,然後使用這些模式生成適合新問題的回答。
讓我用一個簡單的比較來解釋:
- 傳統數據庫:就像索取你的出生證明——每次都會得到完全相同的文件
- 搜索引擎:就像請圖書館員找關於貓的書——他們會展示可用的內容
- 生成式 AI:就像問一位知識豐富的朋友關於貓的事情——他們會用自己的話告訴你有趣的事情,並根據你的需求量身定制回答
graph LR
    A[Your Question] --> B[AI Model]
    B --> C[Pattern Recognition]
    C --> D[Content Generation]
    D --> E[Contextual Response]

    F[Training Data<br/>Books, Articles, Web] --> B
AI 模型如何學習(簡化版)
AI 模型通過接觸包含書籍、文章和對話的海量數據集進行學習。在此過程中,它們識別出以下模式:
- 書面交流中思想的結構
- 哪些詞語通常一起出現
- 對話通常如何進行
- 正式與非正式交流之間的上下文差異
這類似於考古學家解讀古代語言的方式:他們分析數千個例子以理解語法、詞彙和文化背景,最終能夠使用這些學到的模式解釋新文本。
為什麼選擇 GitHub Models?
我們選擇 GitHub Models 是出於非常實際的原因——它讓我們能夠訪問企業級 AI,而無需自己設置 AI 基礎設施(相信我,現在你不會想自己設置!)。這就像使用天氣 API,而不是自己設置氣象站來預測天氣。
這基本上是「AI 即服務」,最棒的是?它可以免費開始使用,因此你可以放心地進行實驗,而不必擔心產生巨額費用。
graph LR
    A[Frontend Chat UI] --> B[Your Backend API]
    B --> C[GitHub Models API]
    C --> D[AI Model Processing]
    D --> C
    C --> B
    B --> A
我們將使用 GitHub Models 進行後端整合,通過一個對開發者友好的界面提供專業級的 AI 功能。GitHub Models Playground 是一個測試環境,你可以在其中試驗不同的 AI 模型並了解它們的功能,然後再在代碼中實現它們。

Playground 的實用之處:
- 嘗試不同的 AI 模型,例如 GPT-4o-mini、Claude 等(全部免費!)
- 測試你的想法和提示,然後再編寫任何代碼
- 獲取你喜愛的編程語言的即用型代碼片段
- 調整創意水平和回答長度等設置,看看它們如何影響輸出
玩了一會兒後,只需點擊「Code」選項卡,選擇你的編程語言,即可獲得所需的實現代碼。

設置 Python 後端整合
現在讓我們使用 Python 實現 AI 整合。Python 因其簡單的語法和強大的庫而非常適合 AI 應用。我們將從 GitHub Models playground 的代碼開始,然後將其重構為可重用的生產級函數。
理解基本實現
當你從 playground 獲取 Python 代碼時,你會得到類似以下的內容。如果一開始看起來有點多,別擔心——我們會逐步解析:
"""Run this model in Python

> pip install openai
"""
import os
from openai import OpenAI

# To authenticate with the model you will need to generate a personal access token (PAT) in your GitHub settings.
# Create your PAT token by following instructions here: https://docs.github.com/en/authentication/keeping-your-account-and-data-secure/managing-your-personal-access-tokens
client = OpenAI(
    base_url="https://models.github.ai/inference",
    api_key=os.environ["GITHUB_TOKEN"],
)

```python
response = client.chat.completions.create(
    messages=[
        {
            "role": "system",
            "content": "",
        },
        {
            "role": "user",
            "content": "What is the capital of France?",
        }
    ],
    model="openai/gpt-4o-mini",
    temperature=1,
    max_tokens=4096,
    top_p=1
)

print(response.choices[0].message.content)
這段代碼的作用:
- 我們導入所需的工具:
os用於讀取環境變量,OpenAI用於與 AI 通信 - 我們設置 OpenAI 客戶端指向 GitHub 的 AI 服務器,而不是直接指向 OpenAI
- 我們進行身份驗證,使用特殊的 GitHub 令牌(稍後會詳細介紹!)
- 我們結構化我們的對話,使用不同的「角色」——可以將其想像成為戲劇設置場景
- 我們發送帶有一些微調參數的請求給 AI
- 我們提取從返回的所有數據中提取實際的回答文本
理解消息角色:AI 對話框架
AI 對話使用特定的結構,其中不同的「角色」具有不同的目的:
messages=[
    {
        "role": "system",
        "content": "You are a helpful assistant who explains things simply."
    },
    {
        "role": "user",
        "content": "What is machine learning?"
    }
]
可以將其想像成為指導一場戲劇:
- 系統角色:就像給演員的舞台指導——告訴 AI 如何表現,擁有什麼樣的個性,以及如何回答
- 用戶角色:應用程序用戶的實際問題或消息
- 助手角色:AI 的回答(你不需要發送這個,但它會出現在對話歷史中)
現實生活中的類比:想像你在派對上向某人介紹一位朋友:
- 系統消息:這是我的朋友 Sarah,她是一位擅長用簡單術語解釋醫學概念的醫生
- 用戶消息:你能解釋一下疫苗是如何工作的嗎?
- 助手回答:Sarah 以友好的醫生身份回答,而不是以律師或廚師的身份回答
理解 AI 參數:微調回答行為
AI API 調用中的數值參數控制模型生成回答的方式。這些設置允許你根據不同的使用場景調整 AI 的行為:
溫度 (0.0 到 2.0):創意調節器
作用:控制 AI 回答的創意性或可預測性。
可以將其想像成爵士音樂家的即興演奏水平:
- 溫度 = 0.1:每次都演奏完全相同的旋律(高度可預測)
- 溫度 = 0.7:在保持可識別的基礎上添加一些有品味的變化(平衡的創意性)
- 溫度 = 1.5:完全的實驗性爵士樂,帶有意想不到的轉折(高度不可預測)
# Very predictable responses (good for factual questions)
response = client.chat.completions.create(
    messages=[{"role": "user", "content": "What is 2+2?"}],
    temperature=0.1  # Will almost always say "4"
)

# Creative responses (good for brainstorming)
response = client.chat.completions.create(
    messages=[{"role": "user", "content": "Write a creative story opening"}],
    temperature=1.2  # Will generate unique, unexpected stories
)
最大 Token 數 (1 到 4096+): 回答長度控制器
作用:設置 AI 回答的最大長度。
可以將 Token 大致等同於單詞(在英語中約 1 個 Token = 0.75 個單詞):
- max_tokens=50:簡短精煉(像短信)
- max_tokens=500:一兩段文字
- max_tokens=2000:詳細的解釋,附帶示例
# Short, concise answers
response = client.chat.completions.create(
    messages=[{"role": "user", "content": "Explain JavaScript"}],
    max_tokens=100  # Forces a brief explanation
)

# Detailed, comprehensive answers
response = client.chat.completions.create(
    messages=[{"role": "user", "content": "Explain JavaScript"}],
    max_tokens=1500  # Allows for detailed explanations with examples
)
Top_p (0.0 到 1.0):專注參數
作用:控制 AI 在最可能的回答上保持專注的程度。
想像 AI 擁有一個巨大的詞彙表,按每個詞的可能性排序:
- top_p=0.1:僅考慮最可能的前 10% 詞語(非常專注)
- top_p=0.9:考慮 90% 的可能詞語(更具創意)
- top_p=1.0:考慮所有詞語(最大多樣性)
例如:如果你問「天空通常是...」
- 低 top_p:幾乎肯定會回答「藍色」
- 高 top_p:可能回答「藍色」、「多雲」、「廣闊」、「變化」、「美麗」等
整合所有內容:不同使用場景的參數組合
# For factual, consistent answers (like a documentation bot)
factual_params = {
    "temperature": 0.2,
    "max_tokens": 300,
    "top_p": 0.3
}

# For creative writing assistance
creative_params = {
    "temperature": 1.1,
    "max_tokens": 1000,
    "top_p": 0.9
}

# For conversational, helpful responses (balanced)
conversational_params = {
    "temperature": 0.7,
    "max_tokens": 500,
    "top_p": 0.8
}
理解這些參數的重要性:不同的應用需要不同類型的回答。一個客戶服務機器人應該是一致且事實性的(低溫度),而一個創意寫作助手應該是富有想像力且多樣化的(高溫度)。理解這些參數可以讓你控制 AI 的個性和回答風格。
**Here's what's happening in this code:**
- **We import** the tools we need: `os` for reading environment variables and `OpenAI` for talking to the AI
- **We set up** the OpenAI client to point to GitHub's AI servers instead of OpenAI directly
- **We authenticate** using a special GitHub token (more on that in a minute!)
- **We structure** our conversation with different "roles" – think of it like setting the scene for a play
- **We send** our request to the AI with some fine-tuning parameters
- **We extract** the actual response text from all the data that comes back

> 🔐 **Security Note**: Never hardcode API keys in your source code! Always use environment variables to store sensitive credentials like your `GITHUB_TOKEN`.

### Creating a Reusable AI Function

Let's refactor this code into a clean, reusable function that we can easily integrate into our web application:

```python
import asyncio
from openai import AsyncOpenAI

# Use AsyncOpenAI for better performance
client = AsyncOpenAI(
    base_url="https://models.github.ai/inference",
    api_key=os.environ["GITHUB_TOKEN"],
)

async def call_llm_async(prompt: str, system_message: str = "You are a helpful assistant."):
    """
    Sends a prompt to the AI model asynchronously and returns the response.

    Args:
        prompt: The user's question or message
        system_message: Instructions that define the AI's behavior and personality

    Returns:
        str: The AI's response to the prompt
    """
    try:
        response = await client.chat.completions.create(
            messages=[
                {
                    "role": "system",
                    "content": system_message,
                },
                {
                    "role": "user",
                    "content": prompt,
                }
            ],
            model="openai/gpt-4o-mini",
            temperature=1,
            max_tokens=4096,
            top_p=1
        )
        return response.choices[0].message.content
    except Exception as e:
        logger.error(f"AI API error: {str(e)}")
        return "I'm sorry, I'm having trouble processing your request right now."

# Backward compatibility function for synchronous calls
def call_llm(prompt: str, system_message: str = "You are a helpful assistant."):
    """Synchronous wrapper for async AI calls."""
    return asyncio.run(call_llm_async(prompt, system_message))
理解這個改進的函數:
- 接受兩個參數:用戶的提示和可選的系統消息
- 提供一個默認的系統消息,用於一般的助手行為
- 使用適當的 Python 類型提示,以改善代碼文檔
- 僅返回回答內容,使其易於在我們的 Web API 中使用
- 保持相同的模型參數,以確保 AI 行為的一致性
系統提示的魔力:編程 AI 的個性
如果說參數控制 AI 的思維方式,那麼系統提示則控制 AI 認為自己是誰。這是使用 AI 最酷的部分之一——你基本上是在給 AI 設定一個完整的個性、專業水平和交流風格。
可以將系統提示想像成為不同角色選擇的演員:與其擁有一個通用助手,你可以為不同的情境創建專業的專家。需要一位耐心的老師?一位創意的頭腦風暴夥伴?一位不拖泥帶水的商業顧問?只需更改系統提示!
為什麼系統提示如此強大
有趣的部分是:AI 模型已經在無數的對話中進行了訓練,這些對話中人們採用了不同的角色和專業水平。當你給 AI 一個特定角色時,就像打開了一個開關,激活了所有這些學到的模式。
這就像 AI 的方法演技:告訴一位演員「你是一位睿智的老教授」,然後看著他們自動調整姿勢、詞彙和舉止。AI 在語言模式上也有類似的表現。
設計有效的系統提示:藝術與科學
優秀系統提示的結構:
- 角色/身份:AI 是誰?
- 專業知識:它知道什麼?
- 交流風格:它如何說話?
- 具體指示:它應該專注於什麼?
# ❌ Vague system prompt
"You are helpful."

# ✅ Detailed, effective system prompt
"You are Dr. Sarah Chen, a senior software engineer with 15 years of experience at major tech companies. You explain programming concepts using real-world analogies and always provide practical examples. You're patient with beginners and enthusiastic about helping them understand complex topics."
帶有上下文的系統提示示例
讓我們看看不同的系統提示如何創造完全不同的 AI 個性:
# Example 1: The Patient Teacher
teacher_prompt = """
You are an experienced programming instructor who has taught thousands of students.
You break down complex concepts into simple steps, use analogies from everyday life,
and always check if the student understands before moving on. You're encouraging
and never make students feel bad for not knowing something.
"""

# Example 2: The Creative Collaborator
creative_prompt = """
You are a creative writing partner who loves brainstorming wild ideas. You're
enthusiastic, imaginative, and always build on the user's ideas rather than
replacing them. You ask thought-provoking questions to spark creativity and
offer unexpected perspectives that make stories more interesting.
"""

# Example 3: The Strategic Business Advisor
business_prompt = """
You are a strategic business consultant with an MBA and 20 years of experience
helping startups scale. You think in frameworks, provide structured advice,
and always consider both short-term tactics and long-term strategy. You ask
probing questions to understand the full business context before giving advice.
"""
看看系統提示的效果
讓我們用不同的系統提示測試同一個問題,看看顯著的差異:
問題:「如何在我的網頁應用中處理用戶身份驗證?」
# With teacher prompt:
teacher_response = call_llm(
    "How do I handle user authentication in my web app?",
    teacher_prompt
)
# Typical response: "Great question! Let's break authentication down into simple steps.
# Think of it like a nightclub bouncer checking IDs..."

# With business prompt:
business_response = call_llm(
    "How do I handle user authentication in my web app?",
    business_prompt
)
# Typical response: "From a strategic perspective, authentication is crucial for user
# trust and regulatory compliance. Let me outline a framework considering security,
# user experience, and scalability..."
高級系統提示技巧
1. 上下文設置:提供 AI 背景信息
system_prompt = """
You are helping a junior developer who just started their first job at a startup.
They know basic HTML/CSS/JavaScript but are new to backend development and databases.
Be encouraging and explain things step-by-step without being condescending.
"""
2. 輸出格式化:告訴 AI 如何結構化回答
system_prompt = """
You are a technical mentor. Always structure your responses as:
1. Quick Answer (1-2 sentences)
2. Detailed Explanation
3. Code Example
4. Common Pitfalls to Avoid
5. Next Steps for Learning
"""
3. 限制設置:定義 AI 不應該做什麼
system_prompt = """
You are a coding tutor focused on teaching best practices. Never write complete
solutions for the user - instead, guide them with hints and questions so they
learn by doing. Always explain the 'why' behind coding decisions.
"""
為什麼這對你的聊天助手很重要
理解系統提示可以讓你擁有創建專業化 AI 助手的巨大能力:
- 客戶服務機器人:樂於助人、有耐心、熟悉政策
- 學習導師:鼓勵、循序漸進、檢查理解
- 創意夥伴:富有想像力、基於想法進行構建、提出「如果...」的問題
- 技術專家:精確、詳細、注重安全
關鍵洞察:你不僅僅是在調用一個 AI API——你是在創建一個定制的 AI 個性,以服務於你的特定使用場景。這就是現代 AI 應用感覺量身定制且有用的原因。
使用 FastAPI 構建 Web API:你的高效 AI 通信中心
現在,讓我們構建一個後端,將你的前端與 AI 服務連接起來。我們將使用 FastAPI,一個現代的 Python 框架,非常適合用於構建 AI 應用的 API。
FastAPI 為此類項目提供了多種優勢:內置的異步支持以處理並發請求、自動生成 API 文檔以及卓越的性能。你的 FastAPI 服務器充當中介,接收來自前端的請求,與 AI 服務通信,並返回格式化的回答。
為什麼選擇 FastAPI 用於 AI 應用?
你可能會問:「我不能直接從前端 JavaScript 調用 AI 嗎?」或者「為什麼選擇 FastAPI 而不是 Flask 或 Django?」這些都是很好的問題! 以下是為什麼 FastAPI 非常適合我們正在構建的項目:
- 預設支援非同步:可以同時處理多個 AI 請求而不會卡住
- 自動生成文件:訪問
/docs即可免費獲得美觀且互動的 API 文件頁面 - 內建驗證:在錯誤引發問題之前就能捕捉到
- 速度極快:Python 框架中速度最快之一
- 現代化 Python:使用最新最棒的 Python 特性
以下是為什麼我們需要後端的原因:
安全性:你的 AI API 金鑰就像密碼一樣——如果你將它放在前端的 JavaScript 中,任何查看你網站源代碼的人都可以竊取它並使用你的 AI 點數。後端可以保護敏感的憑證。
速率限制與控制:後端可以控制用戶請求的頻率,實現用戶身份驗證,並添加日誌記錄以追蹤使用情況。
數據處理:你可能需要保存對話、過濾不適當的內容,或整合多個 AI 服務。這些邏輯都在後端完成。
架構類似於客戶端-伺服器模型:
- 前端:用戶交互界面層
- 後端 API:請求處理與路由層
- AI 服務:外部計算與響應生成
- 環境變數:安全配置與憑證存儲
理解請求-響應流程
讓我們追蹤用戶發送消息時的過程:
sequenceDiagram
    participant User as 👤 User
    participant Frontend as 🌐 Frontend
    participant API as 🔧 FastAPI Server
    participant AI as 🤖 AI Service

    User->>Frontend: Types "Hello AI!"
    Frontend->>API: POST /hello {"message": "Hello AI!"}
    Note over API: Validates request<br/>Adds system prompt
    API->>AI: Sends formatted request
    AI->>API: Returns AI response
    Note over API: Processes response<br/>Logs conversation
    API->>Frontend: {"response": "Hello! How can I help?"}
    Frontend->>User: Displays AI message
理解每個步驟:
- 用戶交互:用戶在聊天界面輸入消息
- 前端處理:JavaScript 捕捉輸入並將其格式化為 JSON
- API 驗證:FastAPI 使用 Pydantic 模型自動驗證請求
- AI 整合:後端添加上下文(系統提示)並調用 AI 服務
- 響應處理:API 接收 AI 響應並在需要時進行修改
- 前端顯示:JavaScript 在聊天界面顯示響應
理解 API 架構
sequenceDiagram
    participant Frontend
    participant FastAPI
    participant AI Function
    participant GitHub Models

    Frontend->>FastAPI: POST /hello {"message": "Hello AI!"}
    FastAPI->>AI Function: call_llm(message, system_prompt)
    AI Function->>GitHub Models: API request
    GitHub Models->>AI Function: AI response
    AI Function->>FastAPI: response text
    FastAPI->>Frontend: {"response": "Hello! How can I help?"}
創建 FastAPI 應用
讓我們一步步構建 API。創建一個名為 api.py 的文件,並添加以下 FastAPI 代碼:
# api.py
from fastapi import FastAPI, HTTPException
from fastapi.middleware.cors import CORSMiddleware
from pydantic import BaseModel
from llm import call_llm
import logging

# Configure logging
logging.basicConfig(level=logging.INFO)
logger = logging.getLogger(__name__)

# Create FastAPI application
app = FastAPI(
    title="AI Chat API",
    description="A high-performance API for AI-powered chat applications",
    version="1.0.0"
)

# Configure CORS
app.add_middleware(
    CORSMiddleware,
    allow_origins=["*"],  # Configure appropriately for production
    allow_credentials=True,
    allow_methods=["*"],
    allow_headers=["*"],
)

# Pydantic models for request/response validation
class ChatMessage(BaseModel):
    message: str

class ChatResponse(BaseModel):
    response: str

@app.get("/")
async def root():
    """Root endpoint providing API information."""
    return {
        "message": "Welcome to the AI Chat API",
        "docs": "/docs",
        "health": "/health"
    }

@app.get("/health")
async def health_check():
    """Health check endpoint."""
    return {"status": "healthy", "service": "ai-chat-api"}

@app.post("/hello", response_model=ChatResponse)
async def chat_endpoint(chat_message: ChatMessage):
    """Main chat endpoint that processes messages and returns AI responses."""
    try:
        # Extract and validate message
        message = chat_message.message.strip()
        if not message:
            raise HTTPException(status_code=400, detail="Message cannot be empty")

        logger.info(f"Processing message: {message[:50]}...")

        # Call AI service (note: call_llm should be made async for better performance)
        ai_response = await call_llm_async(message, "You are a helpful and friendly assistant.")

        logger.info("AI response generated successfully")
        return ChatResponse(response=ai_response)

    except HTTPException:
        raise
    except Exception as e:
        logger.error(f"Error processing chat message: {str(e)}")
        raise HTTPException(status_code=500, detail="Internal server error")

if __name__ == "__main__":
    import uvicorn
    uvicorn.run(app, host="0.0.0.0", port=5000, reload=True)
理解 FastAPI 的實現:
- 導入 FastAPI 提供現代化的 Web 框架功能,Pydantic 用於數據驗證
- 創建自動 API 文件(服務運行時可在
/docs訪問) - 啟用 CORS 中間件以允許來自不同來源的前端請求
- 定義 Pydantic 模型以自動進行請求/響應驗證和文件生成
- 使用非同步端點以提高多請求並發處理性能
- 實現正確的 HTTP 狀態碼和通過 HTTPException 處理錯誤
- 包含結構化日誌記錄以進行監控和調試
- 提供健康檢查端點以監控服務狀態
FastAPI 相比傳統框架的主要優勢:
- 自動驗證:Pydantic 模型在處理數據前確保數據完整性
- 互動式文件:訪問
/docs獲取自動生成的可測試 API 文件 - 類型安全:Python 類型提示防止運行時錯誤並提高代碼質量
- 非同步支持:同時處理多個 AI 請求而不會阻塞
- 性能:顯著加快實時應用的請求處理速度
理解 CORS:Web 的安全守衛
CORS(跨來源資源共享)就像建築物的保安,檢查訪客是否被允許進入。讓我們了解它的重要性以及如何影響你的應用。
CORS 是什麼以及它的存在原因?
問題:想像一下,如果任何網站都可以在未經你允許的情況下代表你向你的銀行網站發送請求,那將是一場安全災難!瀏覽器通過默認的“同源策略”來防止這種情況。
同源策略:瀏覽器僅允許網頁向其加載的相同域名、端口和協議發送請求。
現實中的類比:就像公寓樓的保安——只有住戶(同源)可以默認進入大樓。如果你想讓朋友(不同源)拜訪,你需要明確告訴保安可以。
CORS 在開發環境中的作用
在開發過程中,前端和後端運行在不同的端口:
- 前端:
http://localhost:3000(或直接打開 HTML 時的 file://) - 後端:
http://localhost:5000
即使它們在同一台電腦上,也被視為“不同源”!
from fastapi.middleware.cors import CORSMiddleware

app = FastAPI(__name__)
CORS(app)   # This tells browsers: "It's okay for other origins to make requests to this API"
CORS 配置實際上做了什麼:
- 添加特殊的 HTTP 標頭到 API 響應中,告訴瀏覽器“允許此跨源請求”
- 處理“預檢”請求(瀏覽器有時會在發送實際請求之前檢查權限)
- 防止瀏覽器控制台中出現“被 CORS 策略阻止”的錯誤
CORS 安全性:開發與生產環境的區別
# 🚨 Development: Allows ALL origins (convenient but insecure)
CORS(app)

# ✅ Production: Only allow your specific frontend domain
CORS(app, origins=["https://yourdomain.com", "https://www.yourdomain.com"])

# 🔒 Advanced: Different origins for different environments
if app.debug:  # Development mode
    CORS(app, origins=["http://localhost:3000", "http://127.0.0.1:3000"])
else:  # Production mode
    CORS(app, origins=["https://yourdomain.com"])
為什麼這很重要:在開發過程中,CORS(app) 就像是把前門敞開——方便但不安全。在生產環境中,你需要明確指定哪些網站可以與你的 API 通信。
常見的 CORS 場景與解決方案
| 場景 | 問題 | 解決方案 |
|---|---|---|
| 本地開發 | 前端無法訪問後端 | 向 FastAPI 添加 CORSMiddleware |
| GitHub Pages + Heroku | 部署的前端無法訪問 API | 將你的 GitHub Pages URL 添加到 CORS origins |
| 自定義域名 | 生產環境中的 CORS 錯誤 | 更新 CORS origins 以匹配你的域名 |
| 移動應用 | 應用無法訪問 Web API | 添加你的應用域名或謹慎使用 * |
小提示:你可以在瀏覽器的開發者工具中檢查 CORS 標頭,方法是打開網絡選項卡,查看響應中的 Access-Control-Allow-Origin 標頭。
錯誤處理與驗證
注意我們的 API 如何包含適當的錯誤處理:
# Validate that we received a message
if not message:
    return jsonify({"error": "Message field is required"}), 400
關鍵的驗證原則:
- 檢查在處理請求之前是否有必要的字段
- 返回以 JSON 格式提供有意義的錯誤消息
- 使用適當的 HTTP 狀態碼(例如 400 表示錯誤請求)
- 提供清晰的反饋以幫助前端開發者調試問題
設置並運行你的後端
現在我們已經準備好 AI 整合和 FastAPI 伺服器,讓我們開始運行整個系統。設置過程包括安裝 Python 依賴項、配置環境變數以及啟動開發伺服器。
Python 環境設置
讓我們設置你的 Python 開發環境。虛擬環境就像曼哈頓計劃的分隔方法——每個項目都有自己的隔離空間,配備特定的工具和依賴項,防止不同項目之間的衝突。
# Navigate to your backend directory
cd backend

# Create a virtual environment (like creating a clean room for your project)
python -m venv venv

# Activate it (Linux/Mac)
source ./venv/bin/activate

# On Windows, use:
# venv\Scripts\activate

# Install the good stuff
pip install openai fastapi uvicorn python-dotenv
我們剛剛完成了:
- 創建了我們自己的 Python 環境,安裝包不會影響其他項目
- 激活它,讓終端知道使用這個特定環境
- 安裝必要工具:OpenAI 用於 AI 魔法,FastAPI 用於 Web API,Uvicorn 用於運行,python-dotenv 用於安全的密鑰管理
關鍵依賴項解釋:
- FastAPI:現代化、快速的 Web 框架,帶有自動 API 文件
- Uvicorn:超快的 ASGI 伺服器,用於運行 FastAPI 應用
- OpenAI:GitHub Models 和 OpenAI API 整合的官方庫
- python-dotenv:從 .env 文件安全加載環境變數
環境配置:保護秘密
在啟動 API 之前,我們需要談談 Web 開發中最重要的一課:如何真正保護你的秘密。環境變數就像一個安全的保險箱,只有你的應用可以訪問。
環境變數是什麼?
想像環境變數像一個保險箱——你把貴重物品放進去,只有你(和你的應用)有鑰匙可以取出。與其直接在代碼中寫敏感信息(任何人都能看到),不如安全地存儲在環境中。
這就是區別:
- 錯誤的方式:把密碼寫在便利貼上貼在顯示器上
- 正確的方式:把密碼存放在只有你能訪問的安全密碼管理器中
為什麼環境變數很重要
# 🚨 NEVER DO THIS - API key visible to everyone
client = OpenAI(
    api_key="ghp_1234567890abcdef...",  # Anyone can steal this!
    base_url="https://models.github.ai/inference"
)

# ✅ DO THIS - API key stored securely
client = OpenAI(
    api_key=os.environ["GITHUB_TOKEN"],  # Only your app can access this
    base_url="https://models.github.ai/inference"
)
硬編碼秘密時會發生什麼:
- 版本控制暴露:任何擁有你 Git 存儲庫訪問權限的人都能看到你的 API 金鑰
- 公共存儲庫:如果你推送到 GitHub,你的金鑰對整個互聯網可見
- 團隊共享:其他開發者在你的項目中工作時可以訪問你的個人 API 金鑰
- 安全漏洞:如果有人偷了你的 API 金鑰,他們可以使用你的 AI 點數
設置你的環境文件
在後端目錄中創建一個 .env 文件。此文件本地存儲你的秘密:
# .env file - This should NEVER be committed to Git
GITHUB_TOKEN=your_github_personal_access_token_here
FASTAPI_DEBUG=True
ENVIRONMENT=development
理解 .env 文件:
- 每行一個秘密,格式為
KEY=value - 等號周圍沒有空格
- 通常不需要引號包裹值
- 註釋以
#開頭
創建你的 GitHub 個人訪問令牌
你的 GitHub 令牌就像一個特殊的密碼,授予你的應用使用 GitHub AI 服務的權限:
逐步創建令牌:
- 前往 GitHub 設置 → 開發者設置 → 個人訪問令牌 → 經典令牌
- 點擊“生成新令牌(經典)”
- 設置過期時間(測試用 30 天,生產環境可設置更長時間)
- 選擇範圍:勾選“repo”和其他需要的權限
- 生成令牌並立即複製(之後無法再次查看!)
- 粘貼到你的 .env 文件中
# Example of what your token looks like (this is fake!)
GITHUB_TOKEN=ghp_1A2B3C4D5E6F7G8H9I0J1K2L3M4N5O6P7Q8R
在 Python 中加載環境變數
import os
from dotenv import load_dotenv

# Load environment variables from .env file
load_dotenv()

# Now you can access them securely
api_key = os.environ.get("GITHUB_TOKEN")
if not api_key:
    raise ValueError("GITHUB_TOKEN not found in environment variables!")

client = OpenAI(
    api_key=api_key,
    base_url="https://models.github.ai/inference"
)
此代碼的作用:
- 加載你的 .env 文件並使變數可供 Python 使用
- 檢查是否存在所需的令牌(良好的錯誤處理!)
- 引發清晰的錯誤,如果令牌丟失
- 安全使用令牌而不在代碼中暴露
Git 安全性:.gitignore 文件
你的 .gitignore 文件告訴 Git 哪些文件永遠不跟蹤或上傳:
# .gitignore - Add these lines
.env
*.env
.env.local
.env.production
__pycache__/
venv/
.vscode/
為什麼這至關重要:一旦你將 .env 添加到 .gitignore,Git 將忽略你的環境文件,防止你意外將秘密上傳到 GitHub。
不同環境,不同秘密
專業應用在不同環境中使用不同的 API 金鑰:
# .env.development
GITHUB_TOKEN=your_development_token
DEBUG=True

# .env.production
GITHUB_TOKEN=your_production_token
DEBUG=False
為什麼這很重要:你不希望開發實驗影響生產 AI 使用配額,並希望為不同的環境設置不同的安全級別。
啟動你的開發伺服器:讓 FastAPI 活起來
現在到了激動人心的時刻——啟動你的 FastAPI 開發伺服器,並看到你的 AI 整合活躍起來!FastAPI 使用 Uvicorn,一個專門為非同步 Python 應用設計的超快 ASGI 伺服器。
理解 FastAPI 伺服器啟動過程
# Method 1: Direct Python execution (includes auto-reload)
python api.py

# Method 2: Using Uvicorn directly (more control)
uvicorn api:app --host 0.0.0.0 --port 5000 --reload
當你運行此命令時,以下是幕後發生的事情:
1. Python 加載你的 FastAPI 應用:
- 導入所有需要的庫(FastAPI、Pydantic、OpenAI 等)
- 從你的
.env文件加載環境變數 - 創建具有自動文件功能的 FastAPI 應用實例
2. Uvicorn 配置 ASGI 伺服器:
- 綁定到端口 5000,具備非同步請求處理能力
- 設置自動驗證的請求路由
- 啟用開發的熱重載(文件更改時重新啟動)
- 生成互動式 API 文件
3. 伺服器開始監聽:
- 你的終端顯示:
INFO: Uvicorn running on http://0.0.0.0:5000 - 伺服器可以處理多個並發的 AI 請求
- 你的 API 已準備好,並可在
http://localhost:5000/docs訪問自動文件
一切正常時你應該看到什麼
$ python api.py
INFO:     Will watch for changes in these directories: ['/your/project/path']
INFO:     Uvicorn running on http://0.0.0.0:5000 (Press CTRL+C to quit)
INFO:     Started reloader process [12345] using WatchFiles
INFO:     Started server process [12346]
INFO:     Waiting for application startup.
INFO:     Application startup complete.
理解 FastAPI 輸出:
- 監控更改:開發過程中啟用自動重載
- Uvicorn 運行中:高性能 ASGI 伺服器已啟動
- 重載器進程已啟動:文件監視器自動重啟
- 應用啟動完成:FastAPI 應用成功初始化
- 可用的互動式文件:訪問
/docs獲取自動 API 文件
測試你的 FastAPI:多種強大的方法
FastAPI 提供了幾種方便的方式來測試你的 API,包括自動生成的互動式文件:
方法 1:互動式 API 文件(推薦)
- 打開瀏覽器,訪問
http://localhost:5000/docs - 你會看到包含所有端點文件的 Swagger UI
- 點擊
/hello→ “Try it out” → 輸入測試消息 → “Execute” - 在瀏覽器中直接查看格式化的響應
方法 2:基本瀏覽器測試
- 訪問
http://localhost:5000查看根端點 - 訪問
http://localhost:5000/health檢查伺服器健康狀態 - 這可以確認你的 FastAPI 伺服器正常運行
方法 3:命令行測試(進階)
# Test with curl (if available)
curl -X POST http://localhost:5000/hello \
  -H "Content-Type: application/json" \
  -d '{"message": "Hello AI!"}'

# Expected response:
# {"response": "Hello! I'm your AI assistant. How can I help you today?"}
方法 4:Python 測試腳本
# test_api.py - Create this file to test your API
import requests
import json

# Test the API endpoint
url = "http://localhost:5000/hello"
data = {"message": "Tell me a joke about programming"}

response = requests.post(url, json=data)
if response.status_code == 200:
    result = response.json()
    print("AI Response:", result['response'])
else:
    print("Error:", response.status_code, response.text)
常見啟動問題排查
| 錯誤訊息 | 意思 | 解決方法 |
|---|---|---|
ModuleNotFoundError: No module named 'fastapi' |
FastAPI 未安裝 | 在虛擬環境中執行 pip install fastapi uvicorn |
ModuleNotFoundError: No module named 'uvicorn' |
ASGI 伺服器未安裝 | 在虛擬環境中執行 pip install uvicorn |
KeyError: 'GITHUB_TOKEN' |
環境變數未找到 | 檢查 .env 文件和 load_dotenv() 調用 |
Address already in use |
5000 埠被佔用 | 終止使用 5000 埠的其他進程或更改埠號 |
ValidationError |
請求數據與 Pydantic 模型不匹配 | 檢查請求格式是否符合預期的結構 |
HTTPException 422 |
無法處理的實體 | 請求驗證失敗,檢查 /docs 以獲取正確格式 |
OpenAI API error |
AI 服務身份驗證失敗 | 確認您的 GitHub token 正確且具有適當的權限 |
開發最佳實踐
熱重載:FastAPI 與 Uvicorn 提供自動重載功能,當您保存 Python 文件的更改時,應用程序會自動重啟。這意味著您可以立即測試修改,而無需手動重啟。
# Enable hot reloading explicitly
if __name__ == "__main__":
    app.run(host="0.0.0.0", port=5000, debug=True)  # debug=True enables hot reload
開發中的日誌記錄:添加日誌記錄以了解發生了什麼:
import logging

# Set up logging
logging.basicConfig(level=logging.INFO)
logger = logging.getLogger(__name__)

@app.route("/hello", methods=["POST"])
def hello():
    data = request.get_json()
    message = data.get("message", "")

    logger.info(f"Received message: {message}")

    if not message:
        logger.warning("Empty message received")
        return jsonify({"error": "Message field is required"}), 400

    try:
        response = call_llm(message, "You are a helpful and friendly assistant.")
        logger.info(f"AI response generated successfully")
        return jsonify({"response": response})
    except Exception as e:
        logger.error(f"AI API error: {str(e)}")
        return jsonify({"error": "AI service temporarily unavailable"}), 500
日誌記錄的好處:在開發過程中,您可以清楚地看到哪些請求進入,AI 的回應內容,以及錯誤發生的位置。這使得調試更加快速。
配置 GitHub Codespaces:輕鬆進行雲端開發
GitHub Codespaces 就像在雲端擁有一台強大的開發電腦,您可以從任何瀏覽器訪問。如果您在 Codespaces 中工作,則需要執行一些額外步驟,使後端能夠被前端訪問。
理解 Codespaces 網絡
在本地開發環境中,所有內容都在同一台電腦上運行:
- 後端:
http://localhost:5000 - 前端:
http://localhost:3000(或 file://)
在 Codespaces 中,您的開發環境運行在 GitHub 的伺服器上,因此“localhost”具有不同的含義。GitHub 會自動為您的服務創建公共 URL,但您需要正確配置它們。
Codespaces 配置步驟
1. 啟動後端伺服器:
cd backend
python api.py
您會看到熟悉的 FastAPI/Uvicorn 啟動消息,但請注意它是在 Codespace 環境中運行的。
2. 配置埠可見性:
- 在 VS Code 底部面板中找到“Ports”選項卡
- 在列表中找到埠 5000
- 右鍵點擊埠 5000
- 選擇“Port Visibility” → “Public”
為什麼要設為公開? 默認情況下,Codespace 的埠是私有的(僅您可訪問)。設為公開允許您的前端(在瀏覽器中運行)與後端通信。
3. 獲取您的公共 URL: 設為公開後,您會看到一個類似以下的 URL:
https://your-codespace-name-5000.app.github.dev
4. 更新您的前端配置:
// In your frontend app.js, update the BASE_URL:
this.BASE_URL = "https://your-codespace-name-5000.app.github.dev";
理解 Codespace URL
Codespace URL 遵循可預測的模式:
https://[codespace-name]-[port].app.github.dev
拆解這些 URL:
codespace-name:Codespace 的唯一標識符(通常包括您的用戶名)port:您的服務運行的埠號(例如,我們的 FastAPI 應用程序使用 5000)app.github.dev:GitHub 為 Codespace 應用程序提供的域名
測試您的 Codespace 設置
1. 直接測試後端: 在新的瀏覽器標籤中打開您的公共 URL。您應該看到:
Welcome to the AI Chat API. Send POST requests to /hello with JSON payload containing 'message' field.
2. 使用瀏覽器開發工具測試:
// Open browser console and test your API
fetch('https://your-codespace-name-5000.app.github.dev/hello', {
  method: 'POST',
  headers: {'Content-Type': 'application/json'},
  body: JSON.stringify({message: 'Hello from Codespaces!'})
})
.then(response => response.json())
.then(data => console.log(data));
Codespaces 與本地開發的比較
| 方面 | 本地開發 | GitHub Codespaces |
|---|---|---|
| 設置時間 | 較長(安裝 Python、依賴項) | 即時(預配置環境) |
| URL 訪問 | http://localhost:5000 |
https://xyz-5000.app.github.dev |
| 埠配置 | 自動 | 手動(設埠為公開) |
| 文件持久性 | 本地機器 | GitHub 儲存庫 |
| 協作 | 環境共享困難 | 輕鬆共享 Codespace 連結 |
| 網絡依賴性 | 僅 AI API 調用需要 | 一切都需要網絡連接 |
Codespace 開發提示
Codespaces 中的環境變數:
您的 .env 文件在 Codespaces 中的工作方式相同,但您也可以直接在 Codespace 中設置環境變數:
# Set environment variable for the current session
export GITHUB_TOKEN="your_token_here"

# Or add to your .bashrc for persistence
echo 'export GITHUB_TOKEN="your_token_here"' >> ~/.bashrc
埠管理:
- Codespaces 會自動檢測您的應用程序何時開始監聽某個埠
- 您可以同時轉發多個埠(如果稍後添加數據庫,這會很有用)
- 只要您的 Codespace 在運行,埠就會保持可訪問
開發工作流程:
- 在 VS Code 中進行代碼更改
- FastAPI 自動重載(得益於 Uvicorn 的重載模式)
- 通過公共 URL 立即測試更改
- 準備好後提交並推送
💡 專業提示:在開發過程中將您的 Codespace 後端 URL 加入書籤。由於 Codespace 名稱是穩定的,只要您使用相同的 Codespace,URL 就不會更改。
創建前端聊天界面:人類與 AI 的交匯點
現在我們將構建用戶界面——這是人們與您的 AI 助手交互的部分。就像原始 iPhone 界面的設計一樣,我們專注於讓複雜的技術感覺直觀且易於使用。
理解現代前端架構
我們的聊天界面將採用所謂的“單頁應用程序”(SPA)。與舊式方法(每次點擊都加載新頁面)不同,我們的應用程序將流暢且即時更新:
舊網站:像翻閱實體書——每次翻頁都完全更換 我們的聊天應用:像使用手機——一切流暢更新
graph TD
    A[User Types Message] --> B[JavaScript Captures Input]
    B --> C[Validate & Format Data]
    C --> D[Send to Backend API]
    D --> E[Display Loading State]
    E --> F[Receive AI Response]
    F --> G[Update Chat Interface]
    G --> H[Ready for Next Message]
前端開發的三大支柱
每個前端應用程序——從簡單的網站到像 Discord 或 Slack 這樣的複雜應用程序——都建立在三個核心技術之上。它們是您在網頁上看到和交互的所有內容的基礎:
HTML(結構):這是您的基礎
- 決定哪些元素存在(按鈕、文本框、容器)
- 賦予內容意義(這是標題,這是表單等)
- 創建所有其他內容構建的基本結構
CSS(外觀):這是您的室內設計師
- 讓一切看起來更美觀(顏色、字體、佈局)
- 處理不同的屏幕尺寸(手機 vs 筆記本電腦 vs 平板電腦)
- 創建流暢的動畫和視覺反饋
JavaScript(行為):這是您的大腦
- 回應用戶的操作(點擊、輸入、滾動)
- 與後端通信並更新頁面
- 使一切都具有互動性和動態性
就像建築設計一樣:
- HTML:結構藍圖(定義空間和關係)
- CSS:美學和環境設計(視覺風格和用戶體驗)
- JavaScript:機械系統(功能和互動性)
為什麼現代 JavaScript 架構很重要
我們的聊天應用程序將使用現代 JavaScript 模式,這些模式在專業應用程序中很常見。理解這些概念將幫助您成為更好的開發者:
基於類的架構:我們將把代碼組織成類,這就像為對象創建藍圖 Async/Await:處理耗時操作(如 API 調用)的現代方法 事件驅動編程:我們的應用程序回應用戶操作(點擊、按鍵),而不是循環運行 DOM 操作:根據用戶交互和 API 回應動態更新網頁內容
項目結構設置
創建一個前端目錄,並使用以下結構進行組織:
frontend/
├── index.html      # Main HTML structure
├── app.js          # JavaScript functionality
└── styles.css      # Visual styling
理解架構:
- 分離結構(HTML)、行為(JavaScript)和外觀(CSS)
- 保持簡單的文件結構,便於導航和修改
- 遵循網頁開發的最佳實踐,確保組織性和可維護性
構建 HTML 基礎:語義結構以提高可訪問性
讓我們從 HTML 結構開始。現代網頁開發強調“語義 HTML”——使用明確描述其用途的 HTML 元素,而不僅僅是外觀。這使您的應用程序對屏幕閱讀器、搜索引擎和其他工具更具可訪性。
為什麼語義 HTML 很重要:想像一下,您需要通過電話向某人描述您的聊天應用。您會說“有一個標題顯示標題,一個主要區域顯示對話,底部有一個表單用於輸入消息。”語義 HTML 使用與此自然描述相匹配的元素。
創建 index.html,並使用以下精心設計的標記:
<!DOCTYPE html>
<html lang="en">
<head>
    <meta charset="UTF-8">
    <meta name="viewport" content="width=device-width, initial-scale=1.0">
    <title>AI Chat Assistant</title>
    <link rel="stylesheet" href="styles.css">
</head>
<body>
    <div class="chat-container">
        <header class="chat-header">
            <h1>AI Chat Assistant</h1>
            <p>Ask me anything!</p>
        </header>

        <main class="chat-messages" id="messages" role="log" aria-live="polite">
            <!-- Messages will be dynamically added here -->
        </main>

        <form class="chat-form" id="chatForm">
            <div class="input-group">
                <input
                    type="text"
                    id="messageInput"
                    placeholder="Type your message here..."
                    required
                    aria-label="Chat message input"
                >
                <button type="submit" id="sendBtn" aria-label="Send message">
                    Send
                </button>
            </div>
        </form>
    </div>
    <script src="app.js"></script>
</body>
</html>
理解每個 HTML 元素及其用途:
文件結構
<!DOCTYPE html>:告訴瀏覽器這是現代 HTML5<html lang="en">:指定頁面語言,方便屏幕閱讀器和翻譯工具使用<meta charset="UTF-8">:確保國際文本的正確字符編碼<meta name="viewport"...>:通過控制縮放和比例使頁面適應移動設備
語義元素
<header>:清楚地標識包含標題和描述的頂部區域<main>:指定主要內容區域(對話顯示的地方)<form>:語義上正確的用於用戶輸入,支持鍵盤導航
可訪問性功能
role="log":告訴屏幕閱讀器此區域包含消息的時間順序記錄aria-live="polite":向屏幕閱讀器宣布新消息而不打斷aria-label:為表單控件提供描述性標籤required:瀏覽器驗證用戶在發送前輸入消息
CSS 和 JavaScript 集成
class屬性:為 CSS 提供樣式掛鉤(例如,chat-container、input-group)id屬性:允許 JavaScript 查找和操作特定元素- 腳本位置:JavaScript 文件在最後加載,確保 HTML 先加載
為什麼這種結構有效:
- 邏輯流程:標題 → 主要內容 → 輸入表單符合自然閱讀順序
- 鍵盤可訪問性:用戶可以通過 Tab 鍵瀏覽所有交互元素
- 屏幕閱讀器友好:為視障用戶提供清晰的標記和描述
- 移動響應式:視口 meta 標籤支持響應式設計
- 漸進增強:即使 CSS 或 JavaScript 加載失敗也能正常工作
添加互動式 JavaScript:現代網頁應用邏輯
現在讓我們構建使聊天界面生動的 JavaScript。我們將使用專業網頁開發中常見的現代 JavaScript 模式,包括 ES6 類、async/await 和事件驅動編程。
理解現代 JavaScript 架構
與編寫程序式代碼(按順序運行的一系列函數)不同,我們將創建一個基於類的架構。可以將類想像成創建對象的藍圖——就像建築師的藍圖可以用來建造多個房屋。
為什麼要為網頁應用使用類?
- 組織性:所有相關功能都集中在一起
- 可重用性:您可以在同一頁面上創建多個聊天實例
- 可維護性:更容易調試和修改特定功能
- 專業標準:此模式在 React、Vue 和 Angular 等框架中使用
創建 app.js,並使用以下現代化、結構良好的 JavaScript:
// app.js - Modern chat application logic

class ChatApp {
    constructor() {
        // Get references to DOM elements we'll need to manipulate
        this.messages = document.getElementById("messages");
        this.form = document.getElementById("chatForm");
        this.input = document.getElementById("messageInput");
        this.sendButton = document.getElementById("sendBtn");

        // Configure your backend URL here
        this.BASE_URL = "http://localhost:5000"; // Update this for your environment
        this.API_ENDPOINT = `${this.BASE_URL}/hello`;

        // Set up event listeners when the chat app is created
        this.initializeEventListeners();
    }

    initializeEventListeners() {
        // Listen for form submission (when user clicks Send or presses Enter)
        this.form.addEventListener("submit", (e) => this.handleSubmit(e));

        // Also listen for Enter key in the input field (better UX)
        this.input.addEventListener("keypress", (e) => {
            if (e.key === "Enter" && !e.shiftKey) {
                e.preventDefault();
                this.handleSubmit(e);
            }
        });
    }

    async handleSubmit(event) {
        event.preventDefault(); // Prevent form from refreshing the page

        const messageText = this.input.value.trim();
        if (!messageText) return; // Don't send empty messages

        // Provide user feedback that something is happening
        this.setLoading(true);

        // Add user message to chat immediately (optimistic UI)
        this.appendMessage(messageText, "user");

        // Clear input field so user can type next message
        this.input.value = '';

        try {
            // Call the AI API and wait for response
            const reply = await this.callAPI(messageText);

            // Add AI response to chat
            this.appendMessage(reply, "assistant");
        } catch (error) {
            console.error('API Error:', error);
            this.appendMessage("Sorry, I'm having trouble connecting right now. Please try again.", "error");
        } finally {
            // Re-enable the interface regardless of success or failure
            this.setLoading(false);
        }
    }

    async callAPI(message) {
        const response = await fetch(this.API_ENDPOINT, {
            method: "POST",
            headers: {
                "Content-Type": "application/json"
            },
            body: JSON.stringify({ message })
        });

        if (!response.ok) {
            throw new Error(`HTTP error! status: ${response.status}`);
        }

        const data = await response.json();
        return data.response;
    }

    appendMessage(text, role) {
        const messageElement = document.createElement("div");
        messageElement.className = `message ${role}`;
        messageElement.innerHTML = `
            <div class="message-content">
                <span class="message-text">${this.escapeHtml(text)}</span>
                <span class="message-time">${new Date().toLocaleTimeString()}</span>
            </div>
        `;

        this.messages.appendChild(messageElement);
        this.scrollToBottom();
    }

    escapeHtml(text) {
        const div = document.createElement('div');
        div.textContent = text;
        return div.innerHTML;
    }

    scrollToBottom() {
        this.messages.scrollTop = this.messages.scrollHeight;
    }

    setLoading(isLoading) {
        this.sendButton.disabled = isLoading;
        this.input.disabled = isLoading;
        this.sendButton.textContent = isLoading ? "Sending..." : "Send";
    }
}

// Initialize the chat application when the page loads
document.addEventListener("DOMContentLoaded", () => {
    new ChatApp();
});
理解每個 JavaScript 概念
ES6 類結構:
class ChatApp {
    constructor() {
        // This runs when you create a new ChatApp instance
        // It's like the "setup" function for your chat
    }

    methodName() {
        // Methods are functions that belong to the class
        // They can access class properties using "this"
    }
}
Async/Await 模式:
// Old way (callback hell):
fetch(url)
  .then(response => response.json())
  .then(data => console.log(data))
  .catch(error => console.error(error));

// Modern way (async/await):
try {
    const response = await fetch(url);
    const data = await response.json();
    console.log(data);
} catch (error) {
    console.error(error);
}
事件驅動編程: 與不斷檢查是否發生某事相比,我們“監聽”事件:
// When form is submitted, run handleSubmit
this.form.addEventListener("submit", (e) => this.handleSubmit(e));

// When Enter key is pressed, also run handleSubmit
this.input.addEventListener("keypress", (e) => { /* ... */ });
DOM 操作:
// Create new elements
const messageElement = document.createElement("div");

// Modify their properties
messageElement.className = "message user";
messageElement.innerHTML = "Hello world!";

// Add to the page
this.messages.appendChild(messageElement);
安全性和最佳實踐
防止 XSS 攻擊:
escapeHtml(text) {
    const div = document.createElement('div');
    div.textContent = text;  // This automatically escapes HTML
    return div.innerHTML;
}
為什麼這很重要:如果用戶輸入 <script>alert('hack')</script>,此函數確保它顯示為文本而不是執行代碼。
錯誤處理:
try {
    const reply = await this.callAPI(messageText);
    this.appendMessage(reply, "assistant");
} catch (error) {
    // Show user-friendly error instead of breaking the app
    this.appendMessage("Sorry, I'm having trouble...", "error");
}
用戶體驗考量:
- 樂觀 UI:立即添加用戶消息,不等待伺服器回應
- 加載狀態:在等待時禁用按鈕並顯示“正在發送...”
- 自動滾動:保持最新消息可見
- 輸入驗證:不發送空消息
- 鍵盤快捷鍵:Enter 鍵發送消息(像真正的聊天應用)
理解應用程序流程
- 頁面加載 → 觸發
DOMContentLoaded事件 → 創建new ChatApp() - 構造函數運行 → 獲取 DOM 元素引用 → 設置事件監聽器
- 用戶輸入消息 → 按下 Enter 或點擊發送 → 運行
handleSubmit - handleSubmit → 驗證輸入 → 顯示加載狀態 → 調用 API
- API 回應 → 將 AI 消息添加到聊天 → 重新啟用界面
- 準備下一條消息 → 用戶可以繼續聊天 此架構具有可擴展性——您可以輕鬆添加消息編輯、文件上傳或多個對話線程等功能,而無需重寫核心結構。
設計您的聊天界面
現在,我們使用 CSS 創建一個現代化且視覺吸引力的聊天界面。良好的設計能讓您的應用程序更具專業感,並改善整體用戶體驗。我們將使用現代 CSS 功能,例如 Flexbox、CSS Grid 和自定義屬性,來實現響應式且可訪問的設計。
創建 styles.css,並添加以下全面的樣式:
/* styles.css - Modern chat interface styling */

:root {
    --primary-color: #2563eb;
    --secondary-color: #f1f5f9;
    --user-color: #3b82f6;
    --assistant-color: #6b7280;
    --error-color: #ef4444;
    --text-primary: #1e293b;
    --text-secondary: #64748b;
    --border-radius: 12px;
    --shadow: 0 4px 6px -1px rgba(0, 0, 0, 0.1);
}

* {
    margin: 0;
    padding: 0;
    box-sizing: border-box;
}

body {
    font-family: -apple-system, BlinkMacSystemFont, 'Segoe UI', Roboto, sans-serif;
    background: linear-gradient(135deg, #667eea 0%, #764ba2 100%);
    min-height: 100vh;
    display: flex;
    align-items: center;
    justify-content: center;
    padding: 20px;
}

.chat-container {
    width: 100%;
    max-width: 800px;
    height: 600px;
    background: white;
    border-radius: var(--border-radius);
    box-shadow: var(--shadow);
    display: flex;
    flex-direction: column;
    overflow: hidden;
}

.chat-header {
    background: var(--primary-color);
    color: white;
    padding: 20px;
    text-align: center;
}

.chat-header h1 {
    font-size: 1.5rem;
    margin-bottom: 5px;
}

.chat-header p {
    opacity: 0.9;
    font-size: 0.9rem;
}

.chat-messages {
    flex: 1;
    padding: 20px;
    overflow-y: auto;
    display: flex;
    flex-direction: column;
    gap: 15px;
    background: var(--secondary-color);
}

.message {
    display: flex;
    max-width: 80%;
    animation: slideIn 0.3s ease-out;
}

.message.user {
    align-self: flex-end;
}

.message.user .message-content {
    background: var(--user-color);
    color: white;
    border-radius: var(--border-radius) var(--border-radius) 4px var(--border-radius);
}

.message.assistant {
    align-self: flex-start;
}

.message.assistant .message-content {
    background: white;
    color: var(--text-primary);
    border-radius: var(--border-radius) var(--border-radius) var(--border-radius) 4px;
    border: 1px solid #e2e8f0;
}

.message.error .message-content {
    background: var(--error-color);
    color: white;
    border-radius: var(--border-radius);
}

.message-content {
    padding: 12px 16px;
    box-shadow: var(--shadow);
    position: relative;
}

.message-text {
    display: block;
    line-height: 1.5;
    word-wrap: break-word;
}

.message-time {
    display: block;
    font-size: 0.75rem;
    opacity: 0.7;
    margin-top: 5px;
}

.chat-form {
    padding: 20px;
    border-top: 1px solid #e2e8f0;
    background: white;
}

.input-group {
    display: flex;
    gap: 10px;
    align-items: center;
}

#messageInput {
    flex: 1;
    padding: 12px 16px;
    border: 2px solid #e2e8f0;
    border-radius: var(--border-radius);
    font-size: 1rem;
    outline: none;
    transition: border-color 0.2s ease;
}

#messageInput:focus {
    border-color: var(--primary-color);
}

#messageInput:disabled {
    background: #f8fafc;
    opacity: 0.6;
    cursor: not-allowed;
}

#sendBtn {
    padding: 12px 24px;
    background: var(--primary-color);
    color: white;
    border: none;
    border-radius: var(--border-radius);
    font-size: 1rem;
    font-weight: 600;
    cursor: pointer;
    transition: background-color 0.2s ease;
    min-width: 80px;
}

#sendBtn:hover:not(:disabled) {
    background: #1d4ed8;
}

#sendBtn:disabled {
    background: #94a3b8;
    cursor: not-allowed;
}

@keyframes slideIn {
    from {
        opacity: 0;
        transform: translateY(10px);
    }
    to {
        opacity: 1;
        transform: translateY(0);
    }
}

/* Responsive design for mobile devices */
@media (max-width: 768px) {
    body {
        padding: 10px;
    }

    .chat-container {
        height: calc(100vh - 20px);
        border-radius: 8px;
    }

    .message {
        max-width: 90%;
    }

    .input-group {
        flex-direction: column;
        gap: 10px;
    }

    #messageInput {
        width: 100%;
    }

    #sendBtn {
        width: 100%;
    }
}

/* Accessibility improvements */
@media (prefers-reduced-motion: reduce) {
    .message {
        animation: none;
    }

    * {
        transition: none !important;
    }
}

/* Dark mode support */
@media (prefers-color-scheme: dark) {
    .chat-container {
        background: #1e293b;
        color: #f1f5f9;
    }

    .chat-messages {
        background: #0f172a;
    }

    .message.assistant .message-content {
        background: #334155;
        color: #f1f5f9;
        border-color: #475569;
    }

    .chat-form {
        background: #1e293b;
        border-color: #475569;
    }

    #messageInput {
        background: #334155;
        color: #f1f5f9;
        border-color: #475569;
    }
}
理解 CSS 架構:
- 使用 CSS 自定義屬性(變量)以實現主題一致性和便於維護
- 實現 Flexbox 布局以支持響應式設計和正確的對齊方式
- 包含平滑的動畫效果,使消息顯示不會分散注意力
- 提供用戶消息、AI 回應和錯誤狀態的視覺區分
- 支持在桌面和移動設備上的響應式設計
- 考慮可訪問性,包括減少運動偏好和適當的對比度
- 提供基於用戶系統偏好的暗模式支持
配置您的後端 URL
最後一步是更新 JavaScript 中的 BASE_URL,以匹配您的後端伺服器:
// For local development
this.BASE_URL = "http://localhost:5000";

// For GitHub Codespaces (replace with your actual URL)
this.BASE_URL = "https://your-codespace-name-5000.app.github.dev";
確定您的後端 URL:
- 本地開發:如果前端和後端都在本地運行,請使用
http://localhost:5000 - Codespaces:在將 5000 端口設為公開後,請在 Ports 標籤中找到您的後端 URL
- 生產環境:部署到託管服務時,請替換為您的實際域名
💡 測試提示:您可以通過在瀏覽器中訪問根 URL 直接測試您的後端。您應該能看到來自 FastAPI 伺服器的歡迎消息。
測試與部署
現在您已經完成了前端和後端組件的構建,接下來讓我們測試它們是否能正常協作,並探索部署選項,將您的聊天助手分享給其他人。
本地測試工作流程
按照以下步驟測試您的完整應用程序:
graph TD
    A[Start Backend Server] --> B[Configure Environment Variables]
    B --> C[Test API Endpoints]
    C --> D[Open Frontend in Browser]
    D --> E[Test Chat Functionality]
    E --> F[Debug Any Issues]
逐步測試流程:
-
啟動您的後端伺服器:
cd backend source venv/bin/activate # or venv\Scripts\activate on Windows python api.py -
驗證 API 是否正常工作:
- 在瀏覽器中打開
http://localhost:5000 - 您應該能看到來自 FastAPI 伺服器的歡迎消息
- 在瀏覽器中打開
-
打開您的前端:
- 進入前端目錄
- 在瀏覽器中打開
index.html - 或使用 VS Code 的 Live Server 擴展以獲得更好的開發體驗
-
測試聊天功能:
- 在輸入框中輸入消息
- 點擊“發送”或按下 Enter
- 驗證 AI 是否正確回應
- 檢查瀏覽器控制台是否有任何 JavaScript 錯誤
常見問題排查
| 問題 | 症狀 | 解決方案 |
|---|---|---|
| CORS 錯誤 | 前端無法連接後端 | 確保 FastAPI 的 CORSMiddleware 配置正確 |
| API 密鑰錯誤 | 401 未授權響應 | 檢查您的 GITHUB_TOKEN 環境變量 |
| 連接被拒絕 | 前端出現網絡錯誤 | 驗證後端 URL 並確保 Flask 伺服器正在運行 |
| 無 AI 回應 | 空白或錯誤回應 | 檢查後端日誌以查看 API 配額或身份驗證問題 |
常見調試步驟:
- 檢查瀏覽器開發者工具控制台中的 JavaScript 錯誤
- 驗證網絡標籤顯示成功的 API 請求和回應
- 查看後端終端輸出中的 Python 錯誤或 API 問題
- 確認環境變量已正確加載並可訪問
GitHub Copilot Agent 挑戰 🚀
使用 Agent 模式完成以下挑戰:
描述: 增強聊天助手,添加對話歷史和消息持久性。此挑戰將幫助您了解如何在聊天應用程序中管理狀態並實現數據存儲,以改善用戶體驗。
提示: 修改聊天應用程序以包含在會話之間持久保存的對話歷史。添加功能以將聊天消息保存到本地存儲,在頁面加載時顯示對話歷史,並包含一個“清除歷史”按鈕。此外,實現打字指示器和消息時間戳,使聊天體驗更真實。
了解更多 agent mode。
作業:建立您的個人 AI 助手
現在您將創建自己的 AI 助手實現。與其簡單地複製教程代碼,不如利用這個機會應用所學概念,構建一個反映您興趣和使用場景的項目。
項目要求
讓我們以乾淨、有組織的結構設置您的項目:
my-ai-assistant/
├── backend/
│   ├── api.py          # Your FastAPI server
│   ├── llm.py          # AI integration functions
│   ├── .env            # Your secrets (keep this safe!)
│   └── requirements.txt # Python dependencies
├── frontend/
│   ├── index.html      # Your chat interface
│   ├── app.js          # The JavaScript magic
│   └── styles.css      # Make it look amazing
└── README.md           # Tell the world about your creation
核心實現任務
後端開發:
- 採用我們的 FastAPI 代碼並使其成為您的專屬
- 創建一個獨特的 AI 個性——也許是一個有用的烹飪助手、一個創意寫作夥伴,或者一個學習助手?
- 添加穩健的錯誤處理,確保您的應用程序在出現問題時不會崩潰
- 撰寫清晰的文檔,供任何想了解您的 API 的人使用
前端開發:
- 構建一個直觀且令人愉悅的聊天界面
- 撰寫乾淨、現代的 JavaScript,讓其他開發者也會感到驕傲
- 設計反映您 AI 個性的自定義樣式——有趣且多彩?乾淨且簡約?完全由您決定!
- 確保它在手機和電腦上都能良好運行
個性化要求:
- 選擇一個獨特的名字和個性,讓您的 AI 助手反映您的興趣或想解決的問題
- 自定義視覺設計以匹配您的助手風格
- 撰寫一個吸引人的歡迎消息,讓人們想要開始聊天
- 測試您的助手,使用不同類型的問題來查看其回應
增強功能建議(可選)
想讓您的項目更上一層樓嗎?以下是一些有趣的探索想法:
| 功能 | 描述 | 您將練習的技能 |
|---|---|---|
| 消息歷史 | 在頁面刷新後仍能記住對話 | 使用 localStorage,JSON 處理 |
| 打字指示器 | 在等待回應時顯示“AI 正在輸入...” | CSS 動畫,異步編程 |
| 消息時間戳 | 顯示每條消息的發送時間 | 日期/時間格式化,UX 設計 |
| 導出聊天 | 允許用戶下載他們的對話 | 文件處理,數據導出 |
| 主題切換 | 明暗模式切換 | CSS 變量,用戶偏好 |
| 語音輸入 | 添加語音轉文字功能 | Web API,可訪問性 |
測試與文檔
質量保證:
- 測試您的應用程序,使用各種輸入類型和邊界情況
- 驗證響應式設計在不同屏幕尺寸上的效果
- 檢查可訪問性,包括鍵盤導航和屏幕閱讀器
- 驗證 HTML 和 CSS 是否符合標準
文檔要求:
- 撰寫 README.md,解釋您的項目及其運行方式
- 包含展示您的聊天界面運行情況的截圖
- 記錄您添加的任何獨特功能或自定義
- 提供清晰的設置說明,供其他開發者使用
提交指南
項目交付物:
- 包含所有源代碼的完整項目文件夾
- 包含項目描述和設置說明的 README.md
- 展示您的聊天助手運行情況的截圖
- 簡要反思您學到了什麼以及面臨了哪些挑戰
評估標準:
- 功能性:聊天助手是否按預期工作?
- 代碼質量:代碼是否組織良好、註釋清晰且易於維護?
- 設計:界面是否具有視覺吸引力且易於使用?
- 創意:您的實現有多獨特和個性化?
- 文檔:設置說明是否清晰完整?
💡 成功提示:首先完成基本要求,然後在一切正常運行後再添加增強功能。專注於創建一個完善的核心體驗,然後再添加高級功能。
解決方案
額外挑戰
準備好將您的 AI 助手提升到更高的水平了嗎?嘗試這些高級挑戰,深入了解 AI 集成和 Web 開發。
個性化定制
真正的魔力在於為您的 AI 助手賦予獨特的個性。嘗試不同的系統提示,創建專業化的助手:
專業助手示例:
call_llm(message, "You are a professional business consultant with 20 years of experience. Provide structured, actionable advice with specific steps and considerations.")
創意寫作助手示例:
call_llm(message, "You are an enthusiastic creative writing coach. Help users develop their storytelling skills with imaginative prompts and constructive feedback.")
技術導師示例:
call_llm(message, "You are a patient senior developer who explains complex programming concepts using simple analogies and practical examples.")
前端增強
通過以下視覺和功能改進,改造您的聊天界面:
高級 CSS 功能:
- 實現平滑的消息動畫和過渡效果
- 添加使用 CSS 形狀和漸變的自定義聊天氣泡設計
- 創建 AI“思考”時的打字指示器動畫
- 設計表情符號反應或消息評分系統
JavaScript 增強:
- 添加鍵盤快捷鍵(Ctrl+Enter 發送,Escape 清除輸入)
- 實現消息搜索和過濾功能
- 創建對話導出功能(下載為文本或 JSON)
- 添加自動保存到 localStorage,防止消息丟失
高級 AI 集成
多個 AI 個性:
- 創建下拉菜單以切換不同的 AI 個性
- 保存用戶偏好的個性到 localStorage
- 實現上下文切換,保持對話流暢
智能回應功能:
- 添加對話上下文感知(AI 記住之前的消息)
- 實現基於對話主題的智能建議
- 創建常見問題的快速回應按鈕
🎯 學習目標:這些額外挑戰幫助您了解生產應用中使用的高級 Web 開發模式和 AI 集成技術。
總結與下一步
恭喜!您已成功從零開始構建了一個完整的 AI 驅動聊天助手。這個項目讓您獲得了現代 Web 開發技術和 AI 集成的實踐經驗——這些技能在當今的技術領域中越來越有價值。
您的成就
在本課程中,您掌握了幾個關鍵技術和概念:
後端開發:
- 集成 GitHub Models API 以實現 AI 功能
- 構建具有適當錯誤處理的 RESTful API
- 實現使用環境變量的安全身份驗證
- 配置 CORS 以支持前端和後端之間的跨域請求
前端開發:
- 創建使用語義化 HTML 的響應式聊天界面
- 實現使用 async/await 和基於類的架構的現代 JavaScript
- 設計使用 CSS Grid、Flexbox 和動畫的吸引人用戶界面
- 添加可訪問性功能和響應式設計原則
全棧集成:
- 通過 HTTP API 調用連接前端和後端
- 處理實時用戶交互和異步數據流
- 實現整個應用程序中的錯誤處理和用戶反饋
- 測試從用戶輸入到 AI 回應的完整應用程序工作流程
關鍵學習成果
mindmap
  root((AI Chat App Skills))
    API Integration
      Authentication
      Error Handling
      Async Programming
    Web Development
      HTML5 Semantics
      Modern CSS
      ES6+ JavaScript
    User Experience
      Responsive Design
      Accessibility
      Real-time Interaction
    AI Understanding
      Prompt Engineering
      Model Parameters
      Conversation Flow
此項目向您介紹了構建 AI 驅動應用程序的基礎知識,這代表了 Web 開發的未來。您現在了解如何將 AI 功能集成到傳統 Web 應用程序中,創造出智能且響應迅速的用戶體驗。
專業應用
您在本課程中開發的技能可直接應用於現代軟件開發職業:
- 現代框架和 API 的全棧 Web 開發
- Web 應用和移動應用中的 AI 集成
- 微服務架構的 API 設計與開發
- 專注於可訪問性和響應式設計的用戶界面開發
- 包括環境配置和部署的 DevOps 實踐
繼續您的 AI 開發之旅
下一步學習:
- 探索更高級的 AI 模型和 API(GPT-4、Claude、Gemini)
- 學習提示工程技術以獲得更好的 AI 回應
- 研究對話設計和聊天機器人用戶體驗原則
- 調查 AI 安全、倫理和負責任的 AI 開發實踐
- 構建更複雜的應用程序,具有對話記憶和上下文感知功能
高級項目想法:
- 帶有 AI 監管的多用戶聊天室
- AI 驅動的客戶服務聊天機器人
- 提供個性化學習的教育輔導助手
- 擁有不同 AI 個性的創意寫作合作夥伴
- 為開發者提供技術文檔助手
使用 GitHub Codespaces 開始
想在雲端開發環境中嘗試此項目嗎?GitHub Codespaces 提供了完整的開發設置,直接在瀏覽器中進行操作,非常適合在不需要本地設置的情況下實驗 AI 應用程序。
設置您的開發環境
步驟 1:從模板創建
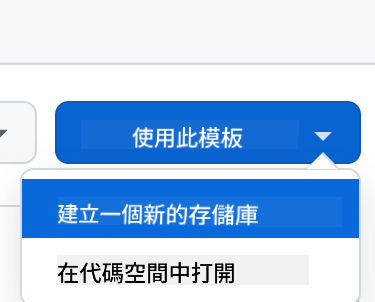
- 導航到 Web Dev For Beginners repository
- 點擊右上角的“使用此模板”(確保您已登錄 GitHub)
步驟 2:啟動 Codespaces
- 打開您新創建的倉庫
- 點擊綠色“Code”按鈕並選擇“Codespaces”
- 選擇“在主分支上創建 Codespace”以啟動您的開發環境

步驟 3:環境配置 當您的 Codespace 加載完成後,您將擁有:
- 預先安裝的 Python、Node.js 和所有必要的開發工具
- VS Code 界面,帶有 Web 開發擴展
- 終端訪問,用於運行後端和前端伺服器
- 埠轉發 用於測試您的應用程式
Codespaces 提供的功能:
- 消除 本地環境設置和配置問題
- 提供 跨不同設備一致的開發環境
- 包含 預先配置的工具和擴展功能,用於網頁開發
- 提供 與 GitHub 的無縫整合,用於版本控制和協作
🚀 專業提示:Codespaces 非常適合學習和原型設計 AI 應用程式,因為它會自動處理所有複雜的環境設置,讓您專注於構建和學習,而不是解決配置問題。
免責聲明:
本文件已使用 AI 翻譯服務 Co-op Translator 進行翻譯。儘管我們努力確保翻譯的準確性,但請注意,自動翻譯可能包含錯誤或不準確之處。原始文件的母語版本應被視為權威來源。對於關鍵信息,建議使用專業人工翻譯。我們對因使用此翻譯而引起的任何誤解或誤釋不承擔責任。