|
|
5 years ago | |
|---|---|---|
| .. | ||
| README.es.md | 5 years ago | |
| README.it.md | 5 years ago | |
| README.ja.md | 5 years ago | |
| README.ko.md | 5 years ago | |
| README.ms.md | 5 years ago | |
| README.zh-tw.md | 5 years ago | |
| assignment.es.md | 5 years ago | |
| assignment.hi.md | 5 years ago | |
| assignment.it.md | 5 years ago | |
| assignment.ja.md | 5 years ago | |
| assignment.ko.md | 5 years ago | |
| assignment.ms.md | 5 years ago | |
| assignment.nl.md | 5 years ago | |
| assignment.zh-tw.md | 5 years ago | |
README.zh-tw.md
盆栽盒專案 Part 1: HTML 簡介
由 Tomomi Imura 繪製
課前測驗
大綱
HTML (HyperText Markup Language) 可說是網頁的骨架。若說 CSS 打扮你的 HTML 而 JavaScript 讓它活起來,HTML 則是網頁應用的身體。HTML 的語法甚至佐證前行說明,它包含了 "head"、 "body" 和 "footer" 的標籤。
在這堂課中,我們會使用 HTML 去構建我們盆栽盒的虛擬介面。包含一個標題、三個欄位:左右各一的可拖曳植物欄位與中間的玻璃盆栽罐。這堂課程後,你會看到欄位中有許多盆栽,但介面可能會有點奇怪。不用擔心,往後的課程會講述 CSS 語法來造型化你的介面。
課題
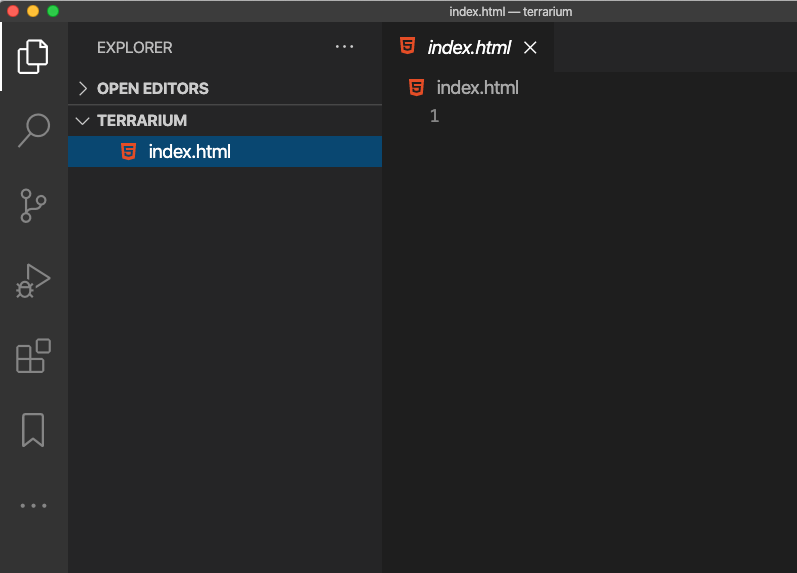
在你的電腦上,建立專案資料夾 'terrarium' 並在其中建立檔案 'index.html'。你可以在 Visual Studio Code 中新增 VS Code 視窗建立你的資料夾,點擊「開啟資料夾」來檢視其中。在探索面板中點擊小小的「檔案」按鈕來建立新的檔案:
或者是
在 git bash 中使用下列指令:
mkdir terrariumcd terrariumtouch index.htmlcode index.html或nano index.html
index.html 檔案預設會連接到你的瀏覽器上,以網頁的方式呈現。網址像
https://anysite.com/test會以資料夾結構的方式包含資料夾test與資料夾內的index.html。index.html不需要出現在網址當中。
文件型別宣告(DocType) 與 html 標籤
HTML 檔案的第一行是文件型別宣告。你會訝異這一行必須存在在檔案首行存在的意義,但這行能告訴舊款瀏覽器這份檔案開啟的模式以及它的定義方式。
提示:在 VS Code 中, 你可以把游標放在標籤上,從MDN文件庫中取得標籤的相關資訊。
檔案第二行會是 <html> 起始標籤,之後接續著 </html> 結束標籤。這項標籤使整個介面的根本。
課題
新增這些行到你的 index.html 檔案開頭:
<!DOCTYPE html>
<html></html>
✅ 有許多不一樣的文件型別模式,你可以用 query string 做設定:怪異模式與標準模式。這些模式用來支援非常古老的瀏覽器,現在可能都不會見到的瀏覽器(Netscape Navigator 4 與 Internet Explorer 5)。 你可以觀看他們的文件型別模式宣告定義。
文件的 'head'
HTML 文件中 'head' 的區域包含很多網頁的重要資訊,也被稱作元資訊(metadata)。我們告訴網頁伺服器我們需要哪些檔案與資訊,主要有四個:
- 網頁標題
- 網頁元資訊,包含:
- 字元集(Character Set),解釋網頁字元的編碼方式。
- 瀏覽器資訊,包含
x-ua-compatible讓 Internet Explorer Edge 瀏覽器支援的資訊。 - 關於裝置的視窗資訊(Viewport)與後續視窗行為的依據。 設定視窗資訊的初始比例為 1 並控制讀取時的縮放大小。
課題
在網頁檔中,新增 'head' 區塊在 <html> 的標籤之間。
<head>
	<title>Welcome to my Virtual Terrarium</title>
	<meta charset="utf-8" />
	<meta http-equiv="X-UA-Compatible" content="IE=edge" />
	<meta name="viewport" content="width=device-width, initial-scale=1" />
</head>
✅ 你認為設定下列視窗元資訊 <meta name="viewport" content="width=600"> 會發生什麼事? 請閱讀更多有關於Viewport的資訊。
文件的 body
HTML 標籤
在 HTML 中,新增標籤到你的 .html 檔案中。每個標籤都要有起始標籤與結束標籤,像是: <p>hello</p> 來增加文章。 在 <html> 標籤中利用一組 <body> 標籤建立新的介面內容,現在你的程式呈現如下:
課題
<!DOCTYPE html>
<html>
	<head>
		<title>Welcome to my Virtual Terrarium</title>
		<meta charset="utf-8" />
		<meta http-equiv="X-UA-Compatible" content="IE=edge" />
		<meta name="viewport" content="width=device-width, initial-scale=1" />
	</head>
	<body></body>
</html>
現在,你可以開始豐富你的網頁內容。通常,你會使用 <div> 標籤來建立網頁中不同的元素。我們在一連串的 <div> 元素當中新增圖片。
圖片
其中一個不需要結束標籤的 html 標籤為 <img> 標籤,因為它含有 src 元素來提供所有網頁需要取得的資訊。
在專案資料夾中新增一個名叫 images 的資料夾,複製我們提供的圖片到資料夾裡面,一共有十四張圖片。
課題
新增這些植物圖片到 <body></body> 標籤之間:
<div id="page">
	<div id="left-container" class="container">
		<div class="plant-holder">
			<img class="plant" alt="plant" id="plant1" src="./images/plant1.png" />
		</div>
		<div class="plant-holder">
			<img class="plant" alt="plant" id="plant2" src="./images/plant2.png" />
		</div>
		<div class="plant-holder">
			<img class="plant" alt="plant" id="plant3" src="./images/plant3.png" />
		</div>
		<div class="plant-holder">
			<img class="plant" alt="plant" id="plant4" src="./images/plant4.png" />
		</div>
		<div class="plant-holder">
			<img class="plant" alt="plant" id="plant5" src="./images/plant5.png" />
		</div>
		<div class="plant-holder">
			<img class="plant" alt="plant" id="plant6" src="./images/plant6.png" />
		</div>
		<div class="plant-holder">
			<img class="plant" alt="plant" id="plant7" src="./images/plant7.png" />
		</div>
	</div>
	<div id="right-container" class="container">
		<div class="plant-holder">
			<img class="plant" alt="plant" id="plant8" src="./images/plant8.png" />
		</div>
		<div class="plant-holder">
			<img class="plant" alt="plant" id="plant9" src="./images/plant9.png" />
		</div>
		<div class="plant-holder">
			<img class="plant" alt="plant" id="plant10" src="./images/plant10.png" />
		</div>
		<div class="plant-holder">
			<img class="plant" alt="plant" id="plant11" src="./images/plant11.png" />
		</div>
		<div class="plant-holder">
			<img class="plant" alt="plant" id="plant12" src="./images/plant12.png" />
		</div>
		<div class="plant-holder">
			<img class="plant" alt="plant" id="plant13" src="./images/plant13.png" />
		</div>
		<div class="plant-holder">
			<img class="plant" alt="plant" id="plant14" src="./images/plant14.png" />
		</div>
	</div>
</div>
筆記: Spans 和 Divs。 Divs 是種「塊」元素,而 Spans 是種「內聯」元素。替換它們會發生什麼事情?
更新這些程式碼後,現在植物出現在畫面上了。他看起來很糟,因為我們還沒用 CSS 來美化它,我們會在下堂課中處理。
每張圖片都有 alt 文字,即使是隱藏起來或沒取得的圖片。它是圖片提供網頁親和力很重要的屬性。你可以在之後學習更多關於網頁親和力的課程。現在,只需要記得 alt 屬性提供而外的圖片資訊,處理用戶無法觀看圖片時的資訊(連線太慢、src 屬性有誤、使用者使用螢幕報讀器......)。
✅ 你有發現每張圖片都有相同的 alt 標籤嗎?這樣合理嗎?為什麼?你能改善它嗎?
語義化標籤
綜觀來說,最好使用普遍意義的標籤名稱。這是什麼意思?這代表你的 HTML 標籤必須表現它的資料型態或是它的功能性。舉例來說,網頁上的標題文字就應該使用 <h1> 標籤。
新增下列程式碼到你的 <body> 標籤中:
<h1>My Terrarium</h1>
使用語義化標籤如:標題 <h1> 和未排序串列 <ul> ,能幫助螢幕報讀器理解網頁的內容。普遍來說,按鈕為 <button> 而串列為 <li>。我們當然 可以 用自訂義包含按鈕事件的 <span> 元素來替代按鈕,但這對障礙者而言,無法直接地理解語法功用會是一種負擔。基於這項原因,盡量只使用語義化標籤。
✅ 看看螢幕報讀器是如何去處理一個網頁。 你可以看出非語義化標籤會怎麼阻礙用戶的嗎?
盆栽盒
最後一項介面的要素,就是建立一個盆栽盒的雛型。
課題:
加入這段程式碼在 </div> 之前:
<div id="terrarium">
	<div class="jar-top"></div>
	<div class="jar-walls">
		<div class="jar-glossy-long"></div>
		<div class="jar-glossy-short"></div>
	</div>
	<div class="dirt"></div>
	<div class="jar-bottom"></div>
</div>
✅ 即使你在檔案中新增了程式碼,你卻沒看到任何東西。為什麼?
🚀 挑戰
這邊有一些「古老」的 HTML 標籤。雖然這些標籤被歸為不推薦使用的標籤,但仍值得去嘗試的。你可以用 <marquee> 標籤來讓 h1 標題文字變成縱向呈現嗎?實驗完後,記得要移除這些標籤喔。
課後測驗
複習與自學
HTML 是一種「行之有效」的構築系統,建立了現今的各種網頁。從標籤來學習關於 HTML 的歷史,你能了解為什麼有的標籤被排除,而有的被新增上去嗎?有什麼標籤會在未來被建立上去呢?
學習更多關於建立網頁的資訊:Microsoft Learn。

