21 KiB
Create a Resume Website Using VSCode.dev
Transform your career prospects by building a professional resume website that showcases your skills and experience in an interactive, modern format. Instead of sending traditional PDFs, imagine providing recruiters with a sleek, responsive website that demonstrates both your qualifications and your web development capabilities.
This hands-on assignment puts all your VSCode.dev skills into practice while creating something genuinely useful for your career. You'll experience the complete web development workflow – from repository creation to deployment – all within your browser.
By completing this project, you'll have a professional online presence that can be easily shared with potential employers, updated as your skills grow, and customized to match your personal brand. This is exactly the kind of practical project that demonstrates real-world web development skills.
Learning Objectives
After completing this assignment, you'll be able to:
- Create and manage a complete web development project using VSCode.dev
- Structure a professional website using semantic HTML elements
- Style responsive layouts with modern CSS techniques
- Implement interactive features using basic web technologies
- Deploy a live website accessible via a shareable URL
- Demonstrate version control best practices throughout the development process
Prerequisites
Before starting this assignment, ensure you have:
- A GitHub account (create one at github.com if needed)
- Completion of the VSCode.dev lesson covering interface navigation and basic operations
- Basic understanding of HTML structure and CSS styling concepts
Project Setup and Repository Creation
Let's start by setting up your project foundation. This process mirrors real-world development workflows where projects begin with proper repository initialization and structure planning.
Step 1: Create Your GitHub Repository
Setting up a dedicated repository ensures your project is properly organized and version-controlled from the beginning.
- Navigate to GitHub.com and sign in to your account
- Click the green "New" button or the "+" icon in the top-right corner
- Name your repository
my-resume(or choose a personalized name likejohn-smith-resume) - Add a brief description: "Professional resume website built with HTML and CSS"
- Select "Public" to make your resume accessible to potential employers
- Check "Add a README file" to create an initial project description
- Click "Create repository" to finalize setup
💡 Repository Naming Tip: Use descriptive, professional names that clearly indicate the project's purpose. This helps when sharing with employers or during portfolio reviews.
Step 2: Initialize Project Structure
Since VSCode.dev requires at least one file to open a repository, we'll create our main HTML file directly on GitHub before switching to the web editor.
- Click "creating a new file" link in your new repository
- Type
index.htmlas the filename - Add this initial HTML structure:
<!DOCTYPE html>
<html lang="en">
<head>
    <meta charset="UTF-8">
    <meta name="viewport" content="width=device-width, initial-scale=1.0">
    <title>Your Name - Professional Resume</title>
</head>
<body>
    <h1>Your Name</h1>
    <p>Professional Resume Website</p>
</body>
</html>
- Write a commit message: "Add initial HTML structure"
- Click "Commit new file" to save your changes

Here's what this initial setup accomplishes:
- Establishes proper HTML5 document structure with semantic elements
- Includes viewport meta tag for responsive design compatibility
- Sets a descriptive page title that appears in browser tabs
- Creates the foundation for professional content organization
Working in VSCode.dev
Now that your repository foundation is established, let's transition to VSCode.dev for the main development work. This web-based editor provides all the tools needed for professional web development.
Step 3: Open Your Project in VSCode.dev
-
Navigate to vscode.dev in a new browser tab
-
Click "Open Remote Repository" on the welcome screen
-
Copy your repository URL from GitHub and paste it into the input field
Format:
https://github.com/your-username/my-resumeReplace
your-usernamewith your actual GitHub username -
Press Enter to load your project
✅ Success indicator: You should see your project files in the Explorer sidebar and index.html available for editing in the main editor area.
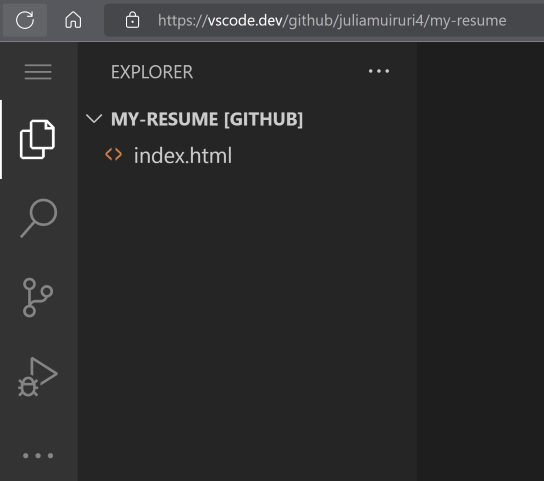
What you'll see in the interface:
- Explorer sidebar: Displays your repository files and folder structure
- Editor area: Shows the content of selected files for editing
- Activity bar: Provides access to features like Source Control and Extensions
- Status bar: Indicates connection status and current branch information
Step 4: Build Your Resume Content
Replace the placeholder content in index.html with a comprehensive resume structure. This HTML provides the foundation for a professional presentation of your qualifications.
Complete HTML Resume Structure
<!DOCTYPE html>
<html lang="en">
<head>
    <meta charset="UTF-8">
    <meta name="viewport" content="width=device-width, initial-scale=1.0">
    <link href="style.css" rel="stylesheet">
    <link rel="stylesheet" href="https://cdnjs.cloudflare.com/ajax/libs/font-awesome/5.15.4/css/all.min.css">
    <title>Your Name - Professional Resume</title>
</head>
<body>
    <header id="header">
        <h1>Your Full Name</h1>
        <hr>
        <p class="role">Your Professional Title</p>
        <hr>
    </header>

    <main>
        <article id="mainLeft">
            <section>
                <h2>CONTACT</h2>
                <p>
                    <i class="fa fa-envelope" aria-hidden="true"></i>
                    <a href="mailto:your.email@domain.com">your.email@domain.com</a>
                </p>
                <p>
                    <i class="fab fa-github" aria-hidden="true"></i>
                    <a href="https://github.com/your-username">github.com/your-username</a>
                </p>
                <p>
                    <i class="fab fa-linkedin" aria-hidden="true"></i>
                    <a href="https://linkedin.com/in/your-profile">linkedin.com/in/your-profile</a>
                </p>
            </section>

            <section>
                <h2>SKILLS</h2>
                <ul>
                    <li>HTML5 & CSS3</li>
                    <li>JavaScript (ES6+)</li>
                    <li>Responsive Web Design</li>
                    <li>Version Control (Git)</li>
                    <li>Problem Solving</li>
                </ul>
            </section>

            <section>
                <h2>EDUCATION</h2>
                <h3>Your Degree or Certification</h3>
                <p>Institution Name</p>
                <p>Start Date - End Date</p>
            </section>
        </article>

        <article id="mainRight">
            <section>
                <h2>ABOUT</h2>
                <p>Write a compelling summary that highlights your passion for web development, key achievements, and career goals. This section should give employers insight into your personality and professional approach.</p>
            </section>

            <section>
                <h2>WORK EXPERIENCE</h2>
                <div class="job">
                    <h3>Job Title</h3>
                    <p class="company">Company Name | Start Date – End Date</p>
                    <ul>
                        <li>Describe a key accomplishment or responsibility</li>
                        <li>Highlight specific skills or technologies used</li>
                        <li>Quantify impact where possible (e.g., "Improved efficiency by 25%")</li>
                    </ul>
                </div>

                <div class="job">
                    <h3>Previous Job Title</h3>
                    <p class="company">Previous Company | Start Date – End Date</p>
                    <ul>
                        <li>Focus on transferable skills and achievements</li>
                        <li>Demonstrate growth and learning progression</li>
                        <li>Include any leadership or collaboration experiences</li>
                    </ul>
                </div>
            </section>

            <section>
                <h2>PROJECTS</h2>
                <div class="project">
                    <h3>Project Name</h3>
                    <p>Brief description of what the project accomplishes and technologies used.</p>
                    <a href="#" target="_blank">View Project</a>
                </div>
            </section>
        </article>
    </main>
</body>
</html>
Customization guidelines:
- Replace all placeholder text with your actual information
- Adjust sections based on your experience level and career focus
- Add or remove sections as needed (e.g., Certifications, Volunteer Work, Languages)
- Include links to your actual profiles and projects
Step 5: Create Supporting Files
Professional websites require organized file structures. Create the CSS stylesheet and configuration files needed for a complete project.
- Hover over your project folder name in the Explorer sidebar
- Click the "New File" icon (📄+) that appears
- Create these files one at a time:
style.css(for styling and layout)codeswing.json(for the preview extension configuration)
Creating the CSS file (style.css):
Professional CSS Styling
/* Modern Resume Styling */
body {
    font-family: 'Segoe UI', Tahoma, Geneva, Verdana, sans-serif;
    font-size: 16px;
    line-height: 1.6;
    max-width: 960px;
    margin: 0 auto;
    padding: 20px;
    color: #333;
    background-color: #f9f9f9;
}

/* Header Styling */
header {
    text-align: center;
    margin-bottom: 3em;
    padding: 2em;
    background: linear-gradient(135deg, #667eea 0%, #764ba2 100%);
    color: white;
    border-radius: 10px;
    box-shadow: 0 4px 6px rgba(0, 0, 0, 0.1);
}

h1 {
    font-size: 3em;
    letter-spacing: 0.1em;
    margin-bottom: 0.2em;
    font-weight: 300;
}

.role {
    font-size: 1.3em;
    font-weight: 300;
    margin: 1em 0;
}

/* Main Content Layout */
main {
    display: grid;
    grid-template-columns: 35% 65%;
    gap: 3em;
    margin-top: 3em;
    background: white;
    padding: 2em;
    border-radius: 10px;
    box-shadow: 0 2px 10px rgba(0, 0, 0, 0.1);
}

/* Typography */
h2 {
    font-size: 1.4em;
    font-weight: 600;
    margin-bottom: 1em;
    color: #667eea;
    border-bottom: 2px solid #667eea;
    padding-bottom: 0.3em;
}

h3 {
    font-size: 1.1em;
    font-weight: 600;
    margin-bottom: 0.5em;
    color: #444;
}

/* Section Styling */
section {
    margin-bottom: 2.5em;
}

#mainLeft {
    border-right: 1px solid #e0e0e0;
    padding-right: 2em;
}

/* Contact Links */
section a {
    color: #667eea;
    text-decoration: none;
    transition: color 0.3s ease;
}

section a:hover {
    color: #764ba2;
    text-decoration: underline;
}

/* Icons */
i {
    margin-right: 0.8em;
    width: 20px;
    text-align: center;
    color: #667eea;
}

/* Lists */
ul {
    list-style: none;
    padding-left: 0;
}

li {
    margin: 0.5em 0;
    padding: 0.3em 0;
    position: relative;
}

li:before {
    content: "▸";
    color: #667eea;
    margin-right: 0.5em;
}

/* Work Experience */
.job, .project {
    margin-bottom: 2em;
    padding-bottom: 1.5em;
    border-bottom: 1px solid #f0f0f0;
}

.company {
    font-style: italic;
    color: #666;
    margin-bottom: 0.5em;
}

/* Responsive Design */
@media (max-width: 768px) {
    main {
        grid-template-columns: 1fr;
        gap: 2em;
    }

    #mainLeft {
        border-right: none;
        border-bottom: 1px solid #e0e0e0;
        padding-right: 0;
        padding-bottom: 2em;
    }

    h1 {
        font-size: 2.2em;
    }

    body {
        padding: 10px;
    }
}

/* Print Styles */
@media print {
    body {
        background: white;
        color: black;
        font-size: 12pt;
    }

    header {
        background: none;
        color: black;
        box-shadow: none;
    }

    main {
        box-shadow: none;
    }
}
Creating the configuration file (codeswing.json):
{
    "scripts": [],
    "styles": []
}
Understanding the CSS features:
- Uses CSS Grid for responsive, professional layout structure
- Implements modern color schemes with gradient headers
- Includes hover effects and smooth transitions for interactivity
- Provides responsive design that works on all device sizes
- Adds print-friendly styles for PDF generation
Step 6: Install and Configure Extensions
Extensions enhance your development experience by providing live preview capabilities and improved workflow tools. The CodeSwing extension is particularly useful for web development projects.
Installing the CodeSwing Extension:
- Click the Extensions icon (🧩) in the Activity Bar
- Search for "CodeSwing" in the marketplace search box
- Select the CodeSwing extension from the search results
- Click the blue "Install" button
What CodeSwing provides:
- Enables live preview of your website as you edit
- Displays changes in real-time without manual refresh
- Supports multiple file types including HTML, CSS, and JavaScript
- Provides an integrated development environment experience
Immediate results after installation: Once CodeSwing is installed, you'll see a live preview of your resume website appear in the editor. This allows you to see exactly how your site looks as you make changes.

Understanding the enhanced interface:
- Split view: Shows your code on one side and live preview on the other
- Real-time updates: Reflects changes immediately as you type
- Interactive preview: Allows you to test links and interactions
- Mobile simulation: Provides responsive design testing capabilities
Step 7: Version Control and Publishing
Now that your resume website is complete, use Git to save your work and make it available online.
Committing your changes:
- Click the Source Control icon (🌿) in the Activity Bar
- Review all the files you've created and modified in the "Changes" section
- Stage your changes by clicking the "+" icon next to each file
- Write a descriptive commit message, such as:
- "Add complete resume website with responsive design"
- "Implement professional styling and content structure"
- Click the checkmark (✓) to commit and push your changes
Effective commit message examples:
- "Add professional resume content and styling"
- "Implement responsive design for mobile compatibility"
- "Update contact information and project links"
💡 Professional Tip: Good commit messages help track your project's evolution and demonstrate attention to detail – qualities that employers value.
Accessing your published site: Once committed, you can return to your GitHub repository using the hamburger menu (☰) in the top-left corner. Your resume website is now version-controlled and ready for deployment or sharing.
Results and Next Steps
Congratulations! 🎉 You've successfully created a professional resume website using VSCode.dev. Your project demonstrates: Technical skills demonstrated:
- Repository management: Created and organized a complete project structure
- Web development: Built a responsive website using modern HTML5 and CSS3
- Version control: Implemented proper Git workflow with meaningful commits
- Tool proficiency: Effectively used VSCode.dev's interface and extension system
Professional outcomes achieved:
- Online presence: A shareable URL that showcases your qualifications
- Modern format: An interactive alternative to traditional PDF resumes
- Demonstrable skills: Concrete evidence of your web development capabilities
- Easy updates: A foundation you can continuously improve and customize
Deployment Options
To make your resume accessible to employers, consider these hosting options:
GitHub Pages (Recommended):
- Go to your repository Settings on GitHub
- Scroll to the "Pages" section
- Select "Deploy from a branch" and choose "main"
- Your site will be available at
https://your-username.github.io/my-resume
Alternative platforms:
- Netlify: Automatic deployment with custom domains
- Vercel: Fast deployment with modern hosting features
- GitHub Codespaces: Development environment with built-in preview
Enhancement Suggestions
Continue developing your skills by adding these features:
Technical improvements:
- JavaScript interactivity: Add smooth scrolling or interactive elements
- Dark mode toggle: Implement theme switching for user preference
- Contact form: Enable direct communication from potential employers
- SEO optimization: Add meta tags and structured data for better search visibility
Content enhancements:
- Project portfolio: Link to GitHub repositories and live demonstrations
- Skills visualization: Create progress bars or skill rating systems
- Testimonials section: Include recommendations from colleagues or instructors
- Blog integration: Add a blog section to showcase your learning journey
GitHub Copilot Agent Challenge 🚀
Use the Agent mode to complete the following challenge:
Description: Enhance your resume website with advanced features that demonstrate professional web development capabilities and modern design principles.
Prompt: Building on your existing resume website, implement these advanced features:
- Add a dark/light theme toggle with smooth transitions
- Create an interactive skills section with animated progress bars
- Implement a contact form with form validation
- Add a projects portfolio section with hover effects and modal popups
- Include a blog section with at least 3 sample posts about your learning journey
- Optimize for SEO with proper meta tags, structured data, and performance
- Deploy the enhanced site using GitHub Pages or Netlify
- Document all new features in your README.md with screenshots
Your enhanced website should demonstrate mastery of modern web development practices including responsive design, JavaScript interactivity, and professional deployment workflows.
Challenge Extension
Ready to take your skills further? Try these advanced challenges:
📱 Mobile-First Redesign: Completely rebuild your site using a mobile-first approach with CSS Grid and Flexbox
🔍 SEO Optimization: Implement comprehensive SEO including meta tags, structured data, and performance optimization
🌐 Multi-language Support: Add internationalization features to support multiple languages
📊 Analytics Integration: Add Google Analytics to track visitor engagement and optimize your content
🚀 Performance Optimization: Achieve perfect Lighthouse scores across all categories
Review & Self Study
Expand your knowledge with these resources:
Advanced VSCode.dev Features:
- VSCode.dev Documentation - Complete guide to web-based editing
- GitHub Codespaces - Cloud development environments
Web Development Best Practices:
- Responsive Design: Study CSS Grid and Flexbox for modern layouts
- Accessibility: Learn WCAG guidelines for inclusive web design
- Performance: Explore tools like Lighthouse for optimization
- SEO: Understand search engine optimization fundamentals
Professional Development:
- Portfolio Building: Create additional projects to showcase diverse skills
- Open Source: Contribute to existing projects to gain collaboration experience
- Networking: Share your resume website in developer communities for feedback
- Continuous Learning: Stay updated with web development trends and technologies
Your Next Steps: Share your resume website with friends, family, or mentors for feedback. Use their suggestions to iterate and improve your design. Remember, this project is not just a resume – it's a demonstration of your growth as a web developer!