# โปรเจคแชท
โปรเจคแชทนี้แสดงวิธีการสร้างผู้ช่วยแชทโดยใช้ GitHub Models
นี่คือลักษณะของโปรเจคที่เสร็จสมบูรณ์:
ข้อมูลเบื้องต้น การสร้างผู้ช่วยแชทโดยใช้ Generative AI เป็นวิธีที่ดีในการเริ่มเรียนรู้เกี่ยวกับ AI สิ่งที่คุณจะได้เรียนรู้คือการผสาน Generative AI เข้ากับเว็บแอปตลอดบทเรียนนี้ มาเริ่มกันเลย
## การเชื่อมต่อกับ Generative AI
สำหรับ Backend เราใช้ GitHub Models ซึ่งเป็นบริการที่ยอดเยี่ยมที่ช่วยให้คุณใช้ AI ได้ฟรี ไปที่ Playground ของมันและดึงโค้ดที่ตรงกับภาษาของ Backend ที่คุณเลือก นี่คือลักษณะของมันที่ [GitHub Models Playground](https://github.com/marketplace/models/azure-openai/gpt-4o-mini/playground)
ดังที่กล่าวไว้ เลือกแท็บ "Code" และ Runtime ที่คุณเลือก
### การใช้ Python
ในกรณีนี้เราเลือก Python ซึ่งหมายความว่าเราจะเลือกโค้ดนี้:
```python
"""Run this model in Python
> pip install openai
"""
import os
from openai import OpenAI
# To authenticate with the model you will need to generate a personal access token (PAT) in your GitHub settings.
# Create your PAT token by following instructions here: https://docs.github.com/en/authentication/keeping-your-account-and-data-secure/managing-your-personal-access-tokens
client = OpenAI(
base_url="https://models.github.ai/inference",
api_key=os.environ["GITHUB_TOKEN"],
)
response = client.chat.completions.create(
messages=[
{
"role": "system",
"content": "",
},
{
"role": "user",
"content": "What is the capital of France?",
}
],
model="openai/gpt-4o-mini",
temperature=1,
max_tokens=4096,
top_p=1
)
print(response.choices[0].message.content)
```
มาทำความสะอาดโค้ดนี้เล็กน้อยเพื่อให้สามารถนำกลับมาใช้ใหม่ได้:
```python
def call_llm(prompt: str, system_message: str):
response = client.chat.completions.create(
messages=[
{
"role": "system",
"content": system_message,
},
{
"role": "user",
"content": prompt,
}
],
model="openai/gpt-4o-mini",
temperature=1,
max_tokens=4096,
top_p=1
)
return response.choices[0].message.content
```
ด้วยฟังก์ชัน `call_llm` นี้ เราสามารถนำ Prompt และ System Prompt มาใช้ และฟังก์ชันจะคืนค่าผลลัพธ์
### ปรับแต่งผู้ช่วย AI
หากคุณต้องการปรับแต่งผู้ช่วย AI คุณสามารถกำหนดวิธีการที่คุณต้องการให้มันทำงานโดยการเติม System Prompt ดังนี้:
```python
call_llm("Tell me about you", "You're Albert Einstein, you only know of things in the time you were alive")
```
## เปิดใช้งานผ่าน Web API
เยี่ยม เราได้ทำส่วน AI เสร็จแล้ว มาดูกันว่าเราจะผสานมันเข้ากับ Web API ได้อย่างไร สำหรับ Web API เราเลือกใช้ Flask แต่ Framework เว็บใด ๆ ก็น่าจะใช้ได้ มาดูโค้ดกัน:
### การใช้ Python
```python
# api.py
from flask import Flask, request, jsonify
from llm import call_llm
from flask_cors import CORS
app = Flask(__name__)
CORS(app) # * example.com
@app.route("/", methods=["GET"])
def index():
return "Welcome to this API. Call POST /hello with 'message': 'my message' as JSON payload"
@app.route("/hello", methods=["POST"])
def hello():
# get message from request body { "message": "do this taks for me" }
data = request.get_json()
message = data.get("message", "")
response = call_llm(message, "You are a helpful assistant.")
return jsonify({
"response": response
})
if __name__ == "__main__":
app.run(host="0.0.0.0", port=5000)
```
ที่นี่ เราสร้าง Flask API และกำหนด Route เริ่มต้น "/" และ "/chat" โดย Route หลังนี้มีไว้สำหรับ Frontend เพื่อส่งคำถามเข้ามา
เพื่อผสาน *llm.py* นี่คือสิ่งที่เราต้องทำ:
- Import ฟังก์ชัน `call_llm`:
```python
from llm import call_llm
from flask import Flask, request
```
- เรียกใช้มันจาก Route "/chat":
```python
@app.route("/hello", methods=["POST"])
def hello():
# get message from request body { "message": "do this taks for me" }
data = request.get_json()
message = data.get("message", "")
response = call_llm(message, "You are a helpful assistant.")
return jsonify({
"response": response
})
```
ที่นี่เราวิเคราะห์คำขอที่เข้ามาเพื่อดึง Property `message` จาก JSON Body หลังจากนั้นเราเรียกใช้ LLM ด้วยการเรียกนี้:
```python
response = call_llm(message, "You are a helpful assistant")
# return the response as JSON
return jsonify({
"response": response
})
```
เยี่ยม ตอนนี้เราทำสิ่งที่จำเป็นเสร็จแล้ว
## ตั้งค่า Cors
เราควรกล่าวถึงว่าเราตั้งค่าบางอย่างเช่น CORS หรือ Cross-Origin Resource Sharing ซึ่งหมายความว่าเนื่องจาก Backend และ Frontend ของเราจะทำงานบนพอร์ตที่ต่างกัน เราจำเป็นต้องอนุญาตให้ Frontend เรียก Backend ได้
### การใช้ Python
มีโค้ดใน *api.py* ที่ตั้งค่านี้:
```python
from flask_cors import CORS
app = Flask(__name__)
CORS(app) # * example.com
```
ตอนนี้มันถูกตั้งค่าให้อนุญาต "*" ซึ่งหมายถึงทุก Origin และนั่นไม่ปลอดภัยนัก เราควรจำกัดมันเมื่อเราไปสู่ Production
## รันโปรเจคของคุณ
ในการรันโปรเจคของคุณ คุณต้องเริ่ม Backend ก่อนแล้วจึง Frontend
### การใช้ Python
โอเค เรามี *llm.py* และ *api.py* แล้ว เราจะทำให้มันทำงานกับ Backend ได้อย่างไร? มีสองสิ่งที่เราต้องทำ:
- ติดตั้ง Dependencies:
```sh
cd backend
python -m venv venv
source ./venv/bin/activate
pip install openai flask flask-cors openai
```
- เริ่ม API
```sh
python api.py
```
หากคุณอยู่ใน Codespaces คุณต้องไปที่ Ports ในส่วนล่างของ Editor คลิกขวาและเลือก "Port Visibility" และเลือก "Public"
### ทำงานกับ Frontend
ตอนนี้เรามี API ที่ทำงานแล้ว มาสร้าง Frontend สำหรับมันกัน Frontend ขั้นต่ำที่เราจะปรับปรุงทีละขั้นตอน ในโฟลเดอร์ *frontend* สร้างสิ่งต่อไปนี้:
```text
backend/
frontend/
index.html
app.js
styles.css
```
เริ่มต้นด้วย **index.html**:
```html
```
ข้างต้นคือสิ่งที่จำเป็นขั้นต่ำสุดที่คุณต้องมีเพื่อรองรับหน้าต่างแชท ประกอบด้วย Textarea ที่จะแสดงข้อความ Input สำหรับพิมพ์ข้อความ และปุ่มสำหรับส่งข้อความไปยัง Backend มาดู JavaScript ต่อใน *app.js*
**app.js**
```js
// app.js
(function(){
// 1. set up elements
const messages = document.getElementById("messages");
const form = document.getElementById("form");
const input = document.getElementById("input");
const BASE_URL = "change this";
const API_ENDPOINT = `${BASE_URL}/hello`;
// 2. create a function that talks to our backend
async function callApi(text) {
const response = await fetch(API_ENDPOINT, {
method: "POST",
headers: { "Content-Type": "application/json" },
body: JSON.stringify({ message: text })
});
let json = await response.json();
return json.response;
}
// 3. add response to our textarea
function appendMessage(text, role) {
const el = document.createElement("div");
el.className = `message ${role}`;
el.innerHTML = text;
messages.appendChild(el);
}
// 4. listen to submit events
form.addEventListener("submit", async(e) => {
e.preventDefault();
// someone clicked the button in the form
// get input
const text = input.value.trim();
appendMessage(text, "user")
// reset it
input.value = '';
const reply = await callApi(text);
// add to messages
appendMessage(reply, "assistant");
})
})();
```
มาดูโค้ดทีละส่วน:
- 1) ที่นี่เราอ้างอิงถึง Element ทั้งหมดที่เราจะใช้ในโค้ดต่อไป
- 2) ในส่วนนี้ เราสร้างฟังก์ชันที่ใช้ `fetch` ซึ่งเป็น Method ในตัวที่เรียก Backend ของเรา
- 3) `appendMessage` ช่วยเพิ่มการตอบกลับรวมถึงข้อความที่คุณพิมพ์ในฐานะผู้ใช้
- 4) ที่นี่เราฟัง Event `submit` และอ่าน Input Field วางข้อความของผู้ใช้ใน Textarea เรียก API และแสดงการตอบกลับใน Textarea
มาดูการจัดสไตล์ต่อ นี่คือที่ที่คุณสามารถสร้างสรรค์ได้เต็มที่และทำให้มันดูเหมือนที่คุณต้องการ แต่มีคำแนะนำบางอย่าง:
**styles.css**
```
.message {
background: #222;
box-shadow: 0 0 0 10px orange;
padding: 10px:
margin: 5px;
}
.message.user {
background: blue;
}
.message.assistant {
background: grey;
}
```
ด้วยสามคลาสนี้ คุณจะจัดสไตล์ข้อความต่างกันขึ้นอยู่กับว่ามาจากผู้ช่วยหรือคุณในฐานะผู้ใช้ หากคุณต้องการแรงบันดาลใจ ลองดูที่โฟลเดอร์ `solution/frontend/styles.css`
### เปลี่ยน Base Url
มีสิ่งหนึ่งที่เรายังไม่ได้ตั้งค่า นั่นคือ `BASE_URL` ซึ่งจะไม่ทราบจนกว่า Backend ของคุณจะเริ่มต้นขึ้น ในการตั้งค่า:
- หากคุณรัน API ในเครื่อง ควรตั้งค่าเป็น `http://localhost:5000`
- หากรันใน Codespaces ควรมีลักษณะบางอย่างเช่น "[name]app.github.dev"
## งานที่ได้รับมอบหมาย
สร้างโฟลเดอร์ของคุณเอง *project* พร้อมเนื้อหาเช่นนี้:
```text
project/
frontend/
index.html
app.js
styles.css
backend/
...
```
คัดลอกเนื้อหาจากที่ได้รับคำแนะนำข้างต้น แต่ปรับแต่งตามที่คุณต้องการ
## โซลูชัน
[Solution](./solution/README.md)
## โบนัส
ลองเปลี่ยนบุคลิกของผู้ช่วย AI
### สำหรับ Python
เมื่อคุณเรียก `call_llm` ใน *api.py* คุณสามารถเปลี่ยน Argument ที่สองเป็นสิ่งที่คุณต้องการ เช่น:
```python
call_llm(message, "You are Captain Picard")
```
### Frontend
เปลี่ยน CSS และข้อความตามที่คุณต้องการ ดังนั้นให้เปลี่ยนใน *index.html* และ *styles.css*
## สรุป
เยี่ยม คุณได้เรียนรู้ตั้งแต่เริ่มต้นวิธีการสร้างผู้ช่วยส่วนตัวโดยใช้ AI เราได้ทำสิ่งนี้โดยใช้ GitHub Models, Backend ใน Python และ Frontend ใน HTML, CSS และ JavaScript
## ตั้งค่าด้วย Codespaces
- ไปที่: [Web Dev For Beginners repo](https://github.com/microsoft/Web-Dev-For-Beginners)
- สร้างจาก Template (ตรวจสอบให้แน่ใจว่าคุณเข้าสู่ระบบ GitHub) ที่มุมขวาบน:
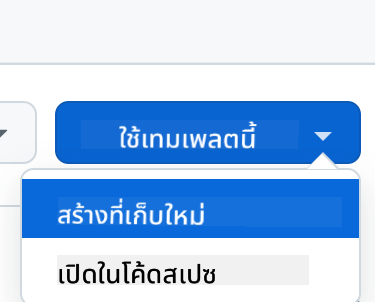
- เมื่ออยู่ใน Repo ของคุณ สร้าง Codespace:

สิ่งนี้จะเริ่มต้น Environment ที่คุณสามารถทำงานได้
---
**ข้อจำกัดความรับผิดชอบ**:
เอกสารนี้ได้รับการแปลโดยใช้บริการแปลภาษา AI [Co-op Translator](https://github.com/Azure/co-op-translator) แม้ว่าเราจะพยายามให้การแปลมีความถูกต้อง แต่โปรดทราบว่าการแปลอัตโนมัติอาจมีข้อผิดพลาดหรือความไม่ถูกต้อง เอกสารต้นฉบับในภาษาดั้งเดิมควรถือเป็นแหล่งข้อมูลที่เชื่อถือได้ สำหรับข้อมูลที่สำคัญ ขอแนะนำให้ใช้บริการแปลภาษามืออาชีพ เราไม่รับผิดชอบต่อความเข้าใจผิดหรือการตีความผิดที่เกิดจากการใช้การแปลนี้

