# 채팅 프로젝트
이 채팅 프로젝트는 GitHub Models를 사용하여 채팅 어시스턴트를 구축하는 방법을 보여줍니다.
완성된 프로젝트는 다음과 같습니다:
생성형 AI를 사용하여 채팅 어시스턴트를 만드는 것은 AI를 배우는 훌륭한 시작점입니다. 이번 레슨에서는 생성형 AI를 웹 앱에 통합하는 방법을 배울 것입니다. 시작해봅시다.
## 생성형 AI 연결하기
백엔드로는 GitHub Models를 사용합니다. 이 서비스는 무료로 AI를 사용할 수 있게 해주는 훌륭한 도구입니다. GitHub Models Playground로 이동하여 선택한 백엔드 언어에 해당하는 코드를 가져오세요. [GitHub Models Playground](https://github.com/marketplace/models/azure-openai/gpt-4o-mini/playground)에서 확인할 수 있습니다.
"Code" 탭과 원하는 런타임을 선택하세요.
### Python 사용하기
이 경우 Python을 선택하면 다음 코드를 가져오게 됩니다:
```python
"""Run this model in Python
> pip install openai
"""
import os
from openai import OpenAI
# To authenticate with the model you will need to generate a personal access token (PAT) in your GitHub settings.
# Create your PAT token by following instructions here: https://docs.github.com/en/authentication/keeping-your-account-and-data-secure/managing-your-personal-access-tokens
client = OpenAI(
base_url="https://models.github.ai/inference",
api_key=os.environ["GITHUB_TOKEN"],
)
response = client.chat.completions.create(
messages=[
{
"role": "system",
"content": "",
},
{
"role": "user",
"content": "What is the capital of France?",
}
],
model="openai/gpt-4o-mini",
temperature=1,
max_tokens=4096,
top_p=1
)
print(response.choices[0].message.content)
```
이 코드를 조금 정리하여 재사용 가능하게 만들어봅시다:
```python
def call_llm(prompt: str, system_message: str):
response = client.chat.completions.create(
messages=[
{
"role": "system",
"content": system_message,
},
{
"role": "user",
"content": prompt,
}
],
model="openai/gpt-4o-mini",
temperature=1,
max_tokens=4096,
top_p=1
)
return response.choices[0].message.content
```
이 `call_llm` 함수는 프롬프트와 시스템 프롬프트를 받아 결과를 반환합니다.
### AI 어시스턴트 커스터마이징
AI 어시스턴트를 커스터마이징하려면 시스템 프롬프트를 채워서 원하는 동작을 지정할 수 있습니다:
```python
call_llm("Tell me about you", "You're Albert Einstein, you only know of things in the time you were alive")
```
## 웹 API로 노출하기
좋습니다, AI 부분은 완료되었습니다. 이제 이를 웹 API에 통합하는 방법을 살펴봅시다. 웹 API로는 Flask를 사용하지만, 다른 웹 프레임워크도 괜찮습니다. 코드를 살펴봅시다:
### Python 사용하기
```python
# api.py
from flask import Flask, request, jsonify
from llm import call_llm
from flask_cors import CORS
app = Flask(__name__)
CORS(app) # * example.com
@app.route("/", methods=["GET"])
def index():
return "Welcome to this API. Call POST /hello with 'message': 'my message' as JSON payload"
@app.route("/hello", methods=["POST"])
def hello():
# get message from request body { "message": "do this taks for me" }
data = request.get_json()
message = data.get("message", "")
response = call_llm(message, "You are a helpful assistant.")
return jsonify({
"response": response
})
if __name__ == "__main__":
app.run(host="0.0.0.0", port=5000)
```
여기서는 Flask API를 생성하고 기본 경로 "/"와 "/chat"을 정의합니다. "/chat"은 프론트엔드에서 질문을 전달하는 데 사용됩니다.
*llm.py*를 통합하려면 다음을 수행해야 합니다:
- `call_llm` 함수 가져오기:
```python
from llm import call_llm
from flask import Flask, request
```
- "/chat" 경로에서 호출하기:
```python
@app.route("/hello", methods=["POST"])
def hello():
# get message from request body { "message": "do this taks for me" }
data = request.get_json()
message = data.get("message", "")
response = call_llm(message, "You are a helpful assistant.")
return jsonify({
"response": response
})
```
여기서는 들어오는 요청을 파싱하여 JSON 본문에서 `message` 속성을 가져옵니다. 그런 다음 LLM을 호출합니다:
```python
response = call_llm(message, "You are a helpful assistant")
# return the response as JSON
return jsonify({
"response": response
})
```
좋습니다, 필요한 작업을 완료했습니다.
## Cors 설정
백엔드와 프론트엔드가 다른 포트에서 실행되기 때문에 프론트엔드가 백엔드에 호출할 수 있도록 CORS(교차 출처 리소스 공유)를 설정해야 합니다.
### Python 사용하기
*api.py*에 다음 코드가 포함되어 있습니다:
```python
from flask_cors import CORS
app = Flask(__name__)
CORS(app) # * example.com
```
현재는 모든 출처를 허용하는 "*"로 설정되어 있는데, 이는 안전하지 않으므로 프로덕션 환경에서는 제한해야 합니다.
## 프로젝트 실행하기
프로젝트를 실행하려면 먼저 백엔드를 시작한 다음 프론트엔드를 시작해야 합니다.
### Python 사용하기
*llm.py*와 *api.py*를 가지고 백엔드를 실행하려면 다음을 수행해야 합니다:
- 종속성 설치:
```sh
cd backend
python -m venv venv
source ./venv/bin/activate
pip install openai flask flask-cors openai
```
- API 시작하기:
```sh
python api.py
```
Codespaces를 사용하는 경우 편집기 하단의 Ports로 이동하여 오른쪽 클릭 후 "Port Visibility"를 선택하고 "Public"을 선택하세요.
### 프론트엔드 작업하기
API가 실행 중이라면 이제 프론트엔드를 만들어봅시다. 최소한의 프론트엔드를 단계적으로 개선해 나갈 것입니다. *frontend* 폴더를 생성하고 다음을 추가하세요:
```text
backend/
frontend/
index.html
app.js
styles.css
```
먼저 **index.html**을 살펴봅시다:
```html
```
위 코드는 채팅 창을 지원하기 위한 최소한의 코드입니다. 메시지가 렌더링될 텍스트 영역, 메시지를 입력할 입력 필드, 백엔드로 메시지를 보내는 버튼으로 구성됩니다. 다음으로 *app.js*의 JavaScript를 살펴봅시다.
**app.js**
```js
// app.js
(function(){
// 1. set up elements
const messages = document.getElementById("messages");
const form = document.getElementById("form");
const input = document.getElementById("input");
const BASE_URL = "change this";
const API_ENDPOINT = `${BASE_URL}/hello`;
// 2. create a function that talks to our backend
async function callApi(text) {
const response = await fetch(API_ENDPOINT, {
method: "POST",
headers: { "Content-Type": "application/json" },
body: JSON.stringify({ message: text })
});
let json = await response.json();
return json.response;
}
// 3. add response to our textarea
function appendMessage(text, role) {
const el = document.createElement("div");
el.className = `message ${role}`;
el.innerHTML = text;
messages.appendChild(el);
}
// 4. listen to submit events
form.addEventListener("submit", async(e) => {
e.preventDefault();
// someone clicked the button in the form
// get input
const text = input.value.trim();
appendMessage(text, "user")
// reset it
input.value = '';
const reply = await callApi(text);
// add to messages
appendMessage(reply, "assistant");
})
})();
```
코드를 섹션별로 살펴봅시다:
- 1) 여기서는 나중에 참조할 모든 요소를 가져옵니다.
- 2) 이 섹션에서는 내장된 `fetch` 메서드를 사용하여 백엔드를 호출하는 함수를 만듭니다.
- 3) `appendMessage`는 사용자 입력과 응답을 텍스트 영역에 추가합니다.
- 4) 제출 이벤트를 감지하여 입력 필드를 읽고, 사용자의 메시지를 텍스트 영역에 추가하고, API를 호출하여 응답을 렌더링합니다.
다음으로 스타일링을 살펴봅시다. 원하는 대로 꾸밀 수 있지만, 다음은 몇 가지 제안입니다:
**styles.css**
```
.message {
background: #222;
box-shadow: 0 0 0 10px orange;
padding: 10px:
margin: 5px;
}
.message.user {
background: blue;
}
.message.assistant {
background: grey;
}
```
이 세 가지 클래스는 메시지가 어시스턴트에서 왔는지 사용자에서 왔는지에 따라 다르게 스타일링합니다. 영감을 얻고 싶다면 `solution/frontend/styles.css` 폴더를 확인하세요.
### Base Url 변경하기
여기서 설정하지 않은 한 가지는 `BASE_URL`입니다. 이는 백엔드가 시작될 때까지 알 수 없습니다. 설정 방법은 다음과 같습니다:
- API를 로컬에서 실행하면 `http://localhost:5000`으로 설정해야 합니다.
- Codespaces에서 실행하면 "[name]app.github.dev"와 같은 형태가 됩니다.
## 과제
*project* 폴더를 생성하고 다음과 같은 내용을 추가하세요:
```text
project/
frontend/
index.html
app.js
styles.css
backend/
...
```
위에서 설명한 내용을 복사하되, 원하는 대로 커스터마이징하세요.
## 솔루션
[Solution](./solution/README.md)
## 보너스
AI 어시스턴트의 성격을 변경해보세요.
### Python 사용하기
*api.py*에서 `call_llm`을 호출할 때 두 번째 인수를 원하는 대로 변경할 수 있습니다. 예를 들어:
```python
call_llm(message, "You are Captain Picard")
```
### 프론트엔드
CSS와 텍스트도 원하는 대로 변경하세요. *index.html*과 *styles.css*에서 수정하세요.
## 요약
처음부터 AI를 사용하여 개인 어시스턴트를 만드는 방법을 배웠습니다. GitHub Models, Python 백엔드, HTML, CSS, JavaScript 프론트엔드를 사용하여 이를 구현했습니다.
## Codespaces 설정하기
- 이동: [Web Dev For Beginners repo](https://github.com/microsoft/Web-Dev-For-Beginners)
- 템플릿에서 생성하기(로그인 상태여야 함):

- 저장소에서 Codespace 생성하기:
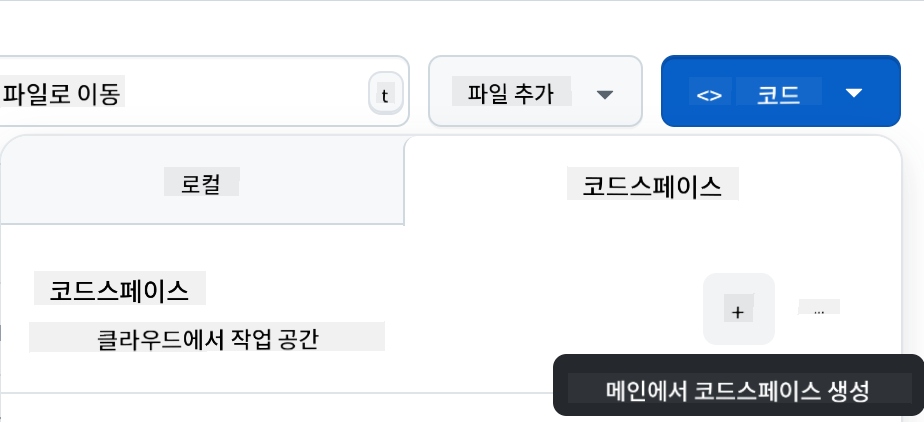
이제 작업할 수 있는 환경이 시작됩니다.
---
**면책 조항**:
이 문서는 AI 번역 서비스 [Co-op Translator](https://github.com/Azure/co-op-translator)를 사용하여 번역되었습니다. 정확성을 위해 최선을 다하고 있으나, 자동 번역에는 오류나 부정확성이 포함될 수 있습니다. 원본 문서의 원어 버전이 권위 있는 출처로 간주되어야 합니다. 중요한 정보의 경우, 전문적인 인간 번역을 권장합니다. 이 번역 사용으로 인해 발생하는 오해나 잘못된 해석에 대해 책임을 지지 않습니다.


