# 聊天項目
這個聊天項目展示了如何使用 GitHub Models 建立一個聊天助手。
以下是完成後的項目樣子:
一些背景資訊,使用生成式 AI 建立聊天助手是一個很好的方式來開始學習 AI。在這堂課中,你將學習如何將生成式 AI 整合到網頁應用程式中,讓我們開始吧。
## 連接生成式 AI
在後端部分,我們使用 GitHub Models。這是一個很棒的服務,讓你可以免費使用 AI。前往它的 playground,並獲取與你選擇的後端語言相對應的代碼。以下是 [GitHub Models Playground](https://github.com/marketplace/models/azure-openai/gpt-4o-mini/playground) 的樣子:
如我們所說,選擇 "Code" 標籤和你選擇的運行環境。
### 使用 Python
在這個例子中,我們選擇 Python,這意味著我們選擇以下代碼:
```python
"""Run this model in Python
> pip install openai
"""
import os
from openai import OpenAI
# To authenticate with the model you will need to generate a personal access token (PAT) in your GitHub settings.
# Create your PAT token by following instructions here: https://docs.github.com/en/authentication/keeping-your-account-and-data-secure/managing-your-personal-access-tokens
client = OpenAI(
base_url="https://models.github.ai/inference",
api_key=os.environ["GITHUB_TOKEN"],
)
response = client.chat.completions.create(
messages=[
{
"role": "system",
"content": "",
},
{
"role": "user",
"content": "What is the capital of France?",
}
],
model="openai/gpt-4o-mini",
temperature=1,
max_tokens=4096,
top_p=1
)
print(response.choices[0].message.content)
```
讓我們稍微清理一下這段代碼,使其可重用:
```python
def call_llm(prompt: str, system_message: str):
response = client.chat.completions.create(
messages=[
{
"role": "system",
"content": system_message,
},
{
"role": "user",
"content": prompt,
}
],
model="openai/gpt-4o-mini",
temperature=1,
max_tokens=4096,
top_p=1
)
return response.choices[0].message.content
```
有了這個函數 `call_llm`,我們現在可以接收一個提示和一個系統提示,並返回結果。
### 自定義 AI 助手
如果你想自定義 AI 助手的行為,可以像下面這樣填充系統提示:
```python
call_llm("Tell me about you", "You're Albert Einstein, you only know of things in the time you were alive")
```
## 通過 Web API 暴露功能
很好,我們已完成 AI 部分,現在看看如何將其整合到 Web API 中。對於 Web API,我們選擇使用 Flask,但任何網頁框架都可以。以下是代碼:
### 使用 Python
```python
# api.py
from flask import Flask, request, jsonify
from llm import call_llm
from flask_cors import CORS
app = Flask(__name__)
CORS(app) # * example.com
@app.route("/", methods=["GET"])
def index():
return "Welcome to this API. Call POST /hello with 'message': 'my message' as JSON payload"
@app.route("/hello", methods=["POST"])
def hello():
# get message from request body { "message": "do this taks for me" }
data = request.get_json()
message = data.get("message", "")
response = call_llm(message, "You are a helpful assistant.")
return jsonify({
"response": response
})
if __name__ == "__main__":
app.run(host="0.0.0.0", port=5000)
```
在這裡,我們創建了一個 Flask API,並定義了默認路由 "/" 和 "/chat"。後者是供前端用來向後端傳遞問題的。
要整合 *llm.py*,我們需要做以下幾件事:
- 導入 `call_llm` 函數:
```python
from llm import call_llm
from flask import Flask, request
```
- 從 "/chat" 路由調用它:
```python
@app.route("/hello", methods=["POST"])
def hello():
# get message from request body { "message": "do this taks for me" }
data = request.get_json()
message = data.get("message", "")
response = call_llm(message, "You are a helpful assistant.")
return jsonify({
"response": response
})
```
在這裡,我們解析傳入的請求,從 JSON 主體中檢索 `message` 屬性。然後我們使用以下調用來調用 LLM:
```python
response = call_llm(message, "You are a helpful assistant")
# return the response as JSON
return jsonify({
"response": response
})
```
很好,現在我們已完成所需的部分。
## 配置 Cors
我們需要設置像 CORS(跨來源資源共享)這樣的東西。這意味著,由於我們的後端和前端將運行在不同的端口,我們需要允許前端調用後端。
### 使用 Python
在 *api.py* 中有一段代碼設置了這個功能:
```python
from flask_cors import CORS
app = Flask(__name__)
CORS(app) # * example.com
```
目前它被設置為允許 "*",即所有來源,這有點不安全,應該在進入生產環境時進行限制。
## 運行你的項目
要運行你的項目,你需要先啟動後端,然後啟動前端。
### 使用 Python
好的,我們有 *llm.py* 和 *api.py*,如何讓它們在後端運行?我們需要做以下兩件事:
- 安裝依賴項:
```sh
cd backend
python -m venv venv
source ./venv/bin/activate
pip install openai flask flask-cors openai
```
- 啟動 API
```sh
python api.py
```
如果你在 Codespaces 中運行,需要在編輯器底部的 Ports 部分,右鍵點擊並選擇 "Port Visibility",然後選擇 "Public"。
### 開發前端
現在我們的 API 已經運行起來了,讓我們為它創建一個前端。以下是一個最低限度的前端,我們將逐步改進它。在 *frontend* 文件夾中,創建以下內容:
```text
backend/
frontend/
index.html
app.js
styles.css
```
首先是 **index.html**:
```html
```
以上是支持聊天窗口所需的最低限度,它包括一個用於顯示消息的文本區域、一個輸入框用於輸入消息,以及一個按鈕用於將消息發送到後端。接下來看看 *app.js* 中的 JavaScript。
**app.js**
```js
// app.js
(function(){
// 1. set up elements
const messages = document.getElementById("messages");
const form = document.getElementById("form");
const input = document.getElementById("input");
const BASE_URL = "change this";
const API_ENDPOINT = `${BASE_URL}/hello`;
// 2. create a function that talks to our backend
async function callApi(text) {
const response = await fetch(API_ENDPOINT, {
method: "POST",
headers: { "Content-Type": "application/json" },
body: JSON.stringify({ message: text })
});
let json = await response.json();
return json.response;
}
// 3. add response to our textarea
function appendMessage(text, role) {
const el = document.createElement("div");
el.className = `message ${role}`;
el.innerHTML = text;
messages.appendChild(el);
}
// 4. listen to submit events
form.addEventListener("submit", async(e) => {
e.preventDefault();
// someone clicked the button in the form
// get input
const text = input.value.trim();
appendMessage(text, "user")
// reset it
input.value = '';
const reply = await callApi(text);
// add to messages
appendMessage(reply, "assistant");
})
})();
```
讓我們逐段解析代碼:
- 1) 在這裡,我們獲取所有稍後會引用的元素的引用。
- 2) 在這部分,我們創建了一個函數,使用內建的 `fetch` 方法調用後端。
- 3) `appendMessage` 幫助添加助手的回應以及用戶輸入的消息。
- 4) 在這裡,我們監聽提交事件,讀取輸入框的內容,將用戶的消息放入文本區域,調用 API,並將回應渲染到文本區域。
接下來看看樣式,這裡你可以自由發揮,讓它看起來像你想要的樣子,但以下是一些建議:
**styles.css**
```
.message {
background: #222;
box-shadow: 0 0 0 10px orange;
padding: 10px:
margin: 5px;
}
.message.user {
background: blue;
}
.message.assistant {
background: grey;
}
```
有了這三個類,你可以根據消息的來源(助手或用戶)來區分樣式。如果需要靈感,可以查看 `solution/frontend/styles.css` 文件夾。
### 更改 Base Url
有一件事我們還沒有設置,那就是 `BASE_URL`,這在後端啟動之前是未知的。設置方法如下:
- 如果你在本地運行 API,應設置為類似 `http://localhost:5000`。
- 如果在 Codespaces 中運行,應設置為類似 "[name]app.github.dev"。
## 作業
創建自己的文件夾 *project*,內容如下:
```text
project/
frontend/
index.html
app.js
styles.css
backend/
...
```
複製上述指導中的內容,但可以根據自己的喜好進行自定義。
## 解決方案
[解決方案](./solution/README.md)
## 額外挑戰
嘗試更改 AI 助手的個性。
### 對於 Python
在 *api.py* 中調用 `call_llm` 時,可以更改第二個參數為你想要的內容,例如:
```python
call_llm(message, "You are Captain Picard")
```
### 前端
同時更改 CSS 和文本,使其符合你的喜好,因此需要修改 *index.html* 和 *styles.css*。
## 總結
很好,你已經從零開始學習如何使用 AI 創建個人助手。我們使用了 GitHub Models、Python 後端以及 HTML、CSS 和 JavaScript 前端完成了這項工作。
## 使用 Codespaces 設置
- 前往:[Web Dev For Beginners repo](https://github.com/microsoft/Web-Dev-For-Beginners)
- 從模板創建(確保你已登錄 GitHub)在右上角:
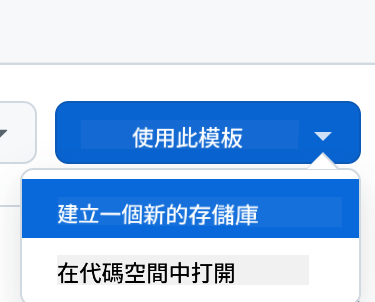
- 一旦進入你的 repo,創建一個 Codespace:

這將啟動一個你可以使用的環境。
---
**免責聲明**:
此文件已使用 AI 翻譯服務 [Co-op Translator](https://github.com/Azure/co-op-translator) 翻譯。我們致力於提供準確的翻譯,但請注意,自動翻譯可能包含錯誤或不準確之處。原始語言的文件應被視為權威來源。對於關鍵資訊,建議尋求專業人工翻譯。我們對因使用此翻譯而引起的任何誤解或錯誤詮釋概不負責。

